
In this article, we will review how virtual servers use networks to connect to the Internet. We will then outline why and how to create a Bridged Network to connect a server to the Internet with a static public IP address rather than using the default connection used by Virtual Machine Manager when our VPS was created.
How Virtual Servers connect to the Internet
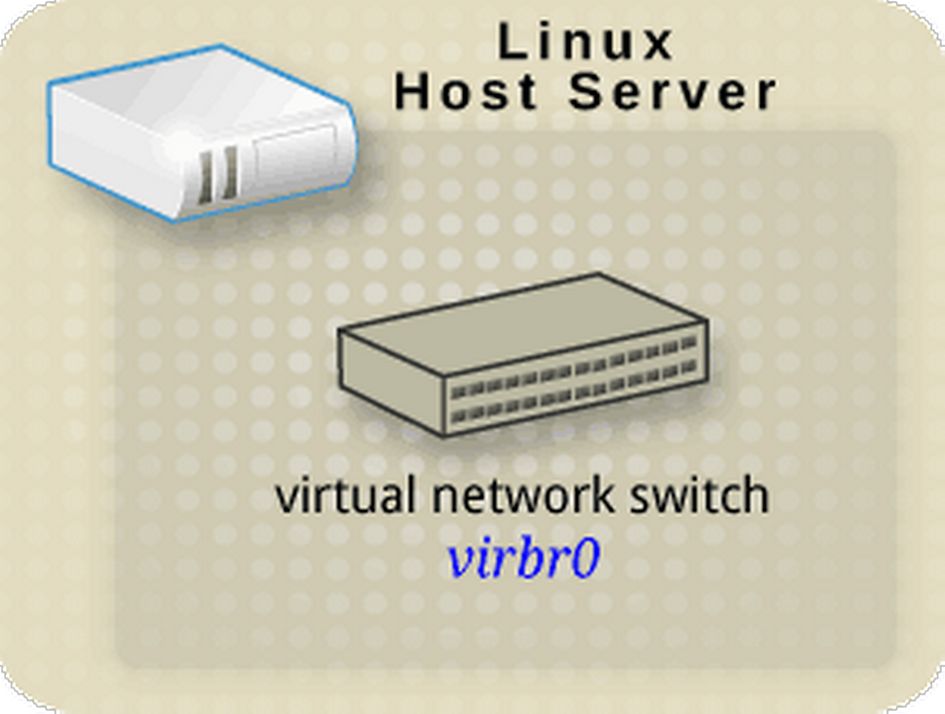
Virtual servers connect to other computers and to the internet by means of a virtual network. Virtual networks uses the concept of a virtual network switch. A virtual network switch is a software program that operates on a host computer (aka your home computer or a web host server). Virtual machines connect to the network through the virtual network switch.
Difference between a Virtual Bridge Connection and a Real Bridge Connection
Virtual servers created by Virtual Machine Manager or Cockpit use a virtual network switch called virbr0 that your virtual private server can connect with. The virbr0 connection is on your host computer – not on any of the virtual servers. Therefore to see virbr0, open terminal on your home computer and type: ip addr
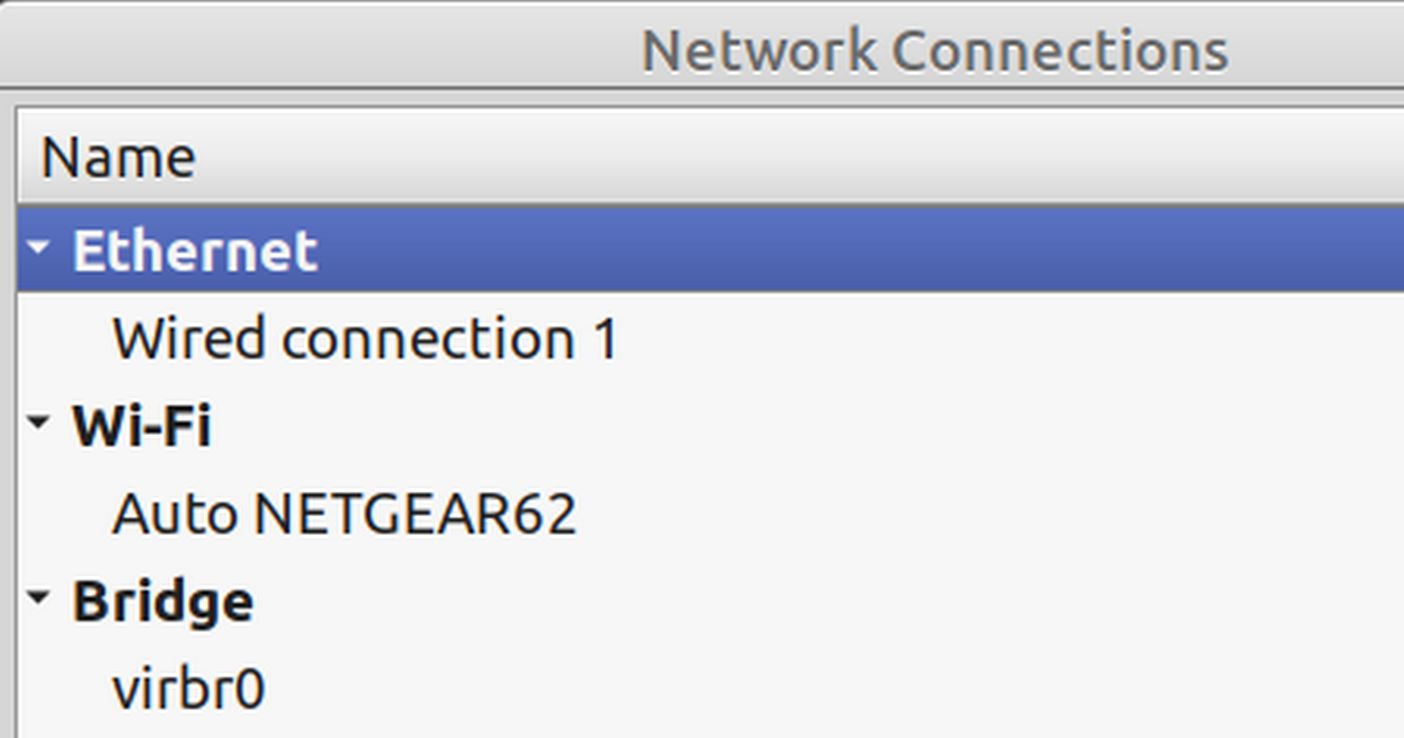
Another way to see virbr0 is to left click on the Internet Connection icon in the right side of your task bar. Then click Network Connections. Virbr0 is listed as a Bridge connection. However, virbr0 is not actually a real bridge connection. Instead virbr0 is a NAT connection that requires running information through your host computer. Put another way, your virtual server is hidden from the public Internet which only sees information coming from your host computer. A real bridge allows information to pass directly from your VPS to the Internet without passing through your host computer.
The Network Address Translation (NAT) Problem
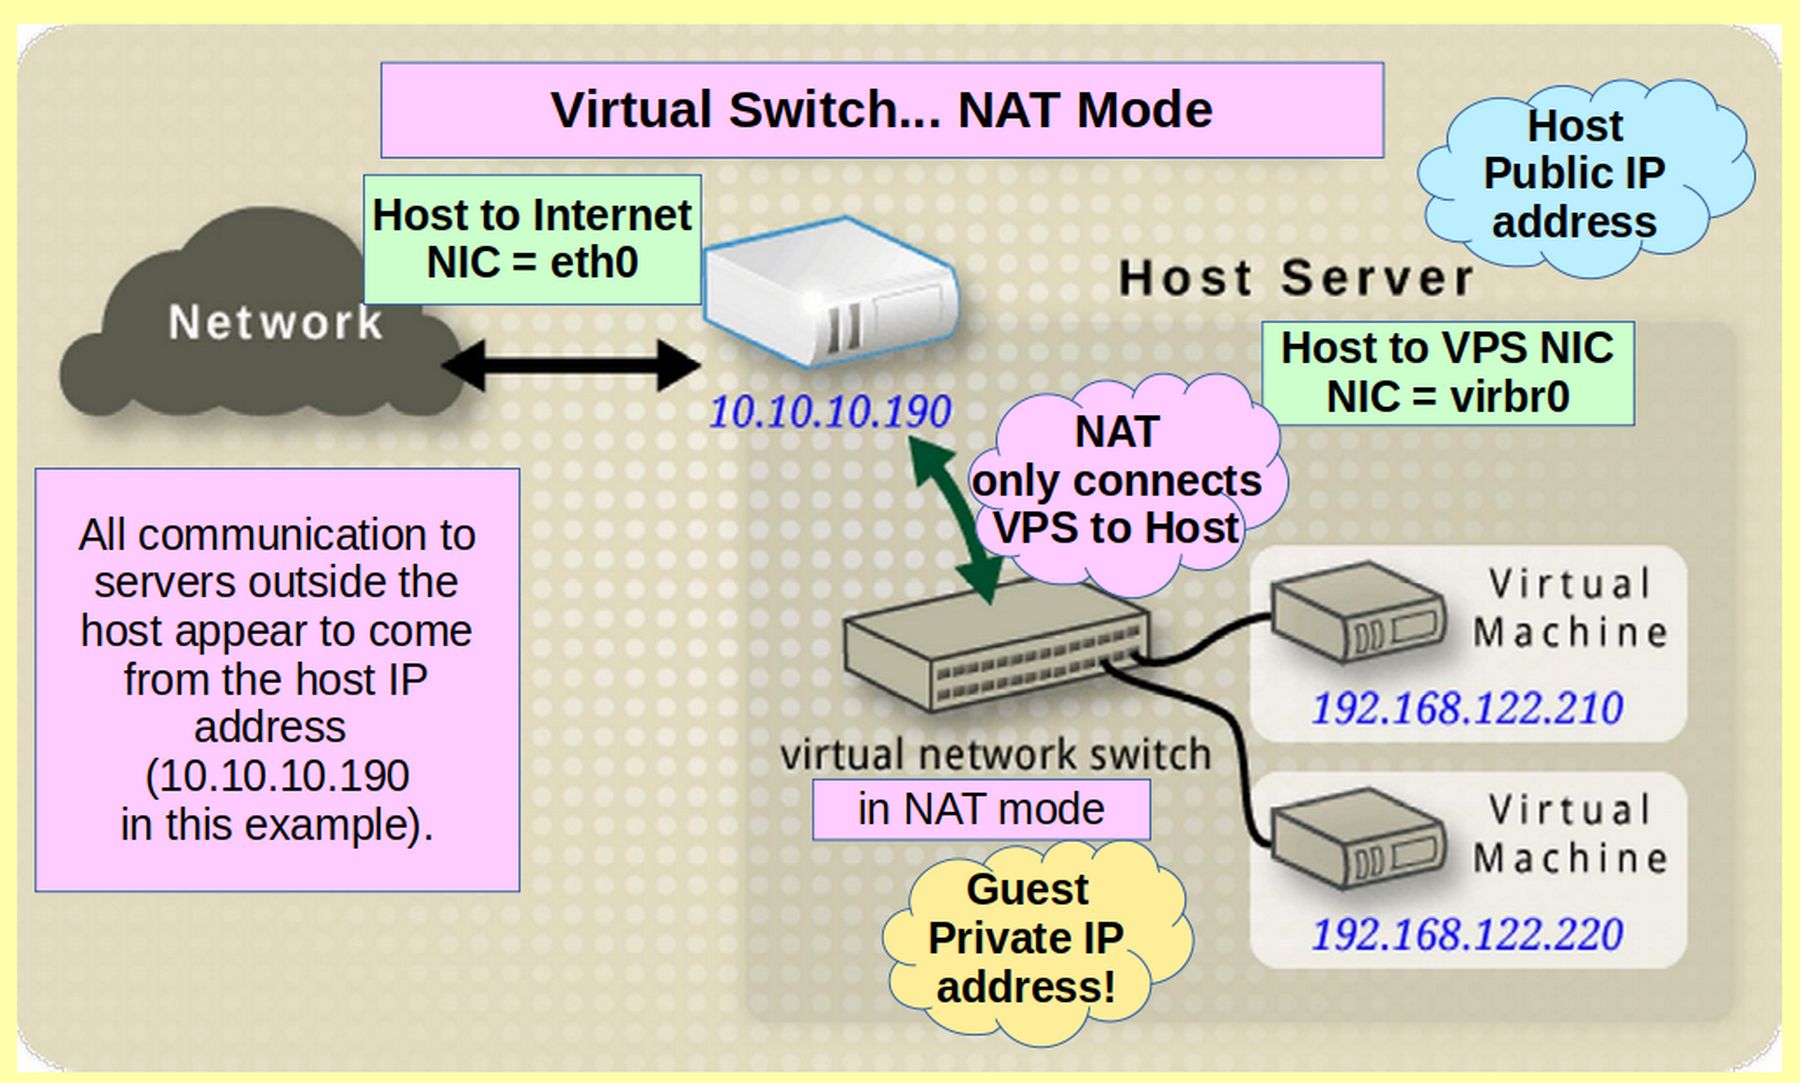
By default, a virtual network switch created by VMM operates in NAT mode. This means any virtual server connected through NAT, uses the host IP address for communication to the public Internet. There is a problem with NAT mode. The problem is that virtual servers are not visible to outside servers on the Internet. These outside servers only see traffic as coming from the host computer and not from the virtual server.
With NAT, the virtual servers use a connection called virbr0 and a private IP address to connect to the host computer. But the Internet only sees the host computers public IP address using an Ethernet connection called eth0.
This means that computers connected to the public internet and external to the host can not communicate directly with the virtual servers, when the virtual network is operating in NAT mode. Therefore, we will learn how to create an additional mode, called a real Bridge, that will allow our virtual server to connect more directly with the internet using its own public facing IP address.
Bridged Mode
Virtual network switches can operate in several other virtual network modes, instead of NAT. One of those modes is called Bridged Mode. In bridged mode, the Virtual Server connects to an existing connection on the host. As a result, the Virtual Server is directly visible on the public physical network. Bridged mode uses connection switching based on the MAC address:
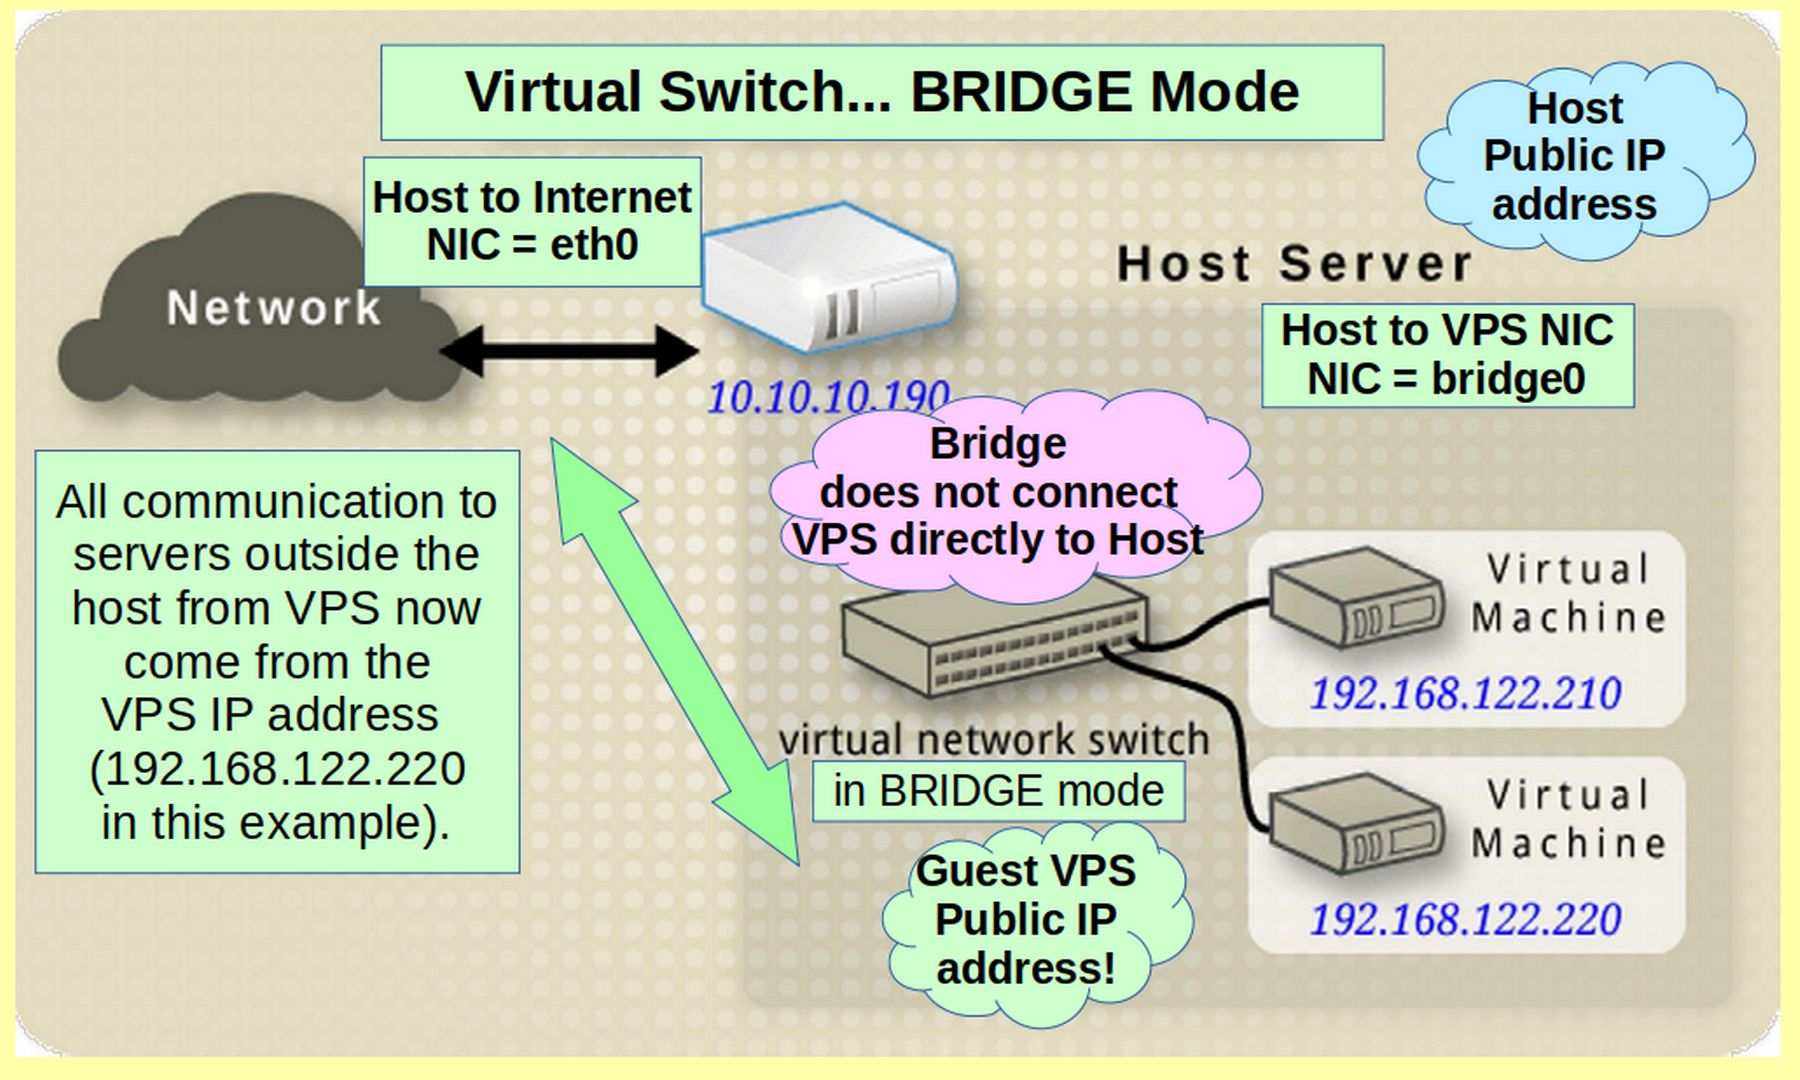
In bridged mode, the virtual server appear within the same network as the host computer. All other computers can detect and access the virtual server directly with if it has a Bridged mode adapter. But before we create a real bridged connection, we need to understand some basic networking concepts.
The Default VPS Network
The default virtual network created by Virtual Machine Manager is called “default” and uses NAT (Network Address Translation) to connect virtual servers with the “outside” world (both the host system and the Internet). In the next article, we will create a different network using a physical Bridge instead of NAT. To see the default network, even when Virtual Machine Manager is not running, open a terminal and copy paste this command:
sudo virsh net-list --all
You will see that the default network is active, persistent and set for autostart when your computer starts.

To obtain detailed information about the default network, we can copy and paste this command into the terminal:
sudo virsh net-edit default
Then type 1 and press Enter to use the Nano editor.
A temporary file containing the network details will open showing the following:
<network>
<name>default</name>
<uuid>8102458c-8e83-441e-931f-c8cbcec6c82b</uuid>
<forward mode='nat'/>
<bridge name='virbr0' stp='on' delay='0'/>
<mac address='52:54:00:a6:8b:57'/>
<ip address='192.168.122.1' netmask='255.255.255.0'>
<dhcp>
<range start='192.168.122.2' end='192.168.122.254'/>
</dhcp>
</ip>
</network>
Press the control key plus the x key to close this file and return to the terminal.
The above confirms that the default network is based on the use of the virbr0 virtual bridge. virbr0 stands for virtual bridge 0. virbr0 uses NAT based connectivity to connect the virtual machines to the outside world.
Dynamic versus Static IP Addresses
You have two choices for setting up IP addresses for virtual servers. The default choice is dynamic assignment using Dynamic Host Configuration Protocol (DHCP). The second choice is Static or fixed assignment. Using DHCP to assign IP addresses is simpler and more flexibe than statically assigning them. However, if you want your virtual machines to communicate with each other using names instead of IP addresses, you must use a static IP address.
Why DHCP does not assign static IP addresses
Each virtual network switch has a range of IP addresses that it uses to assign IP addresses to guests through DHCP. Normally, when you go online from any computer in your home, your network router will assign an IP address to that computer. Your router uses a set of rules called DHCP to determine which IP address to give to that computer.
All DHCP means is that your router has a small range of IP version 4 addresses available and assigns these IP addresses to your computers based on the order in which they access the internet. For example, the first computer that goes online on a given day is assigned the IP version 4 address 192.168.1.10. The second computer that goes inline is assigned the IP address 192.168.1.11 and the third computer, which is usually my daughter because she is sleeping in, is assigned 192.168.1.12.
Since this order of computers going online can change from day to day, the IP addresses assigned to any one computer can vary slightly from day to day. This random assignment of IP addresses is a problem for servers since they need a single constant IP address in order to connect to a control panel and or firewall service on the Internet. A static or constant IP address is also essential for connecting to your virtual server remotely via SSH.
The solution to this problem is to assign a static IP address to a new bridged connection. This in turn requires creating a new wired connection with a static IP address so that our new bridged connection can use an Ethernet connection that is not our normal Ethernet connection. Before we do this, let’s look at the current IP address of our normal Ethernet Wired Connection.
Your home computer normal wired connection
To determine the IP address of your home computer Ethernet connection, open a terminal on your home computer and type ip addr. Then press Enter. Alternately, you can use this command:
sudo ip -c addr show
The above is the same as ip addr with colorized IP addresses.
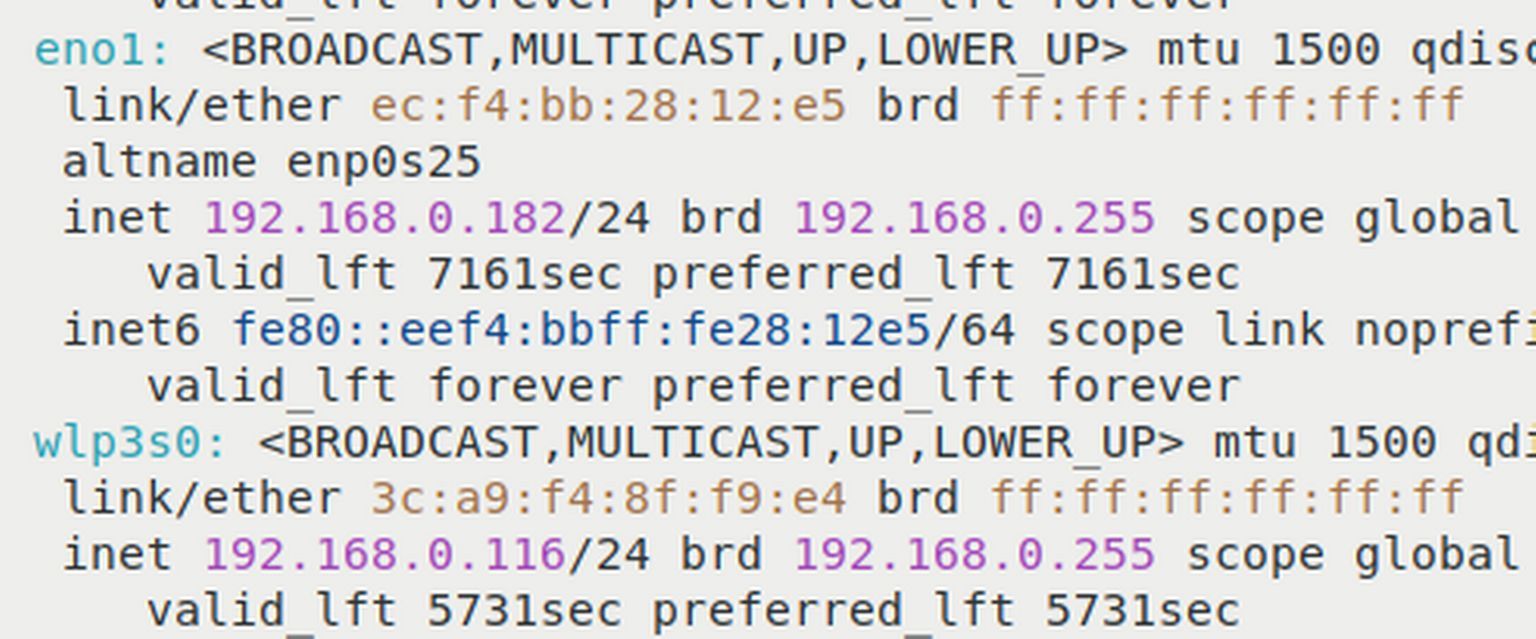
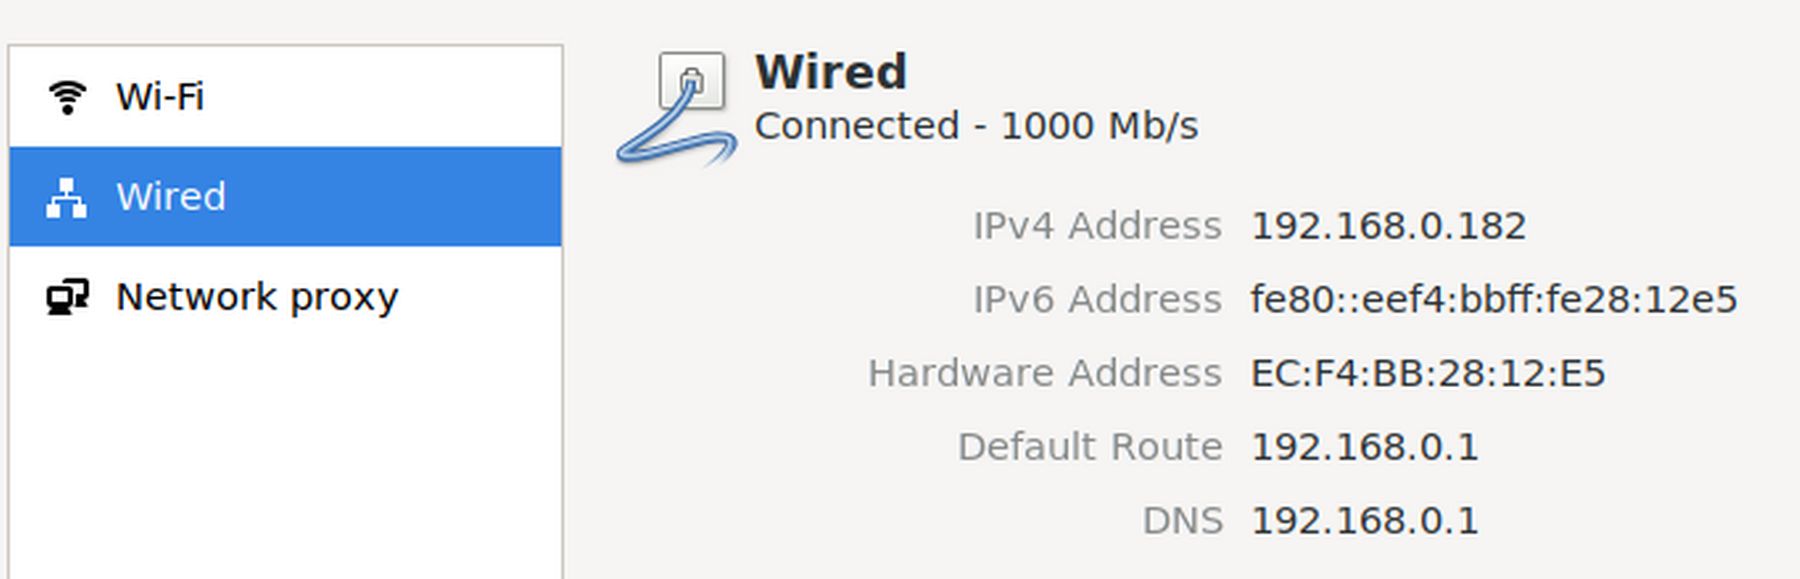
In my case, my Ethernet or Wired Connection was called enp38s0f1. Below this was a line that began with the word inet followed by 192.168.0.1. This was the IP version 4 address of my Ethernet or wired connection. The netmask IP was listed as 255.255.255.0.
What is the netmask IP address used for?
The netmask IP address is used to hide your real IP address on the Internet and at the same time help your local network route data. It is assigned to your computers by your router. The most commonly used netmask is 255.255.255.0.
What is the default gateway address? Check this and get screen shots on Debian here the gateway does not match the IP above.
The default gateway is the IP address of your router. It uses the same first three sets of digits as your wireless and wired connections. But then places a 1 at the end. The default gateway for my router is 192.168.0.1. This is also called the Default Route and it may also be called the DNS IP address. You can have more than one DNS address.
The Hardware Address (also called the MAC address) is a different number. To see the MAC address for your computer, go to the the Mint Menu and click on Settings. Then scroll down to the Hardware section and click on Network. Then click Wired. Your MAC address will be a series of two digit numbers and letters separated by colons.
Pick an Unused IP Version 4 Number for the Static IP Address of our second wired connection
We want to use an IP number we are sure will not be assigned to any other computer in our home. From the above information, we see that the first three sets of digits remained the same. Our router uses 192.168.0. The only number that changes is the last number. This last number can be any number between 0 to 255. To make this number easier to use but also avoid using a small number that your router might use, we will use the number 222. Thus, the static IP address we will assign to new wired connection will be 192.168.0.222.
Use Network Connections to Create a Second Wired Connection
Click on the Internet Connections icon on the right side of your task bar. Then click on Network Connections:
Then click on Wired Connection 1. Then click on the Settings wheel. Then click on the IPv4 Settings tab:
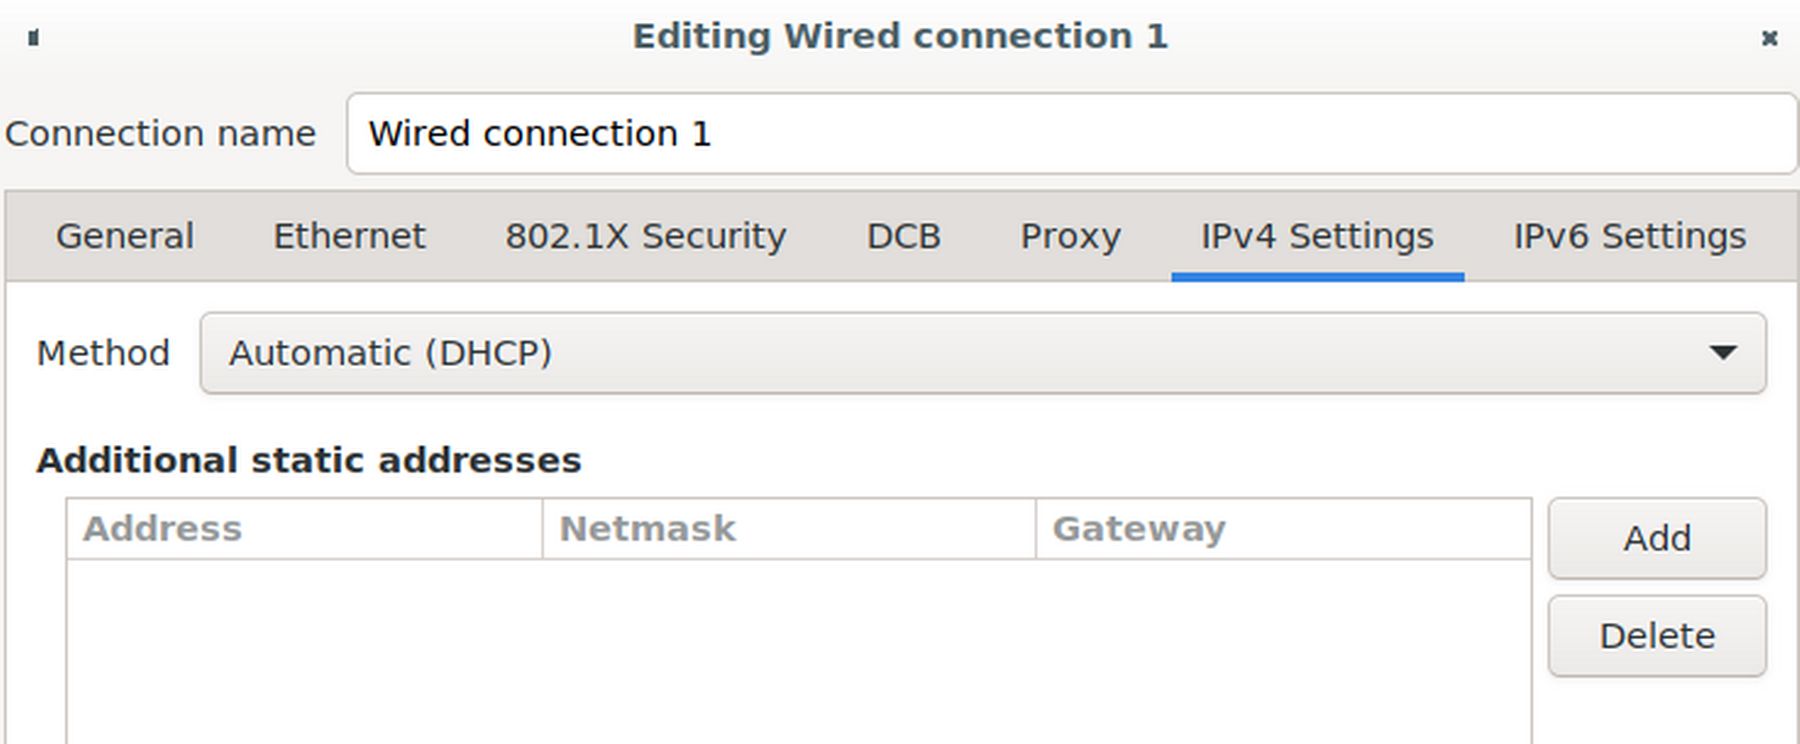
This screen confirms that our normal Wired Connection 1 has no static IP address and instead is assigned a variable IP address by DHCP. Close this screen. Then click on the Plus sign next to the Settings wheel to create a new connection.
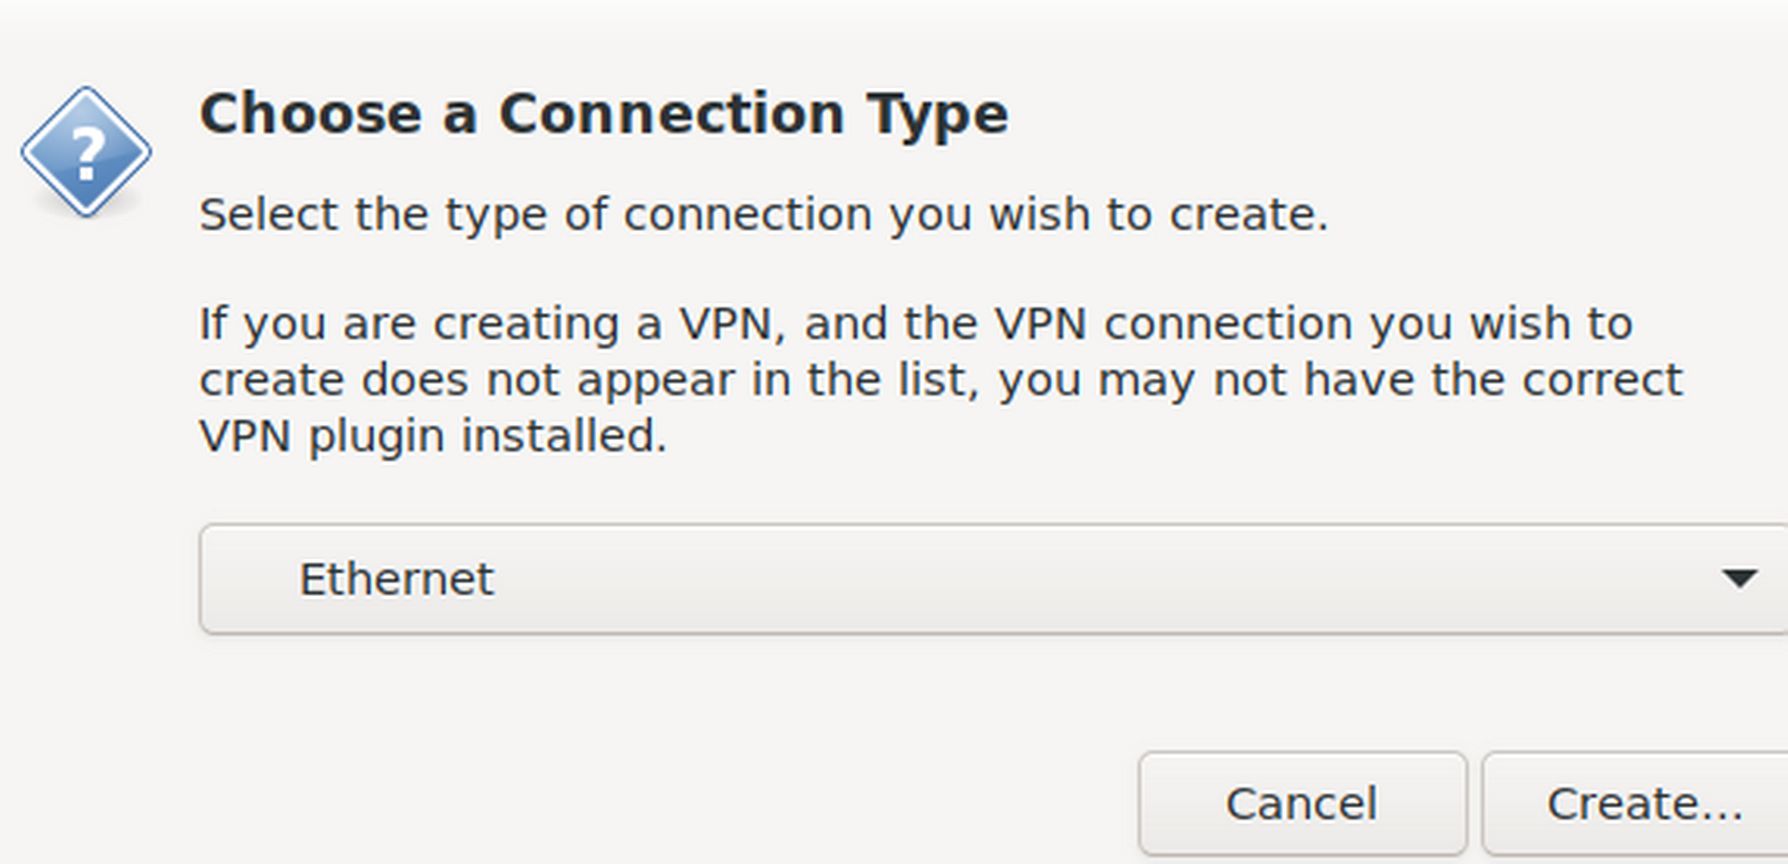
For type, choose Ethernet and click Create. For Connection Name, change it from Ethernet connection 1 to Wired connection 2.
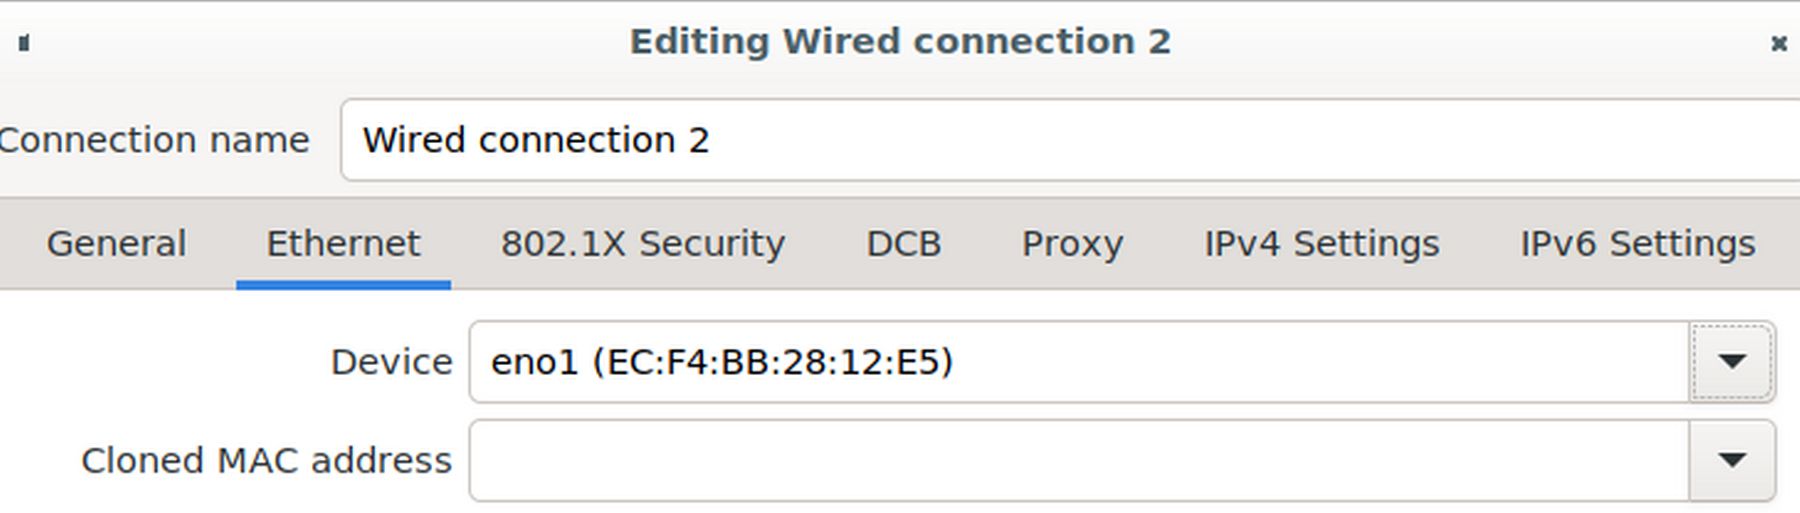
For device, choose the only option which is eno1. Then click on the IPv4 settings tab. Change the method from Automatic (DHCP) to Manual.
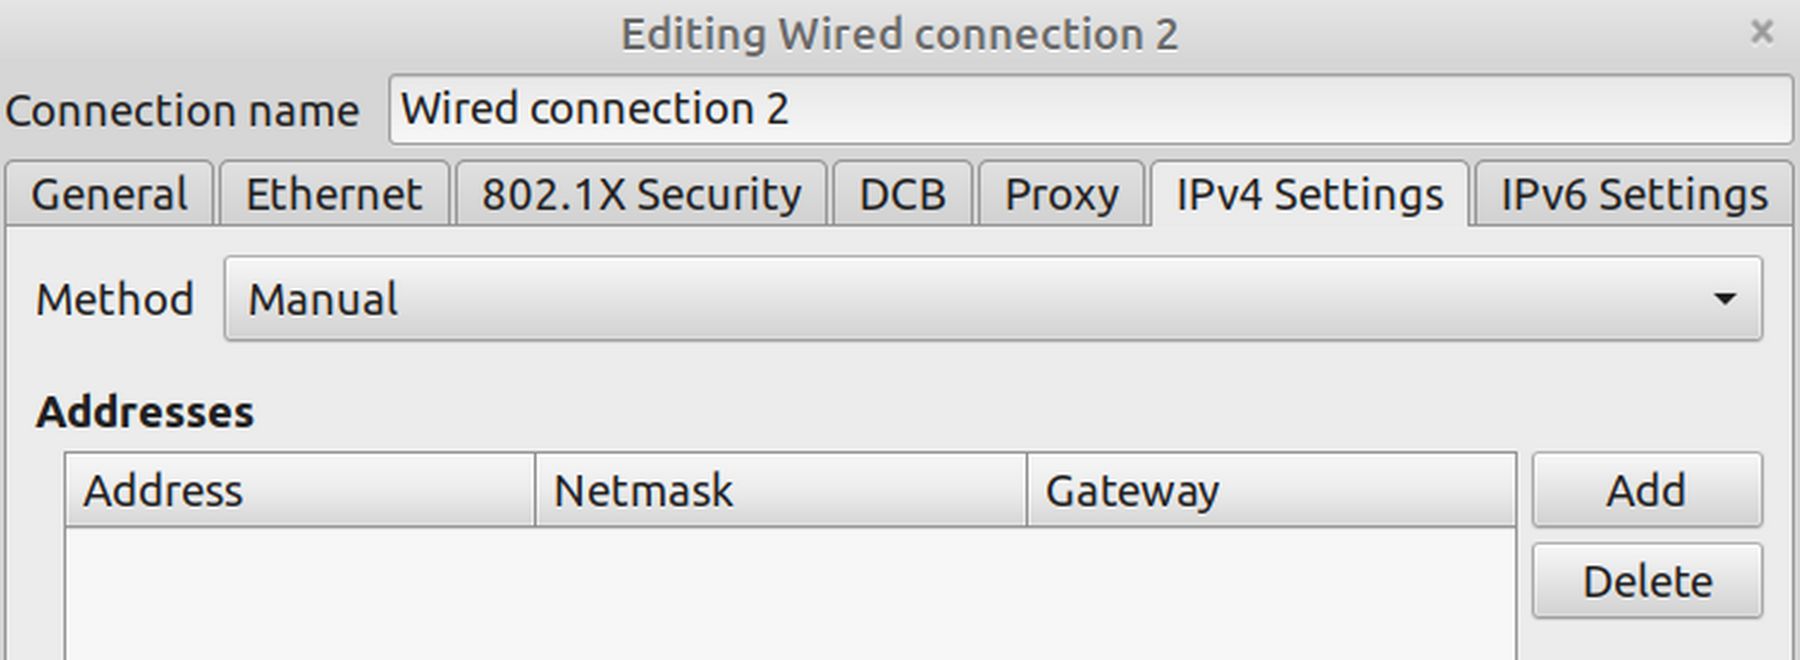
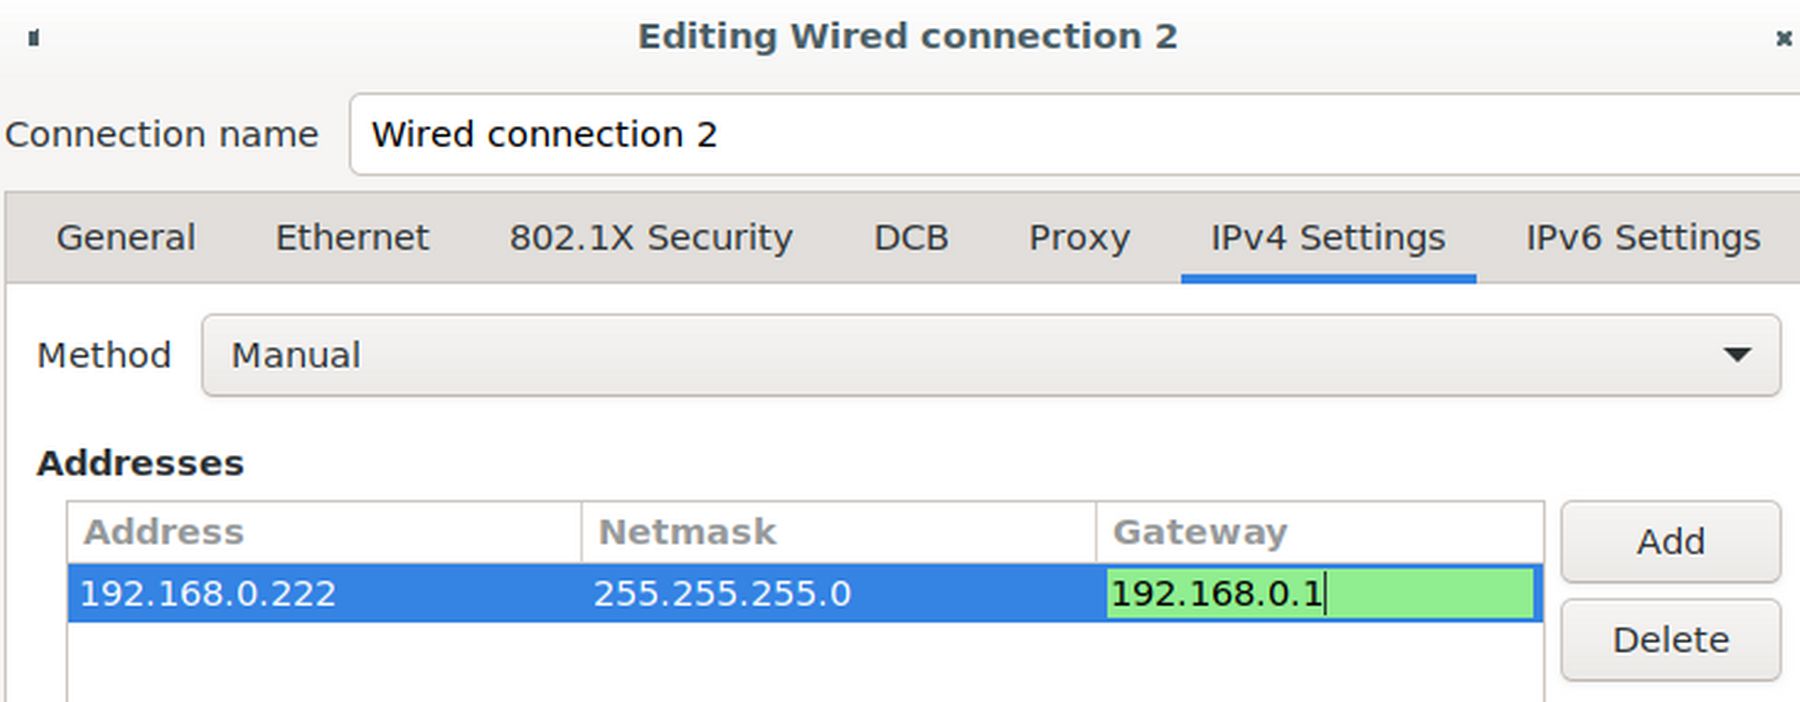
To add a static IP address to this connection, click Add. For address, type 192.168.0.222.
For Netmask, type 255.255.255.0
For Gateway, type 192.168.0.1
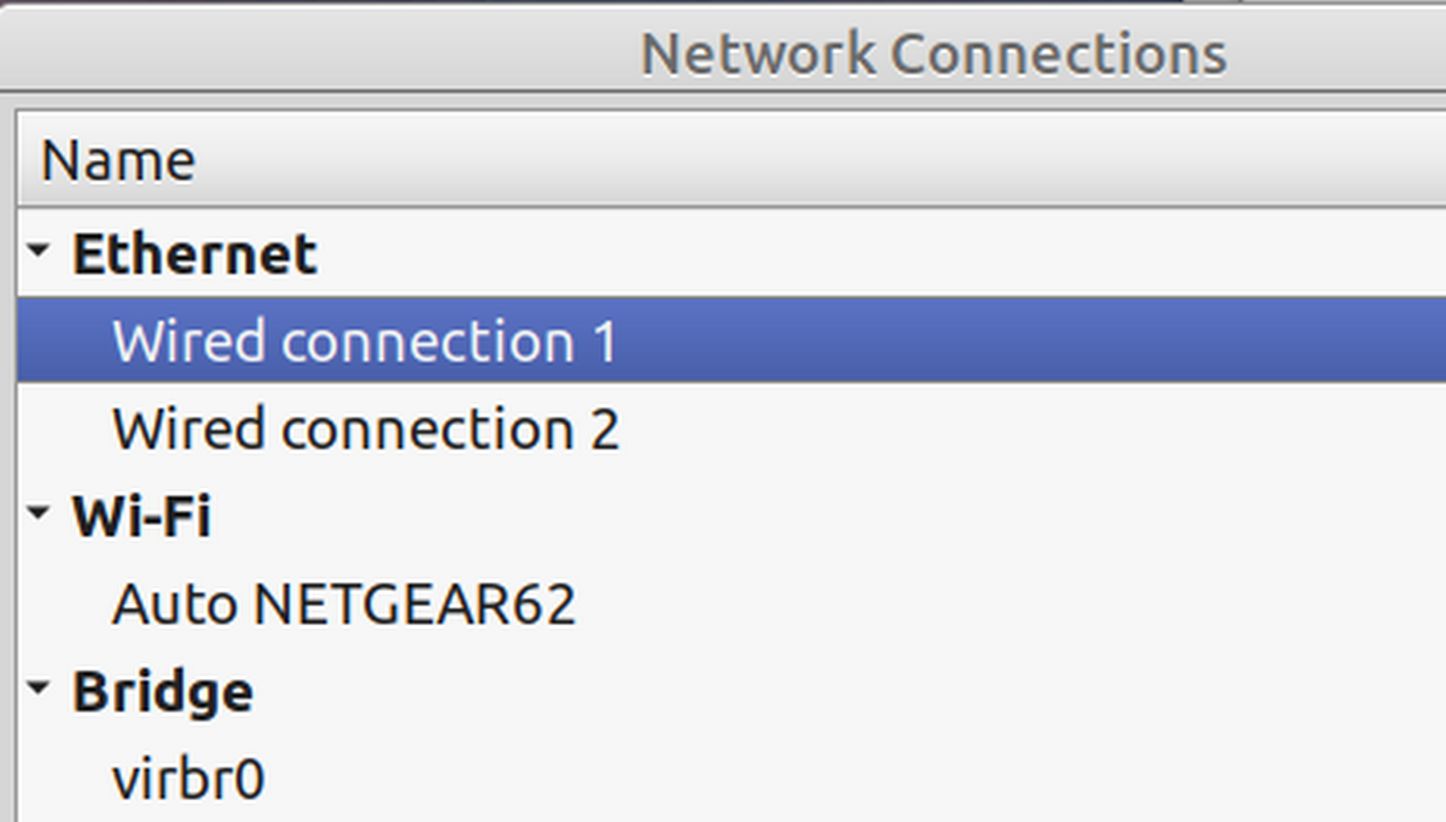
Then click Save. This returns us to the Network Connections screen where we now have a second Ethernet Connection option:
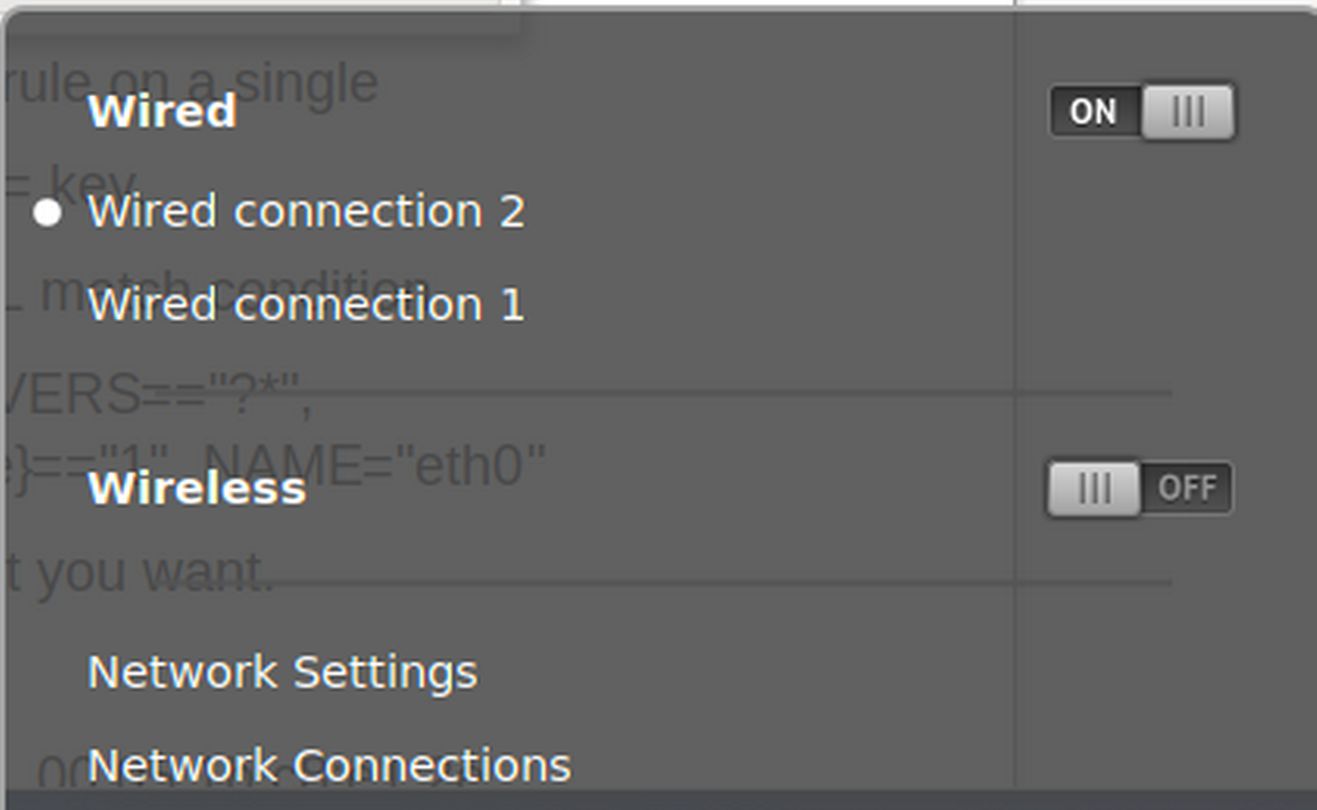
Close the Network Connections window. Now in your taskbar click on the Internet Connection icon and choose Wireless Connection 2:
While connected to Wired connection 2, open a terminal and type ip addr:
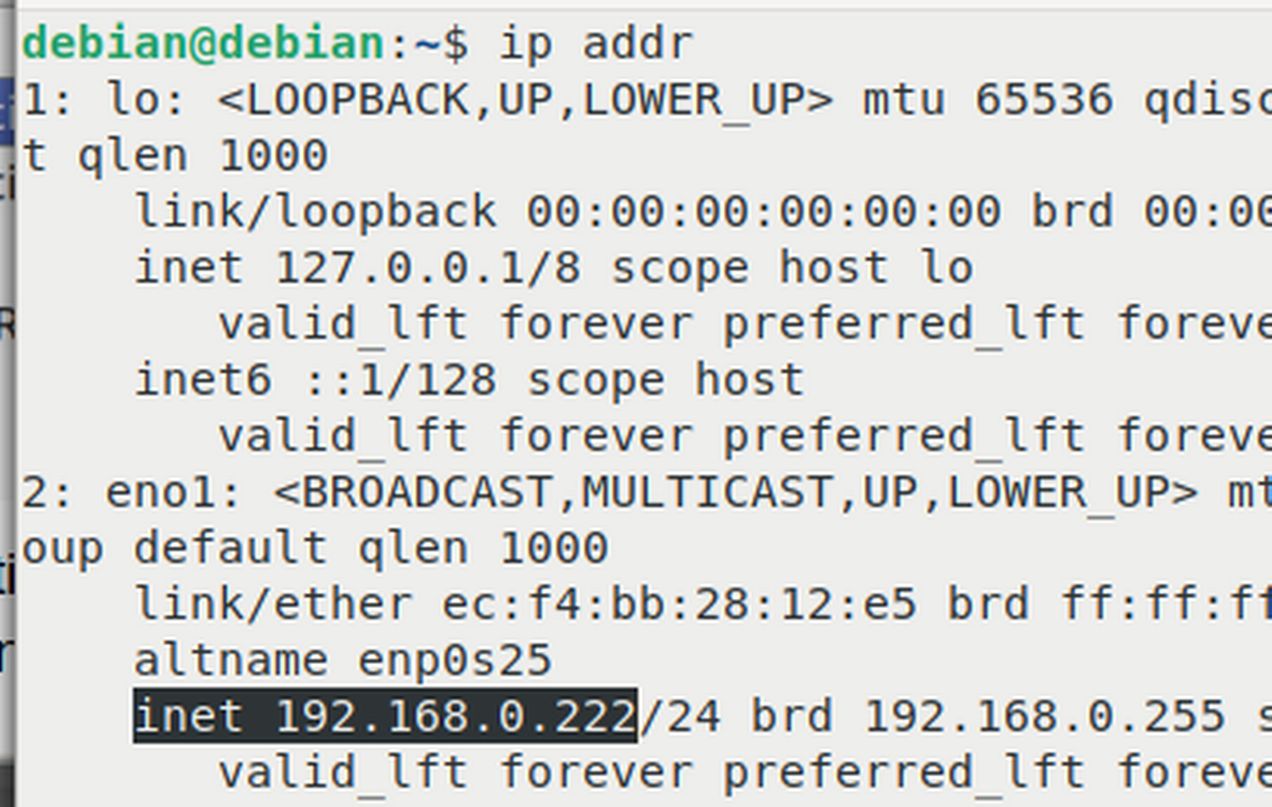
Note that eno1 now has the static Ip address 192.168.0.222
Determine your Network Manager
Linux offers several different kinds of Network Managers which we will cover in more detail in our next article. The three most common options are Network Manager, Networkd and Netplan. To determine which of these you are running on your home computer, copy and paste this command:
sudo service network-manager status
It will say active and running. Then on your keyboard, press lower case q, then enter to close the screen and return to the terminal prompt. Then copy and paste this command:
sudo service systemd-networkd status
The reply will say “Active: inactive (dead).” Then on your keyboard, press lower case q, then enter to close the screen and return to the terminal prompt. Then copy and paste this command:
sudo service netplan status
The reply will be that netplan could not be found.
To determine if IfUpDown is installed, copy and paste this command:
sudo ifup -V
It confirms that ifup is installed. Close the terminal.
Another way to tell what network manager your computer is using is to open your file manager and click on the Debian File System, then open the etc folder. Scroll down to the folder called network. There will be folders called if-up and if-down. This indicates that our home computer is using a networking program called ifupdown to activate or deactivate networks.
Then close this folder and open a folder called Network Manager. Then open the system-connections folder.
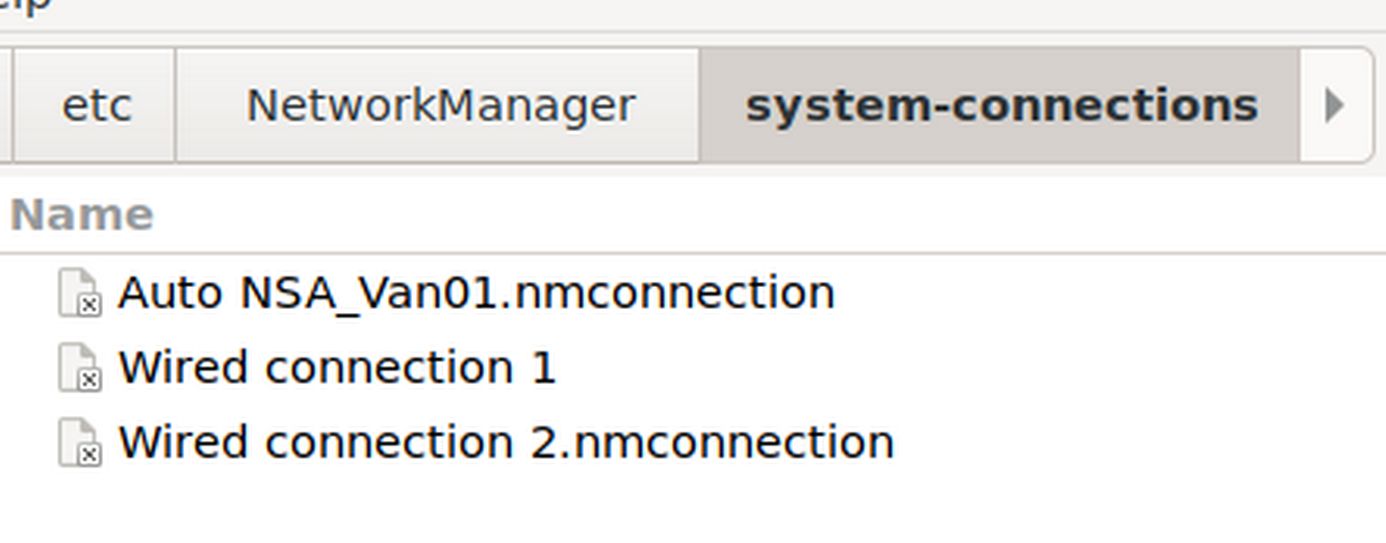
The nm in the Auto connection confirms that Network Manager is being used to control all three of our network connections. Go back to the Network Manager folder and open a file called NetworkManager.conf:
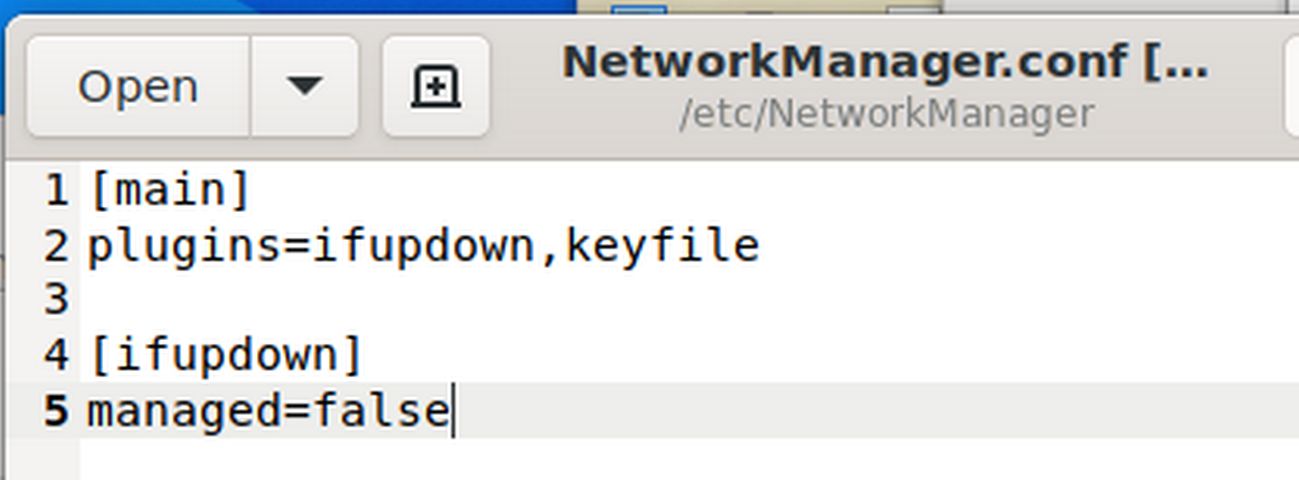
This tells us that Network Manager is using a plugin called ifupdown. Close the file manager.
What is a Gateway?
A gateway is a device that sits between a local area network (LAN) in a home, and a wide area network (WAN) such as the Public Internet.
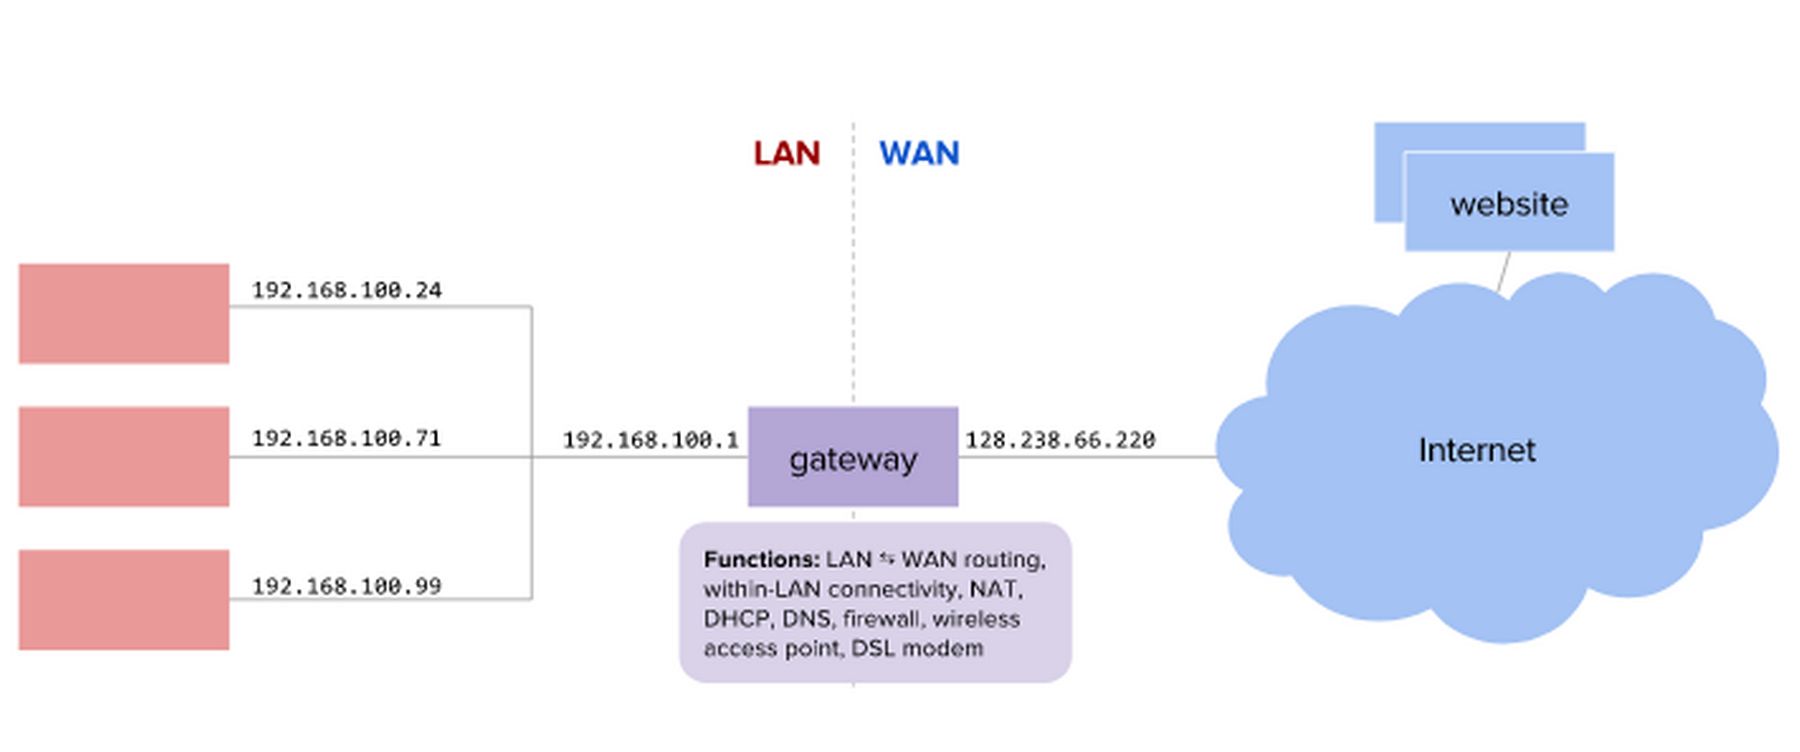
The Gateway IP address is used to route traffic between the LAN and the WAN. The WAN sees only the Gateway instead of the IP addresses of the computers that are part of the local area network LAN. The Gateway also provides DHCP (from the router), DNS to respond to queries and NAT (Network Address Translation) to map one public IP address to internal (private) static IP addresses assigned to computers on the home or LAN network. A typical home gateway or router will come with a DHCP server built-in, and allow you to select the range of IP addresses it distributes.
DNS
For web browsing and similar use cases, hosts on the Internet are referred to by human-readable names, rather than by their IP addresses. The Domain Name System (DNS) is a system that stores records mapping those names to the corresponding IP address, and allows those records to be queried (name resolution).
Many gateways also act as a DNS server, i.e. they can initiate and sequence the queries that ultimately lead to the resolution of a host name into an IP address.
NAT
Another common feature of residential gateways is NAT, Network Address Translation. This is a method of method of remapping one IP address space into another as data packets pass through the gateway. Publicly routable IPv4 addresses, which are scarce, are not generally assigned to every host in a home network. Instead, the Internet Service Provider will provide one public IP address, which is assigned to the Internet-facing interface of the gateway. Within the LAN, hosts will use a private IP address space, such as the 192.168.0.0/24 space. However, those private IP addresses are not routable on the public Internet. Thus, a common NAT use case is to map between private addresses used on a home LAN and the public address associated with the router, so that traffic can be routed between the LAN and the Internet.
Because servers on the public Internet can not communicate directly with private servers hidden in the Local Area Network, (a problem we will call the NAT problem), one solution is to use Port Forwarding which is a process where you can map a specific port to a particular internal server on your home network.
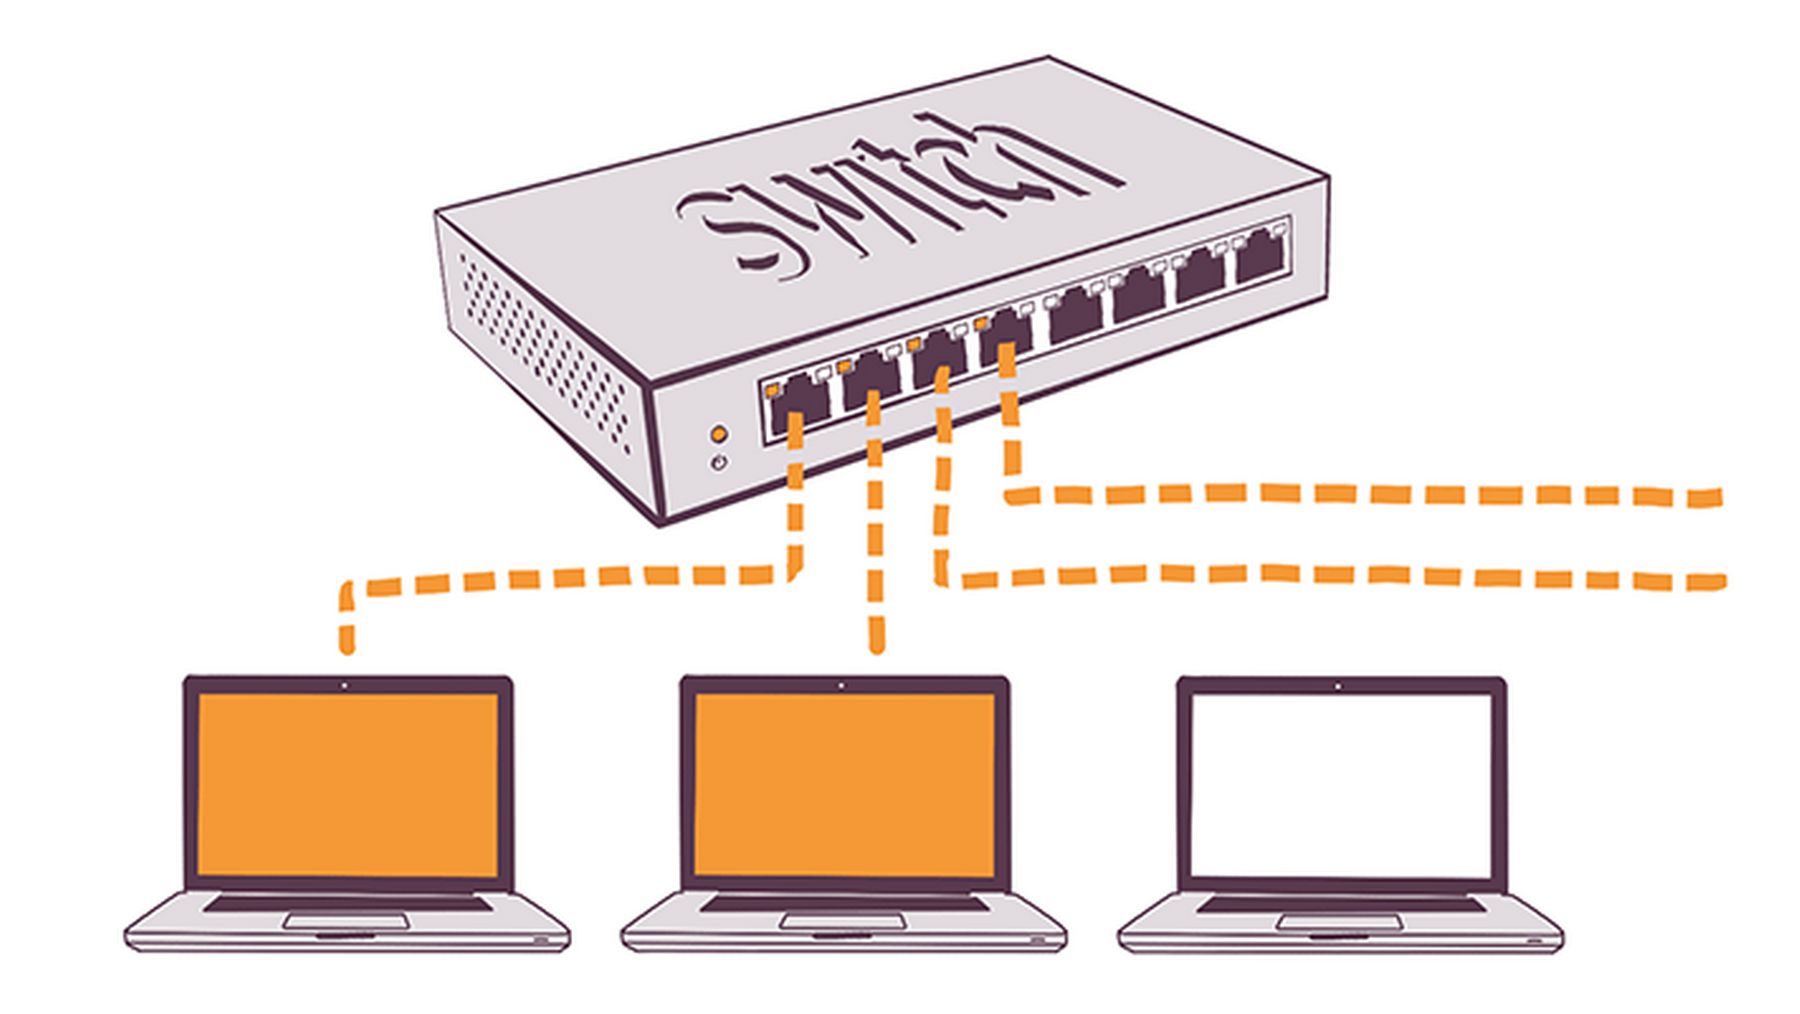
What is a Switch
A switch is a physical device that connects several computer to a local area network using Ethernet cables.
IP Mask
You will often see a private IP address written as 192.168.122.212/24. The number /24, called a mask, is a short cut way of writing 255.255.255.0. It basically means that the range of IP addresses is from 192.168.122.2 to 192.168.122.255 - all of which are routed through the Gateway IP of 192.168.122.1.
Address Resolution Protocol (ARP)
Devices uses MAC addresses and IP addresses. The mechanism which associates a MAC address with its IP address is called ARP (Address Resolution Protocol). Linux has a command arp, which allows us to look at the table of MAC addresses the device knows and IP addresses mapped to them. Open a terminal on your host or home computer and type: ip neigh.
What’s Next
This concludes our introduction to networks and static IP addresses. In our next article, we will review why and how to use Network Manager to create a new network.