
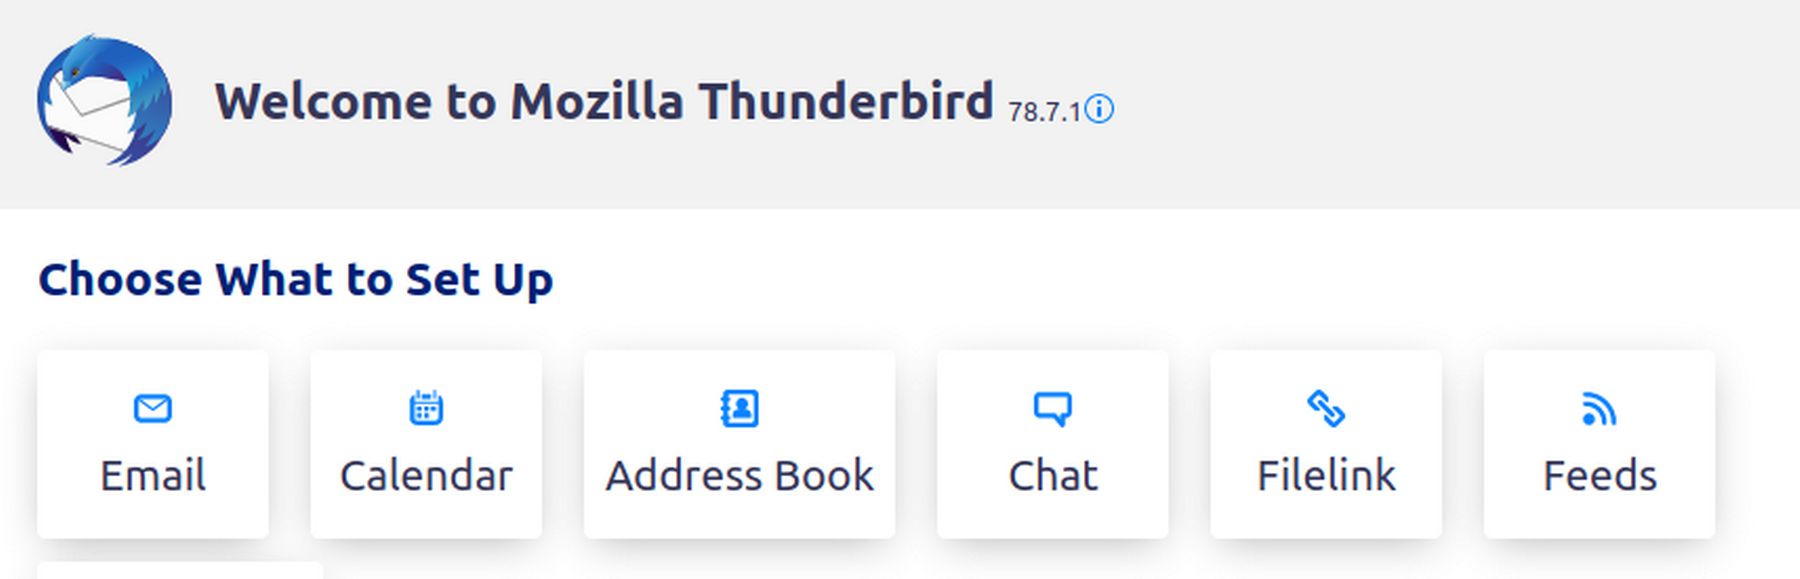
Linux offers several free calendar and email organizers. The most popular calendar and email organizer is called Thunderbird. Previously, the calendar had to be installed separately. But in June 2020, the calendar was combined with the email organizer and it is now all one package. The biggest benefit of Thunderbird is that it is integrated with our Linux Mint Debian Edition operating system. We do not even need to install Thunderbird because it comes loaded in Linux Mint by default. Linux Mint also includes a better calendar called Gnome Calendar that has better event detail functions than Thunderbird. So we will use Thunderbird for email and Gnome for events.
Set Up Thunderbird
Go to the Mint Menu and find Thunderbird under the Internet tools. Then right click on it and select Add to Panel. Then click on the icon to open it. Two windows will open at the same time. Here is the first window:
The first window will eventually be the Thunderbird screen. For now, slide it to the side. Here is the second window:
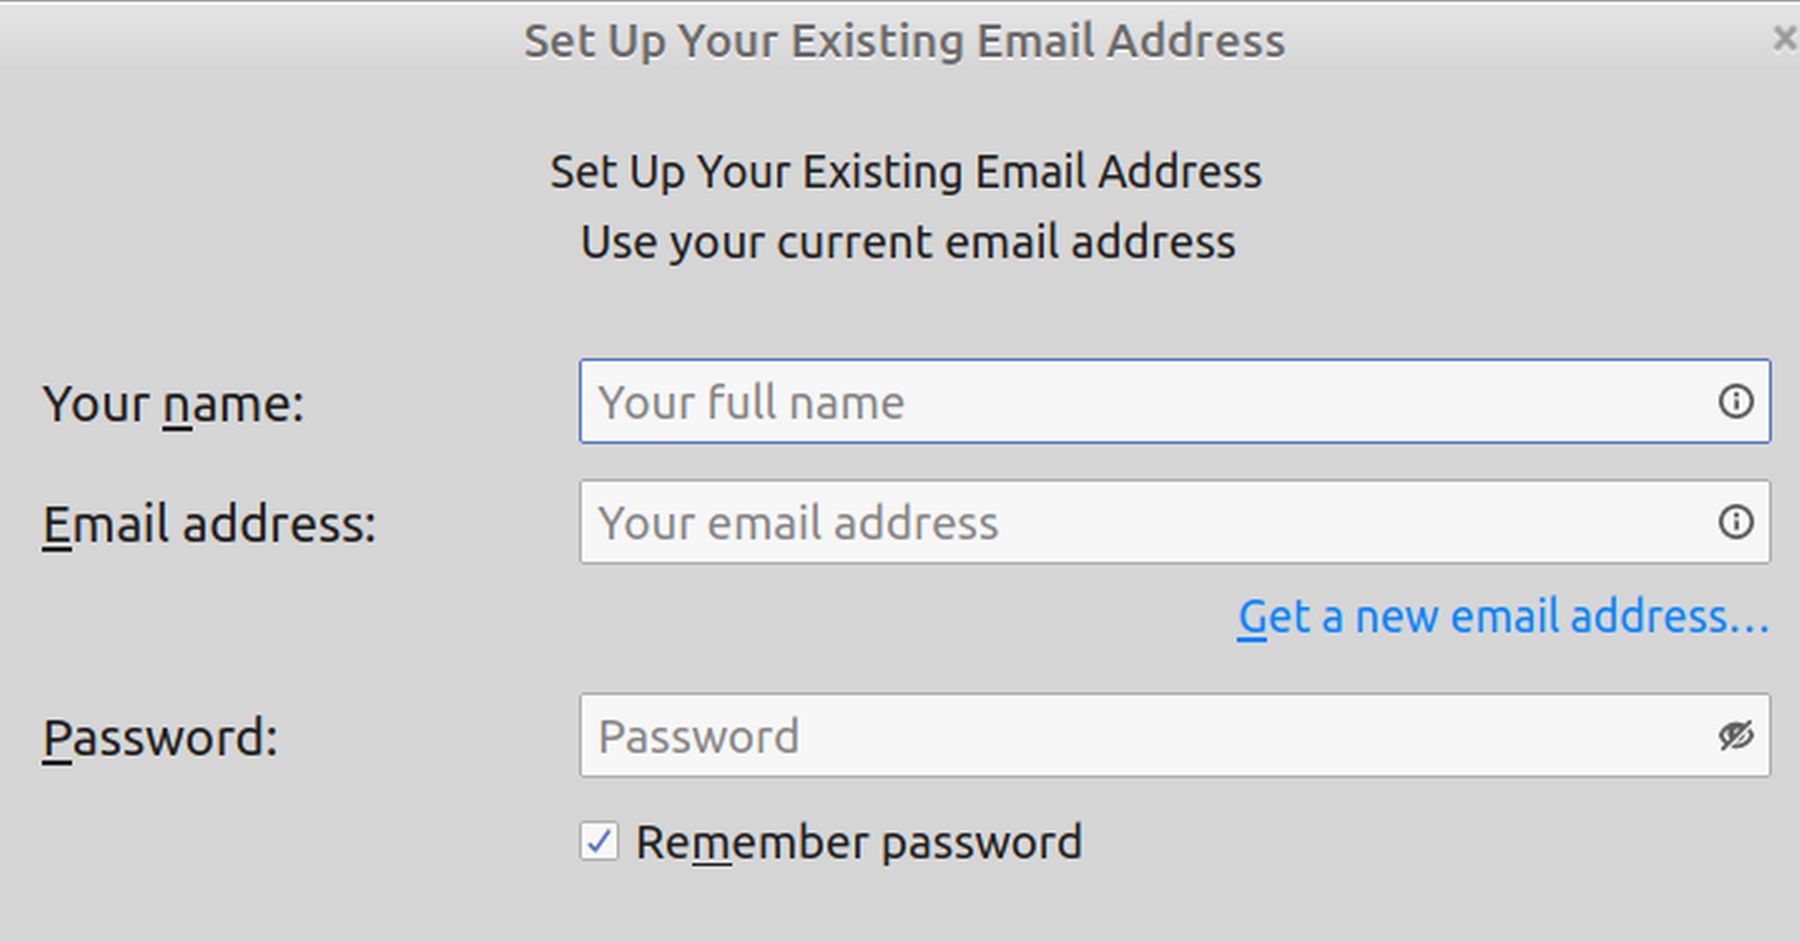
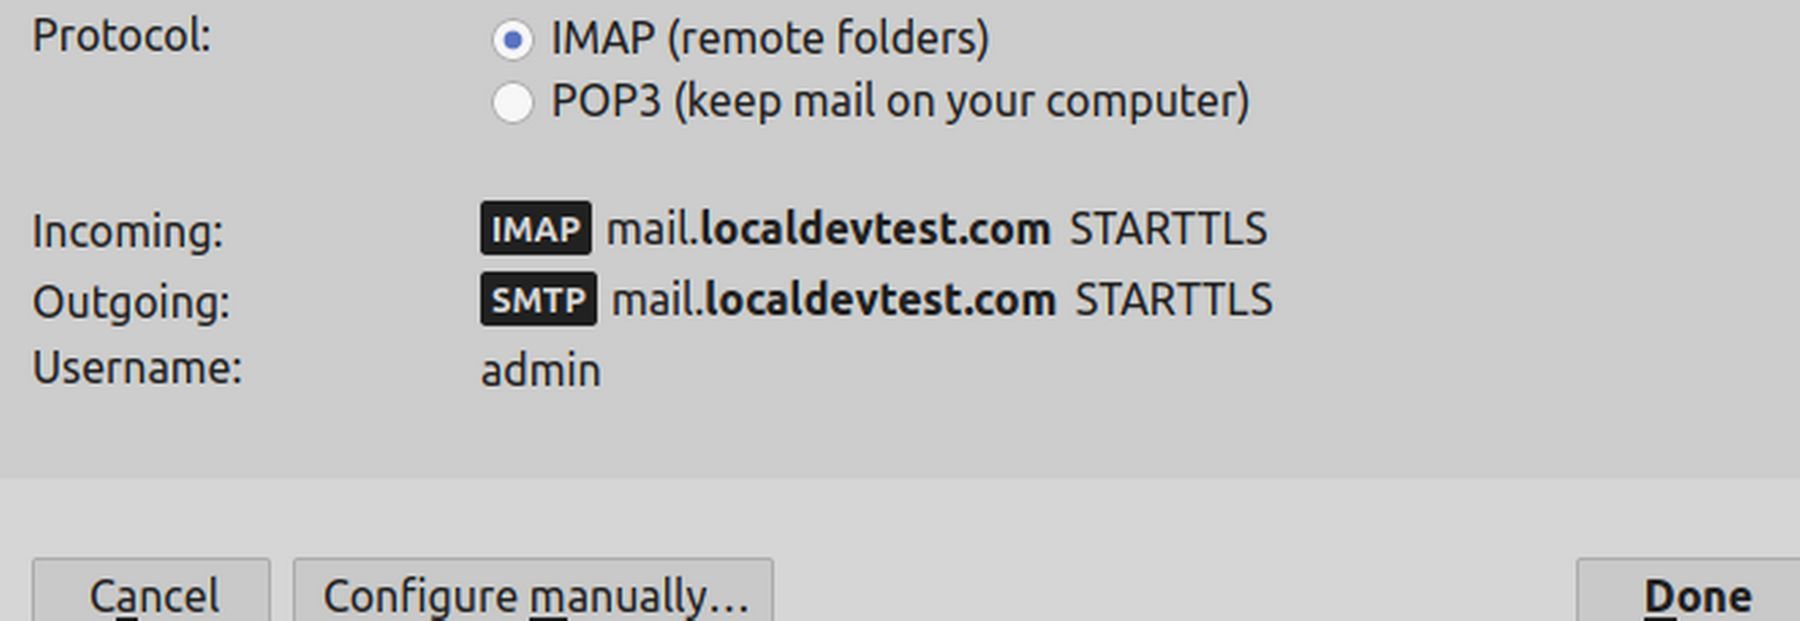
Enter your name, custom business email address and email password. Then click Continue. Hopefully, the next screen will say Configuration found. By default, the Protocol is set for IMAP which will keep your email stored on the remote (VPS) server rather than on your home computer.
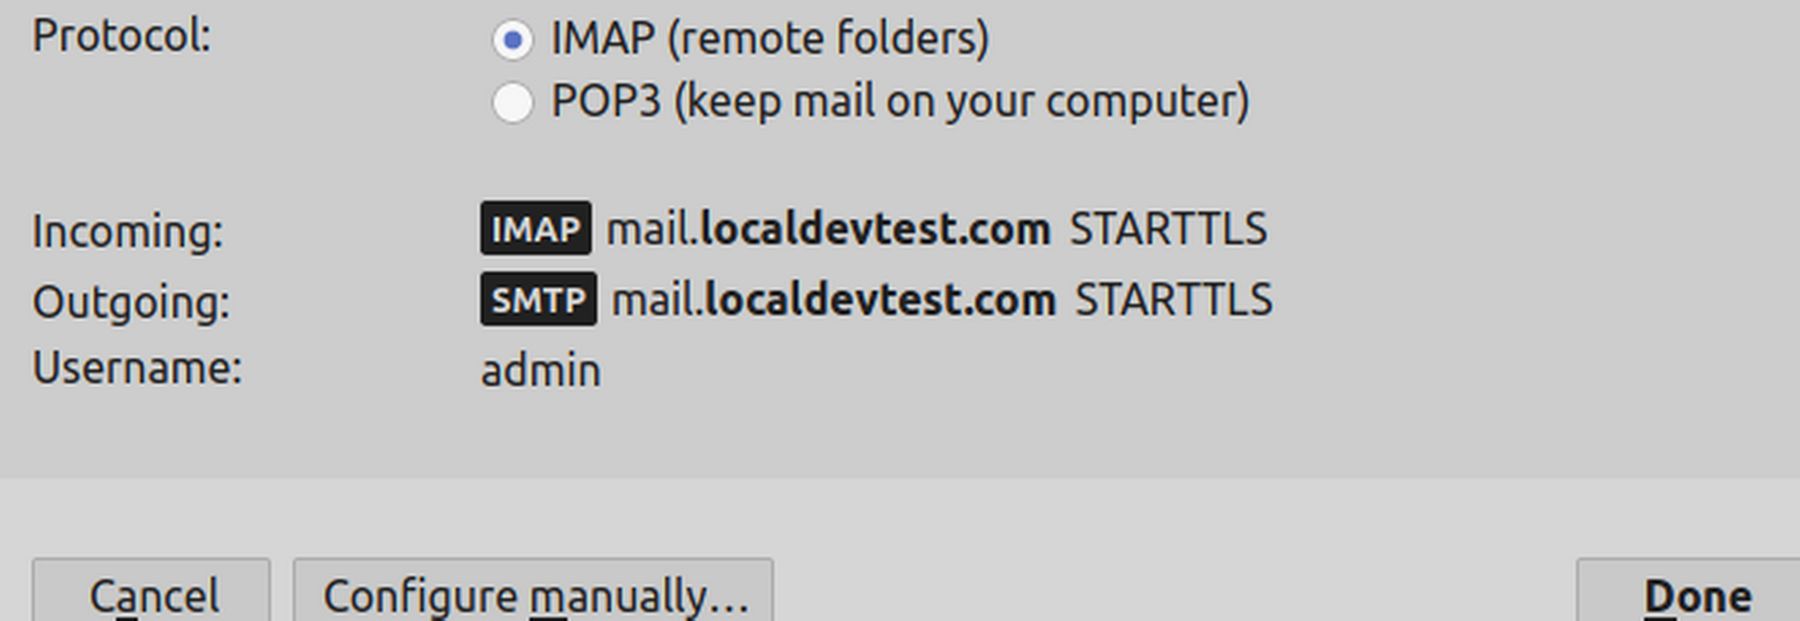
If this is OK, just click Done. However, if you want to use POP3 instead of IMAP, then you should not click Done. Instead, click Configure Manually. We will click Done which is the Automatic Setup method. We will then cover Manual Configuration later.
Clicking done will temporarily close the Installation screen. It will then reappear with the Address book of your custom business email:
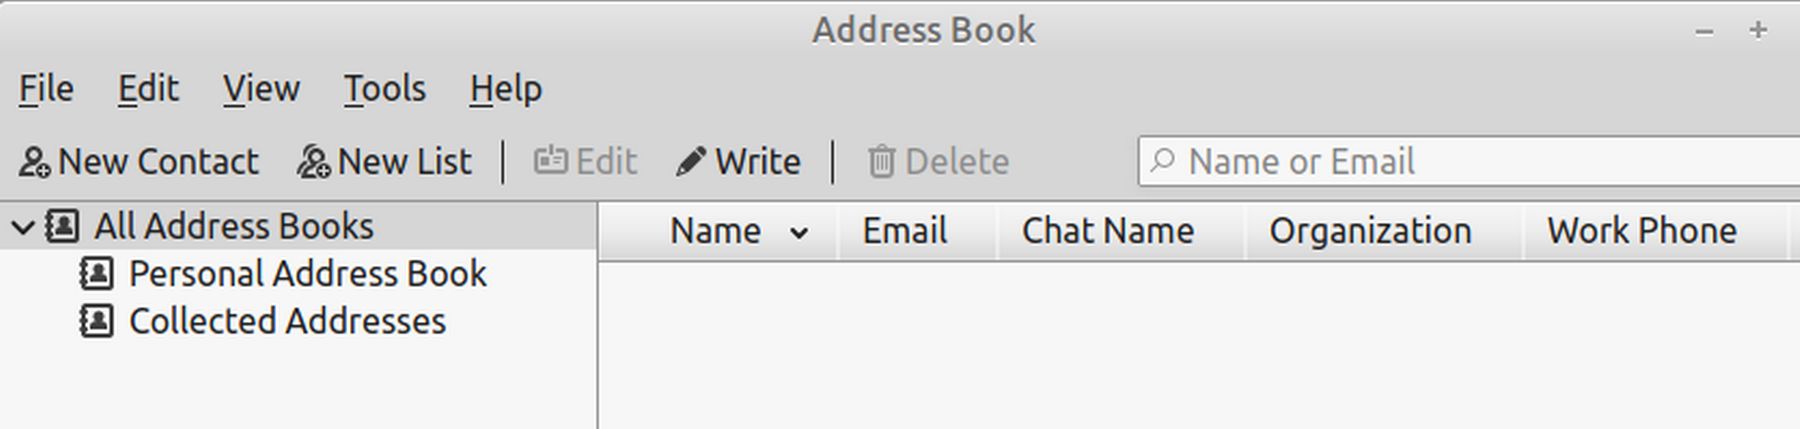
Close the address book screen. This will leave the In Box screen:
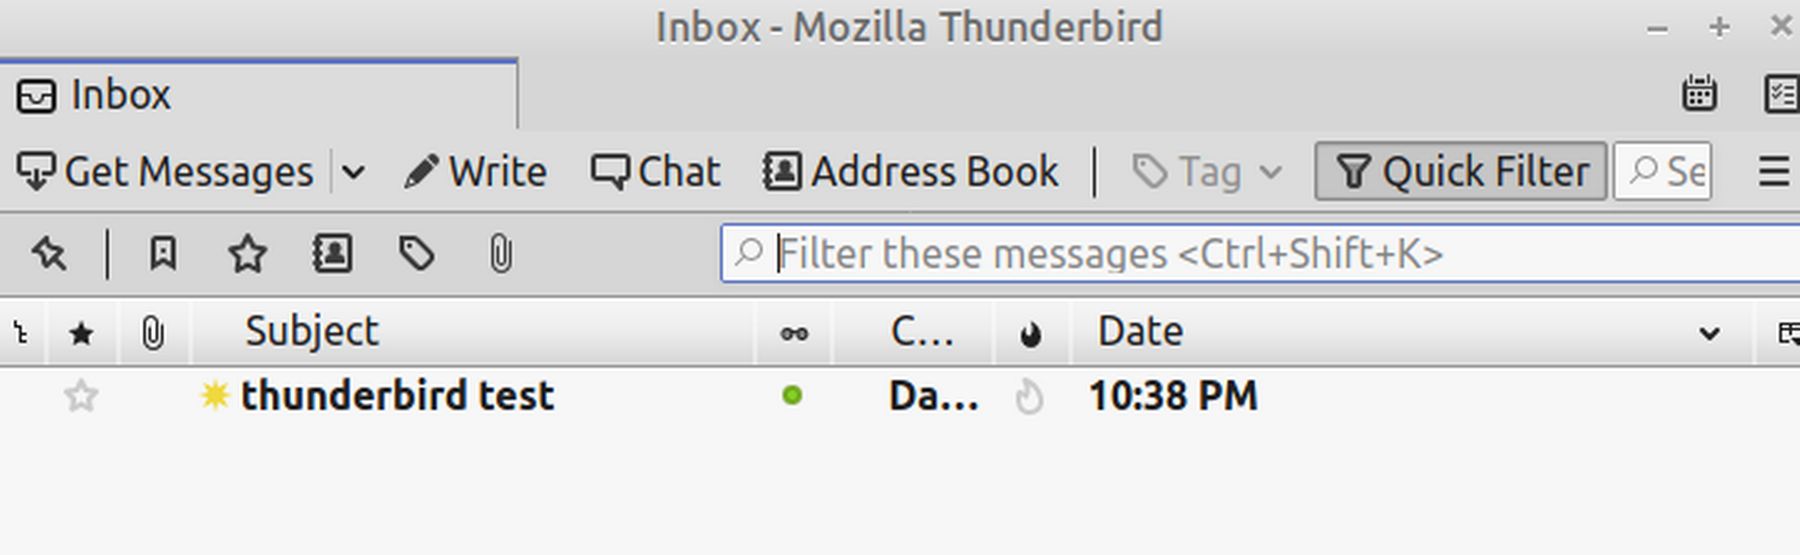
By default, emails are set for oldest first. Click on the Date arrow to change it to most recent first.
Delete an email message
You can right click on an email message and click delete. However, if using IMAP (which Hestia Roundcube does), the message will only be hidden on the Thunderbird screen. It will still appear on the Roundcube interface. Therefore, you need to delete emails from the Roundcube interface.
Send an email message
What you can do from Thunderbird is read email messages, reply to email messages and send new email messages. You can also have several accounts on the same Email Organizer. If you have several business email accounts, you can add each of them to Thunderbird - which will allow you to access all of your mail from a single location.
Click Write to bring up the Email Write Screen:
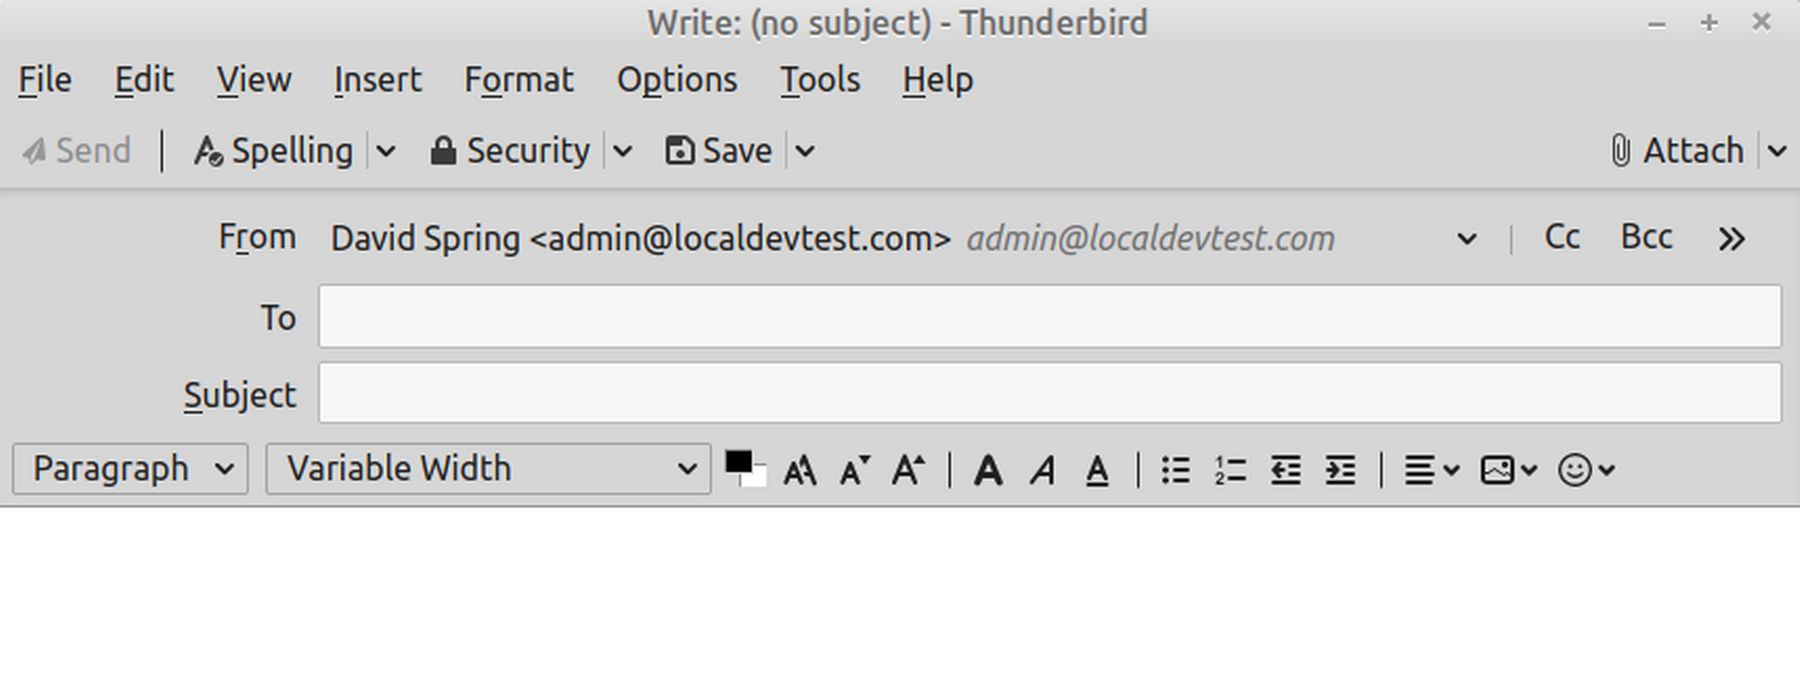
Compose a test message and send it to your business Proton Mail account.
Show Folder Pane to View Sent Mail
By default, the Folder Pane may be hidden. Click Settings. Customize, Folder Pane Tool Bar. Then click Sent to view the sent message.
Edit Preferences
Click on the three bars in the upper right corner. Then click Preferences.
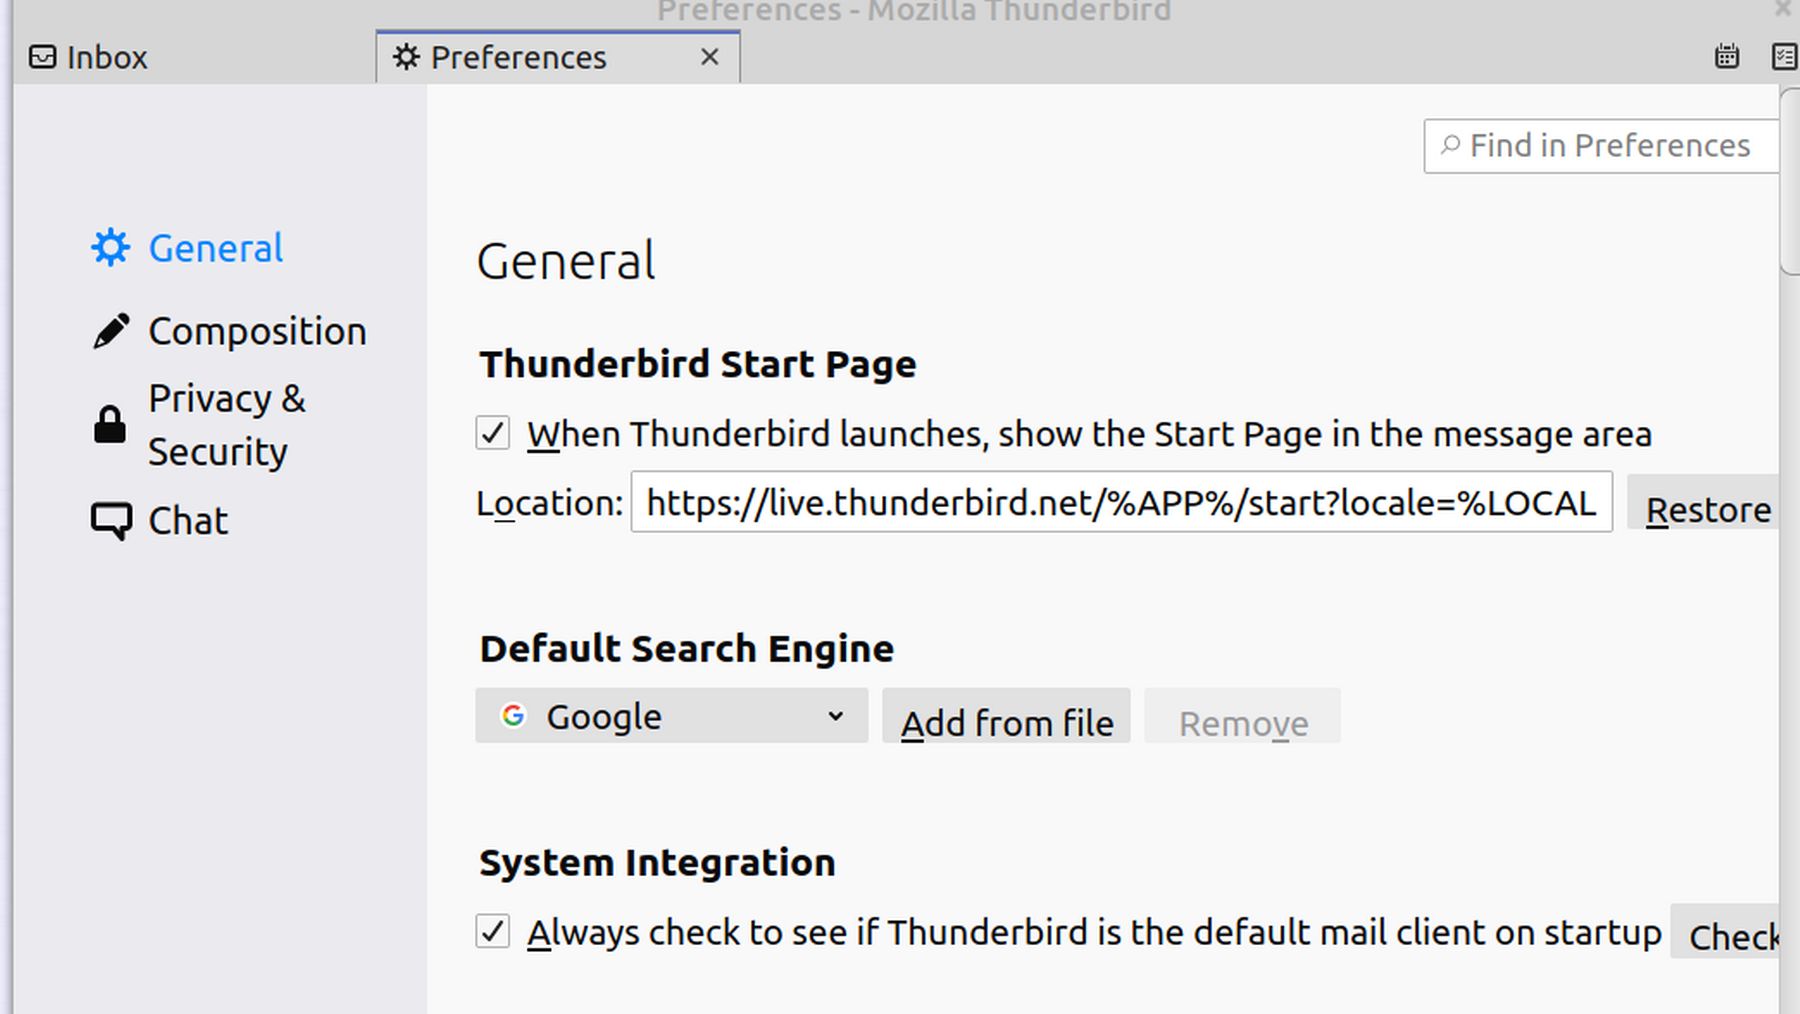
For the General tab, change the search engine from Google to Duck Duck Go and for Incoming Mail, uncheck Play a Sound. To exit Thunderbird Preferences screen, just click the X at the top of the window. Then click Settings Customize. Check the Menu Bar and uncheck the Status bar.
Thunderbird Manual Account Setup
You can run the automatic account setup at anytime by going to the File menu, pointing at New, and clicking Mail Account. Repeat this process for as many accounts as you want to add to Thunderbird. However, there are times when the automatic account set up method described above does not result in a fully functioning email account.
If the automated set up process does not work or if the database that Mozilla maintains doesn't contain information about your email provider, you can set up your account manually. Your email provider should supply you with the information that you'll to set up an account. For Hestia custom email accounts, the information is on the Add New Account screen.
Click on the three bars to open the Thunderbird Menu. Then click on Account Settings. Go to Account Actions and click Add Mail Account.
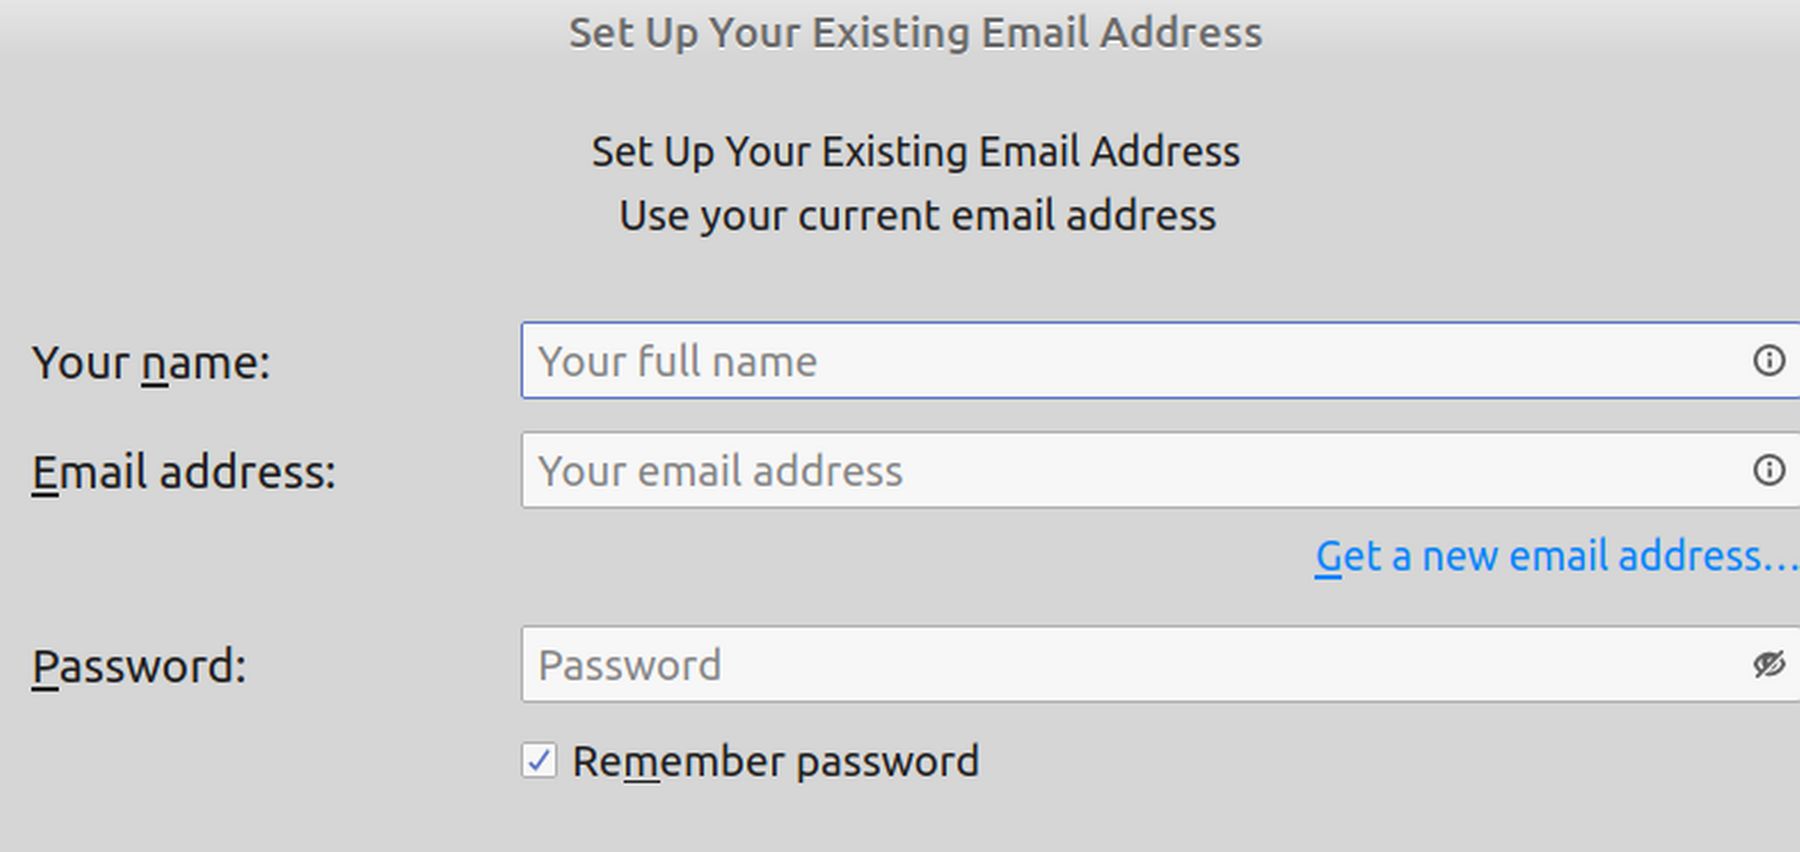
Enter your name, your email address, and email password and then click the Continue button.
To use POP3, click it and also click Configure Manually. You won't be able to change from IMAP to POP3 after you have clicked Manual Setup. Also an existing IMAP account cannot be converted to POP. So please double check that you have selected POP3!
The Account Settings screen will open for your new account. The screen contains your account name, your name, and your email address. Click Server Settings to configure your account to receive email.
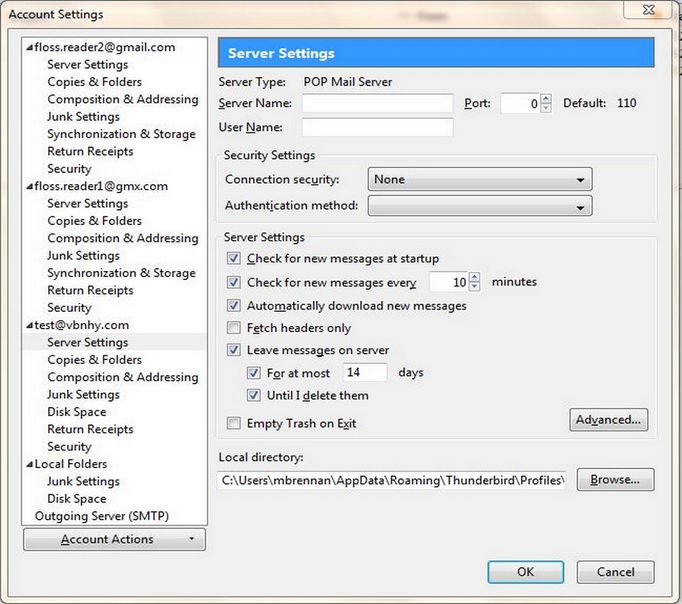
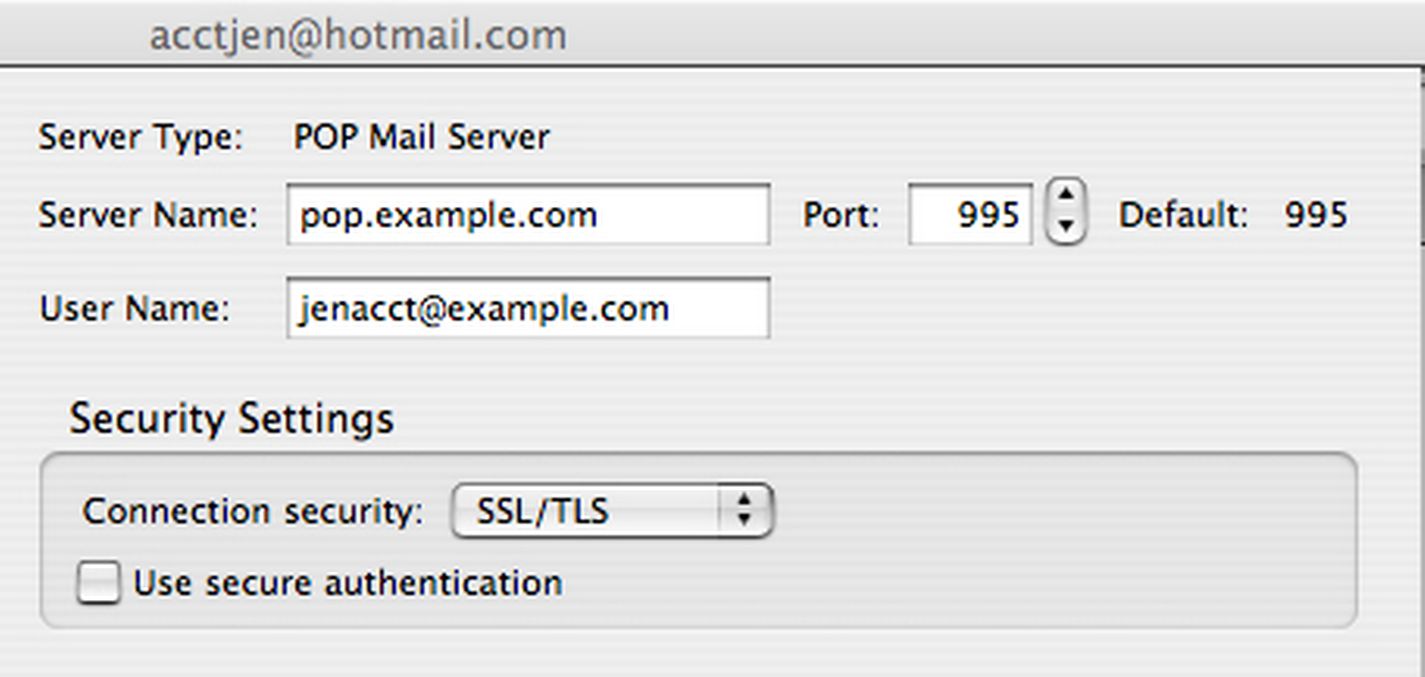
To manually configure an account, you will need to have the following details which can be supplied by your email provider.
Server Name
Username: Enter your full email address (or whatever your email provider recommends, usually your full email address, although sometimes just the part before the "@").
Incoming: mail server and port (for example, "pop.example.com" and port 110 or "imap.example.com" and port 143). Enter your incoming email provider's server (usually "mail.yourmailprovider.com" or "pop.yourmailprovider.com").
Outgoing: outgoing mail server and port (for example, "smtp.example.com" and port 587). Enter your outgoing mail provider's server (usually "mail.domainname.com").
Select "POP" from the drop-down list to the right of the incoming mail server name (the row labelled "Incoming:" in the screenshot). This is important because if IMAP is selected you won't be able to change it to POP later!
Outgoing security: "STARTTLS"
Configure the outgoing server
Click Outgoing Server (SMTP) to setup the account to send email.
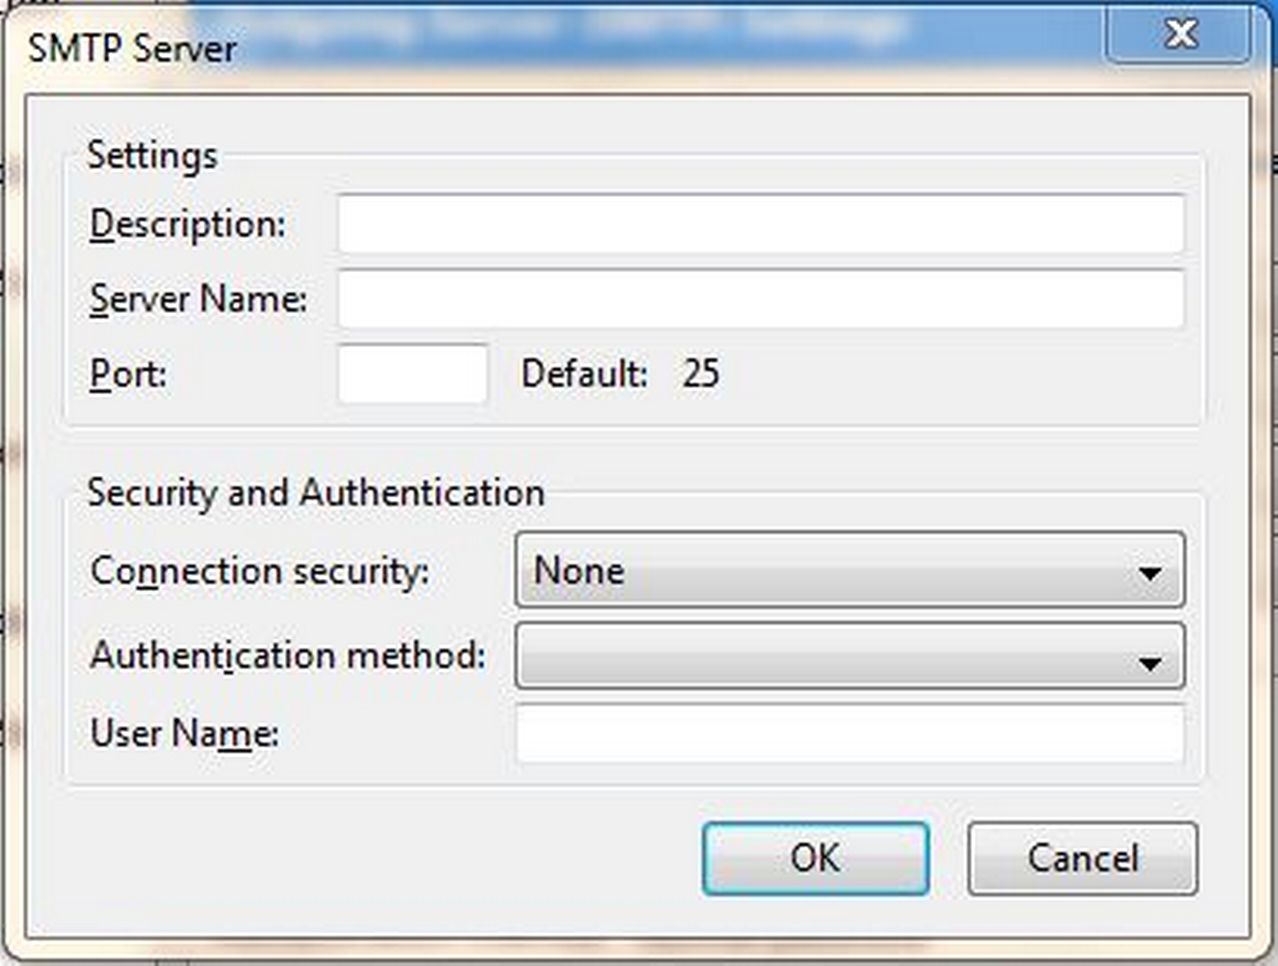
In Outgoing Server (SMTP) Settings click the Add button. Enter the settings for sending email that you got from your email provider.
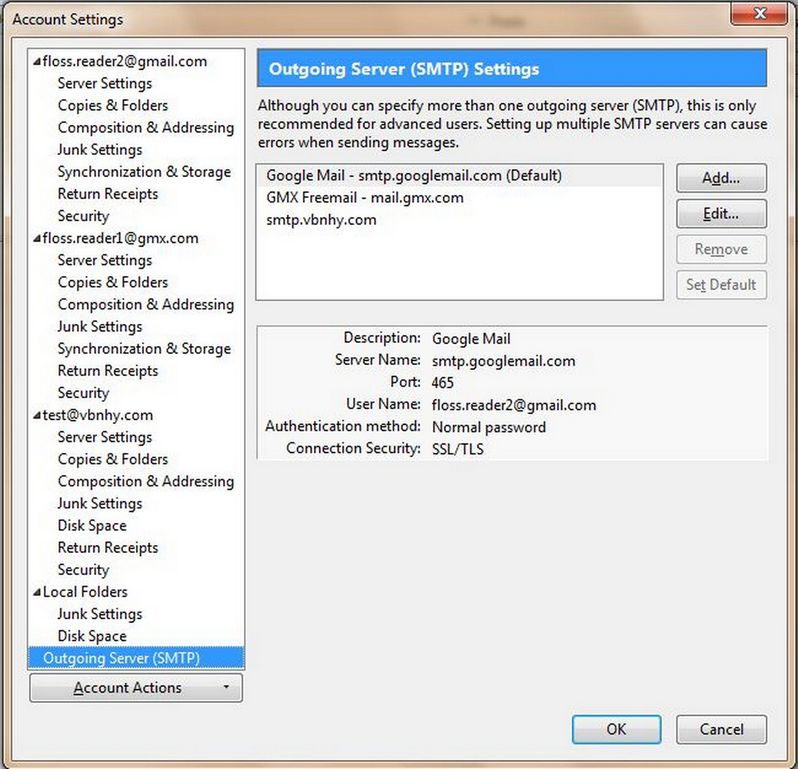
Multiple email accounts can use the same outgoing SMTP server. Therefore, SMTP servers are created separately from email accounts. In the Account Settings dialog, in the left pane, select Outgoing Server (SMTP) from the bottom of the list.
There may be an entry in the resulting list that was created when you entered your account details. Either edit that entry or add a new entry.
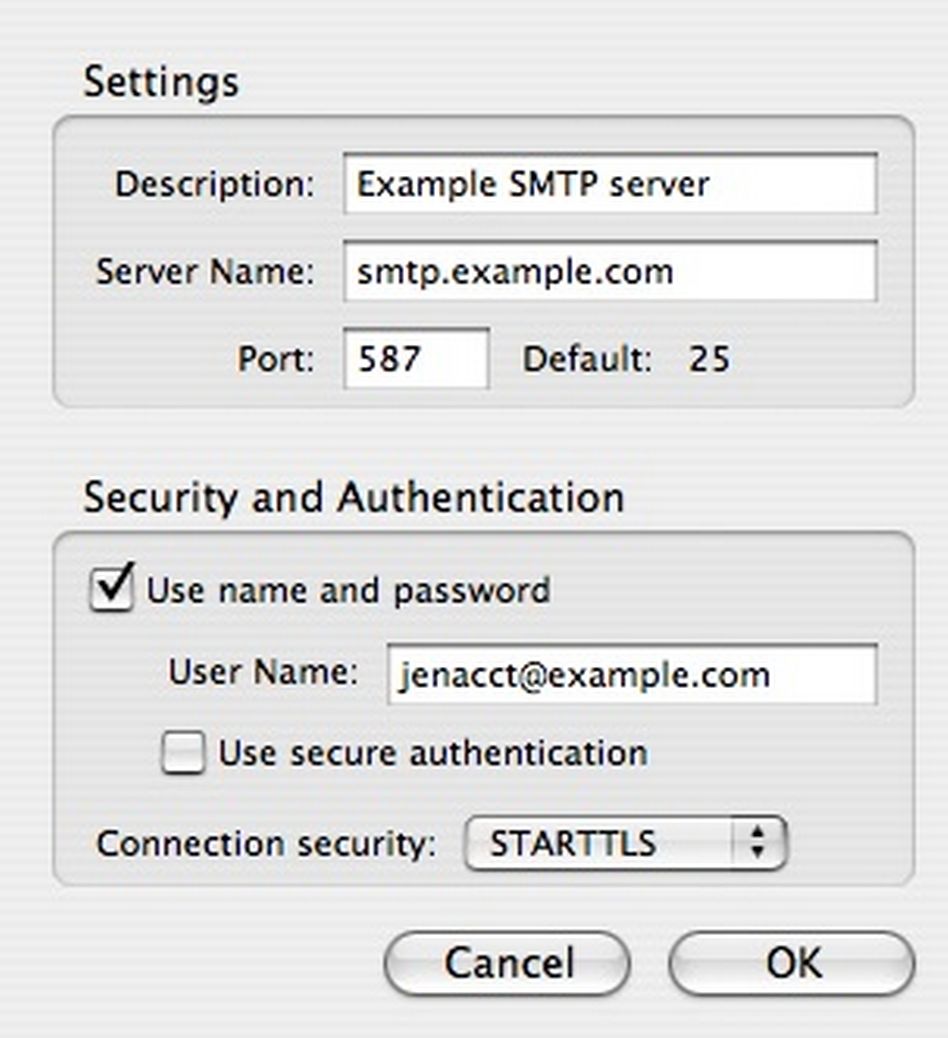
A Hestia account is configured as follows:
Server Name: mail.yourdomainname.com
Port: 587
User name and Password: checked
User Name: your custom email user id without "@yourbusiness.com" extension (for example, if your email address is
Connection Security: STARTTLS
After saving the information about the new outgoing server, select your new email account from the list. In the Outgoing Server (SMTP) field, select the SMTP server from the drop-down list. Other items on the page were automatically created when you entered the account details - alter and extend as necessary. Click on the Server Settings option under your new account. Make sure the entries in the following fields correspond to the settings given to you by your email provider:
If everything is ok (i.e. you can send and receive email and see your old emails; note that some email providers may not give you access to all of your emails or all your email folders; check with your mail provider) and you accidentally created an IMAP account, then delete the accidentally created IMAP account as follows: open Tools > Account Settings..., select the accidentally created IMAP account with the IMAP server setting, then select Account Actions > Remove Account from the drop-down list underneath the account list on the left.
How to Remove an Email Account
Go to the account Manual Set Up screen. Select the account that you want to remove. Click Account Actions and select Remove Account from the list. Thunderbird confirms that you want to remove the account. Click the OK button to continue removing the account.
Congratulations, you now have your Hestia custom business website connected to Thunderbird!
What’s Next?
This concludes our review of setting up a Hestia email process. In the next chapter, we will review Firewalls, Backups and customizing the appearance of Hestia.