
In this article, we will change the Backup Frequency as an example of how to run a Hestia Cron Job. To change the backup frequency, we need to know the Hestia command for this. The list of possible commands is not shown on the Hestia user panel. Instead, log out of the user panel and into the admin panel. Then click on CRON.
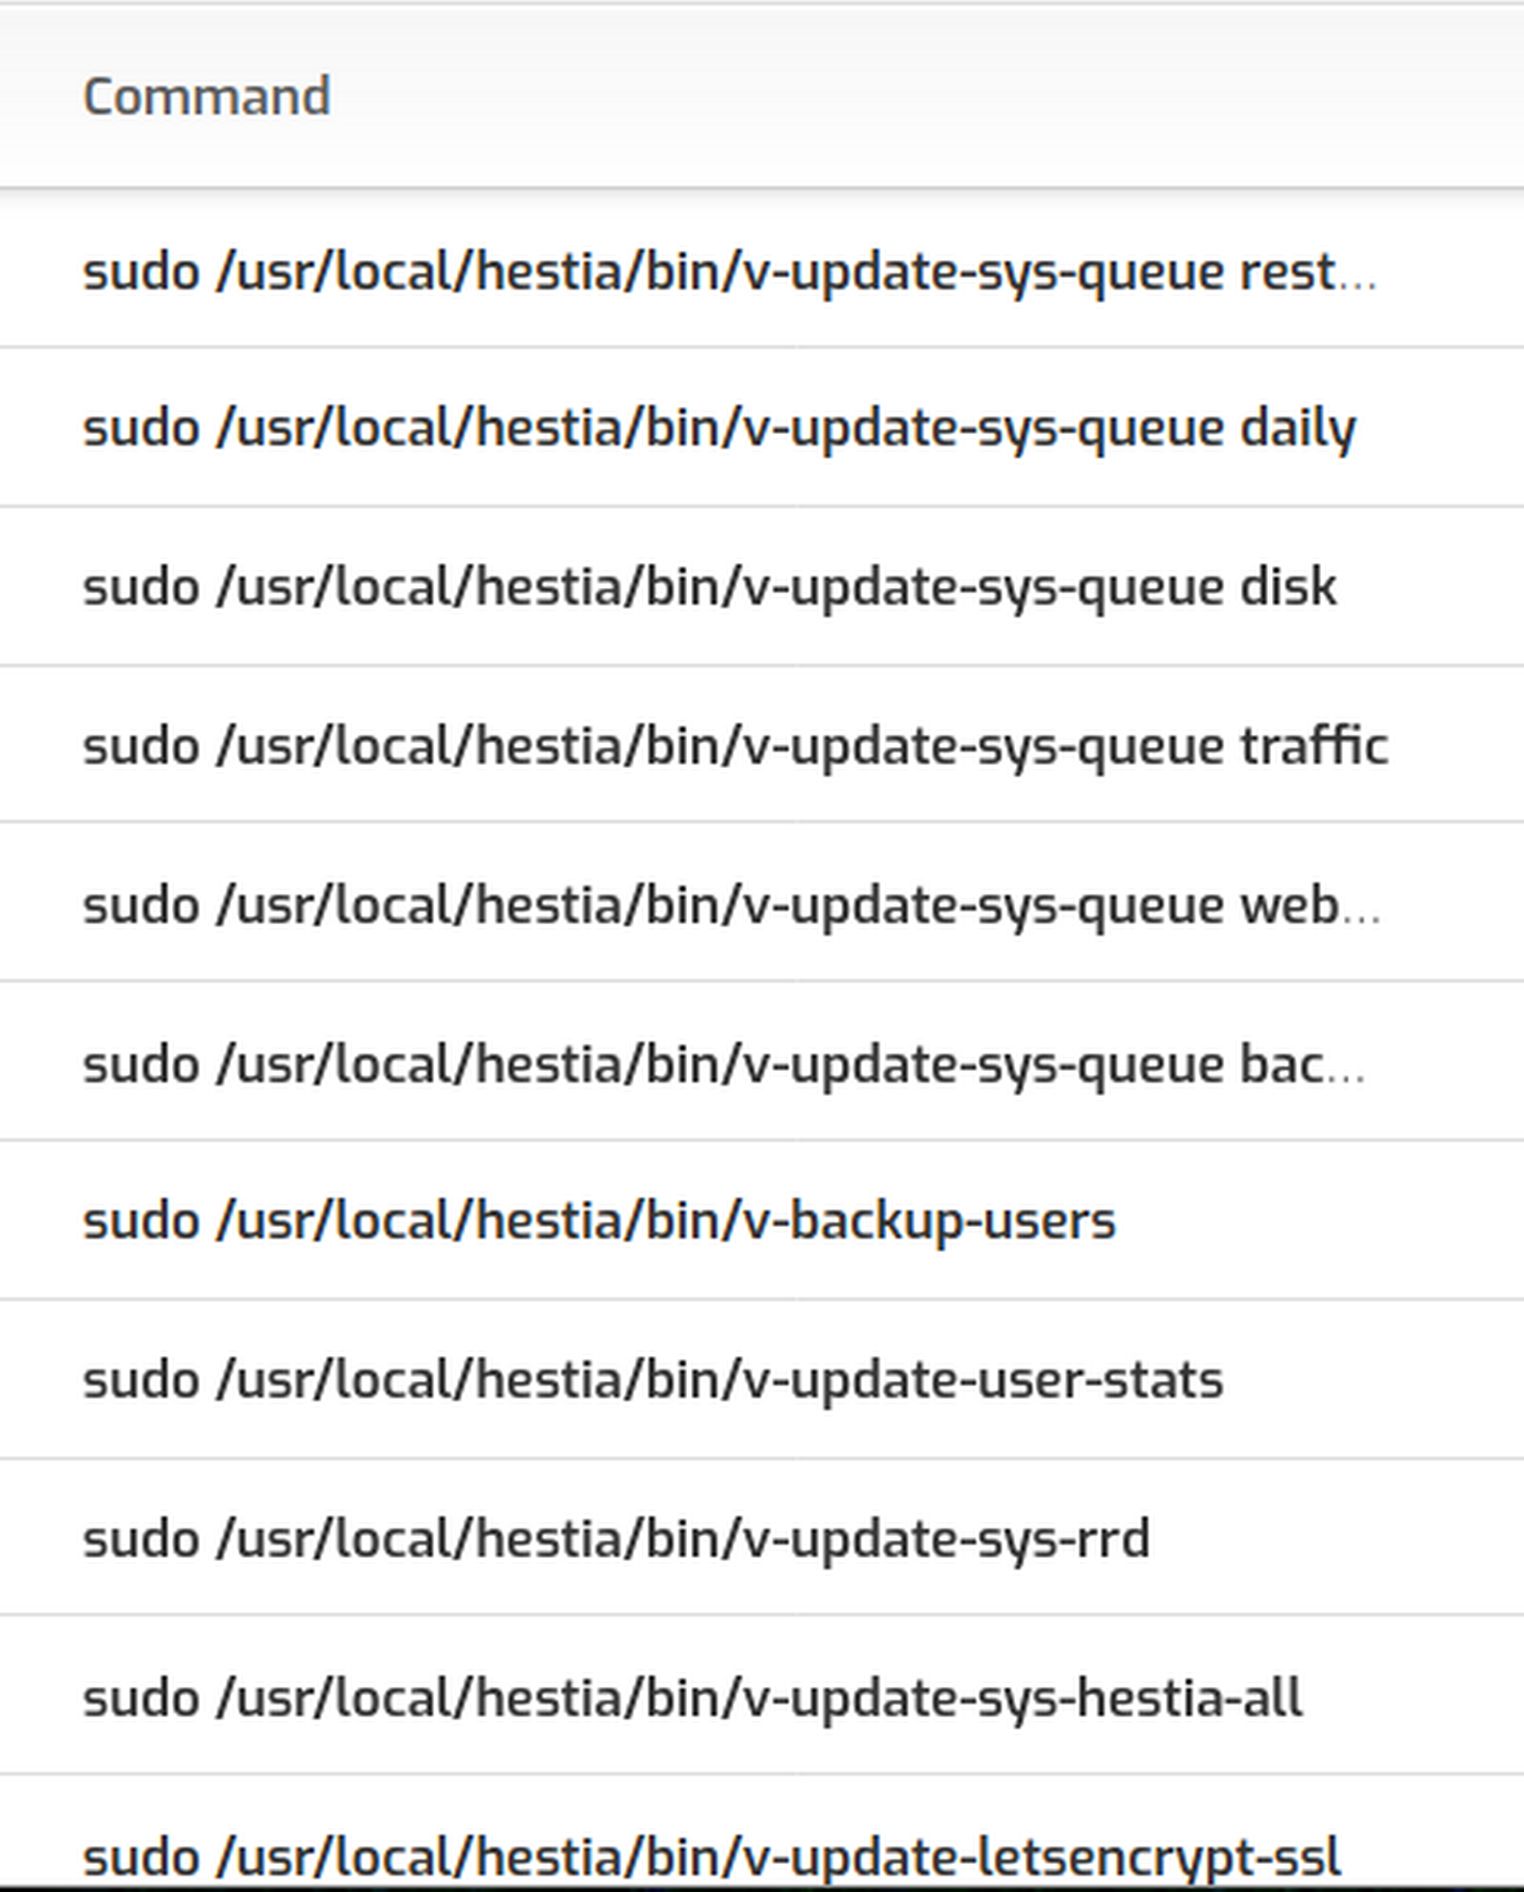
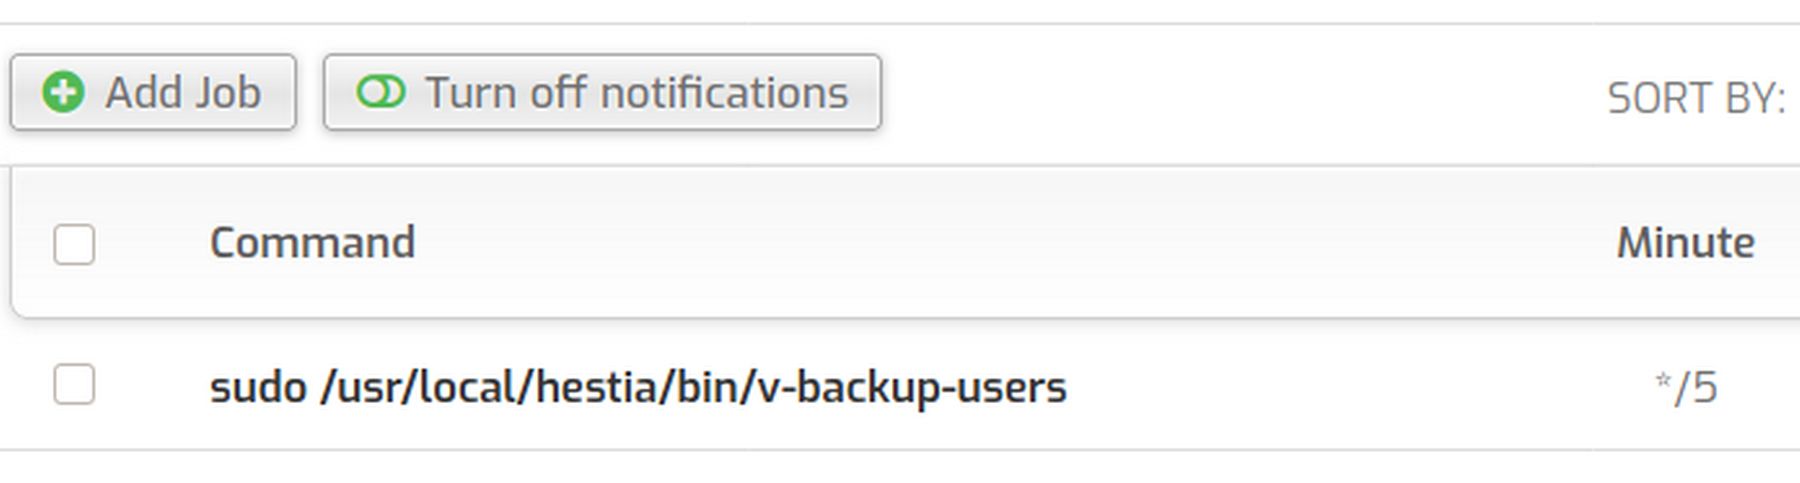
The command used on the admin control panel was:
sudo /usr/local/hestia/bin/v-backup-users
Because we are running the command as a Hestia user, we need to change the file called sudoers before we run the command. To do this, open a terminal on your home computer and start an SSH session: ssh
The open the sudoers file by copy pasting this command:
sudo nano /etc/sudoers.d/admin
Here is what this file will look like before editing it:
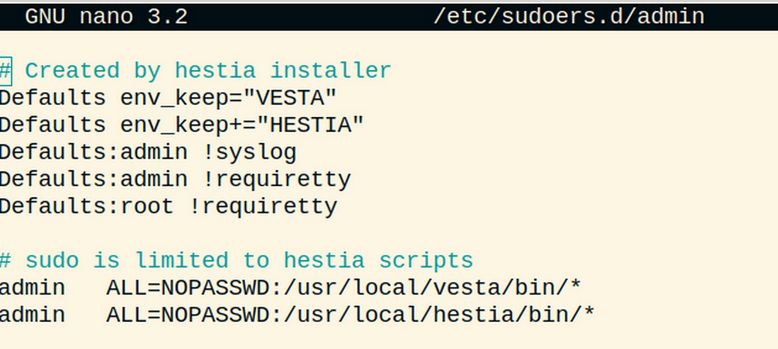
Use the down arrow to position the cursor at a new line. Then copy paste the following lines:
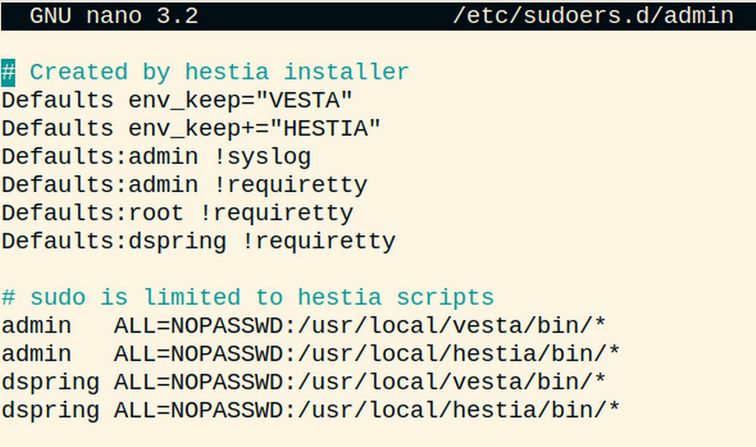
Defaults:dspring !requiretty
dspring ALL=NOPASSWD:/usr/local/vesta/bin/*
dspring ALL=NOPASSWD:/usr/local/hestia/bin/*
Note: Replace dspring with your actual user
Also note: The exclamation mark before the word requiretty means that the password is not required for this user to run Hestia scripts.
Here is what the file will look like when you are done:
Save and Exit from the sudoers file and close the SSH session.
Note: If you try to run cron jobs without changing the file, you will likely get an email with the following error notice:
“sudo no tty present and no askpass program specified”.
Now that we know the command and have changed the sudoers file, log out of the admin panel and back into the user panel. Click CRON in the top menu.

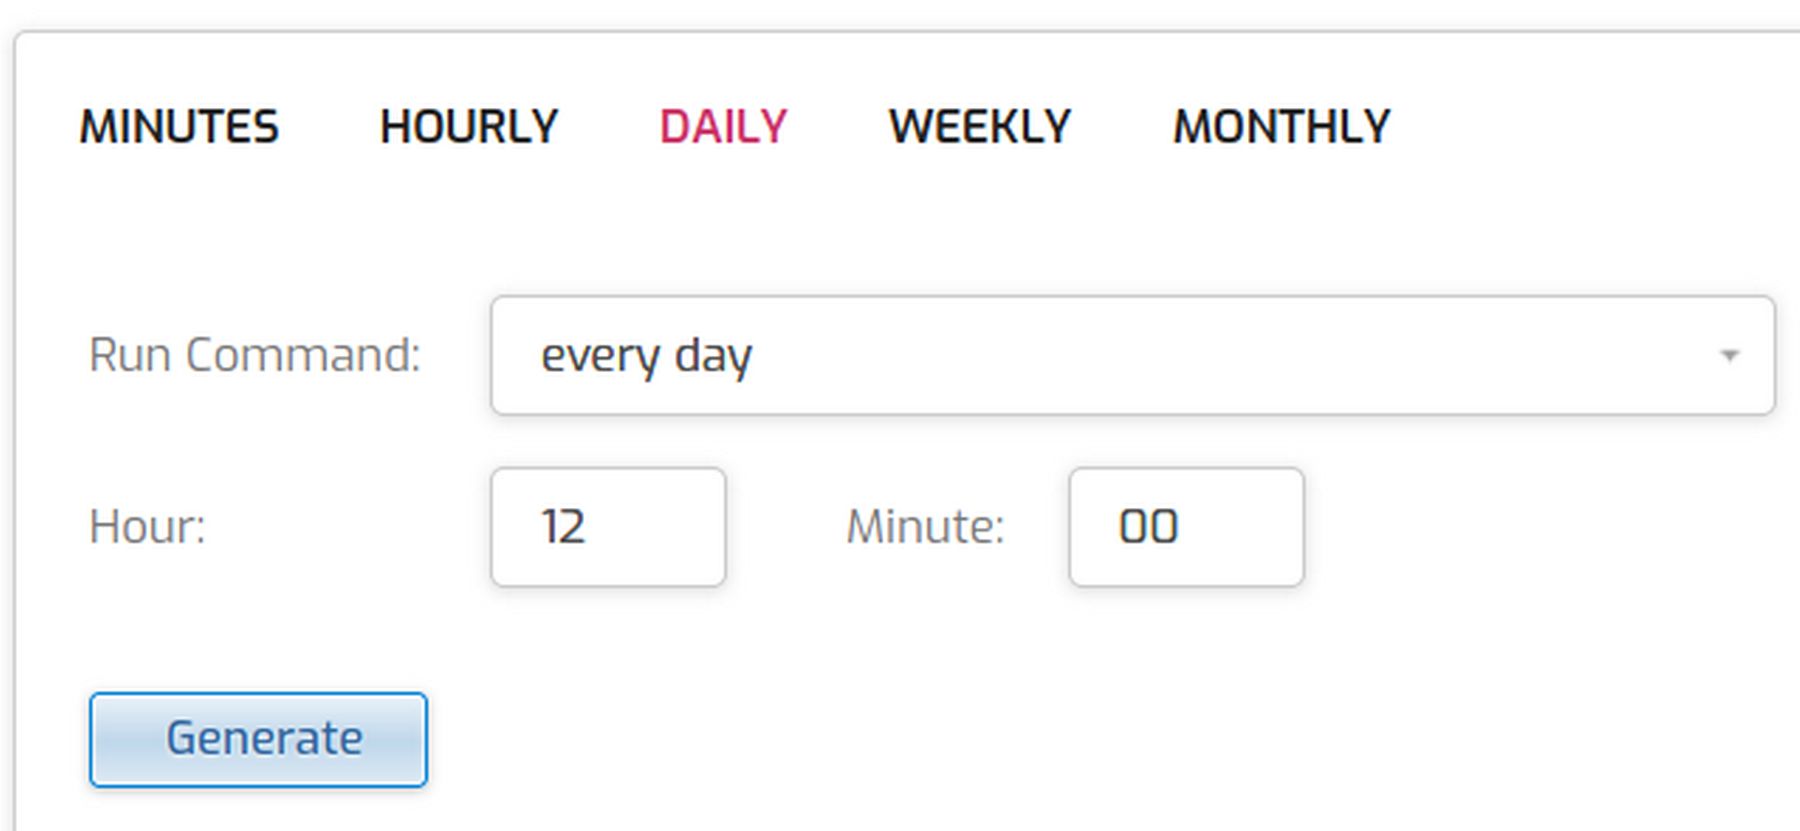
Then click Add Job. Then copy paste the command into the command box:
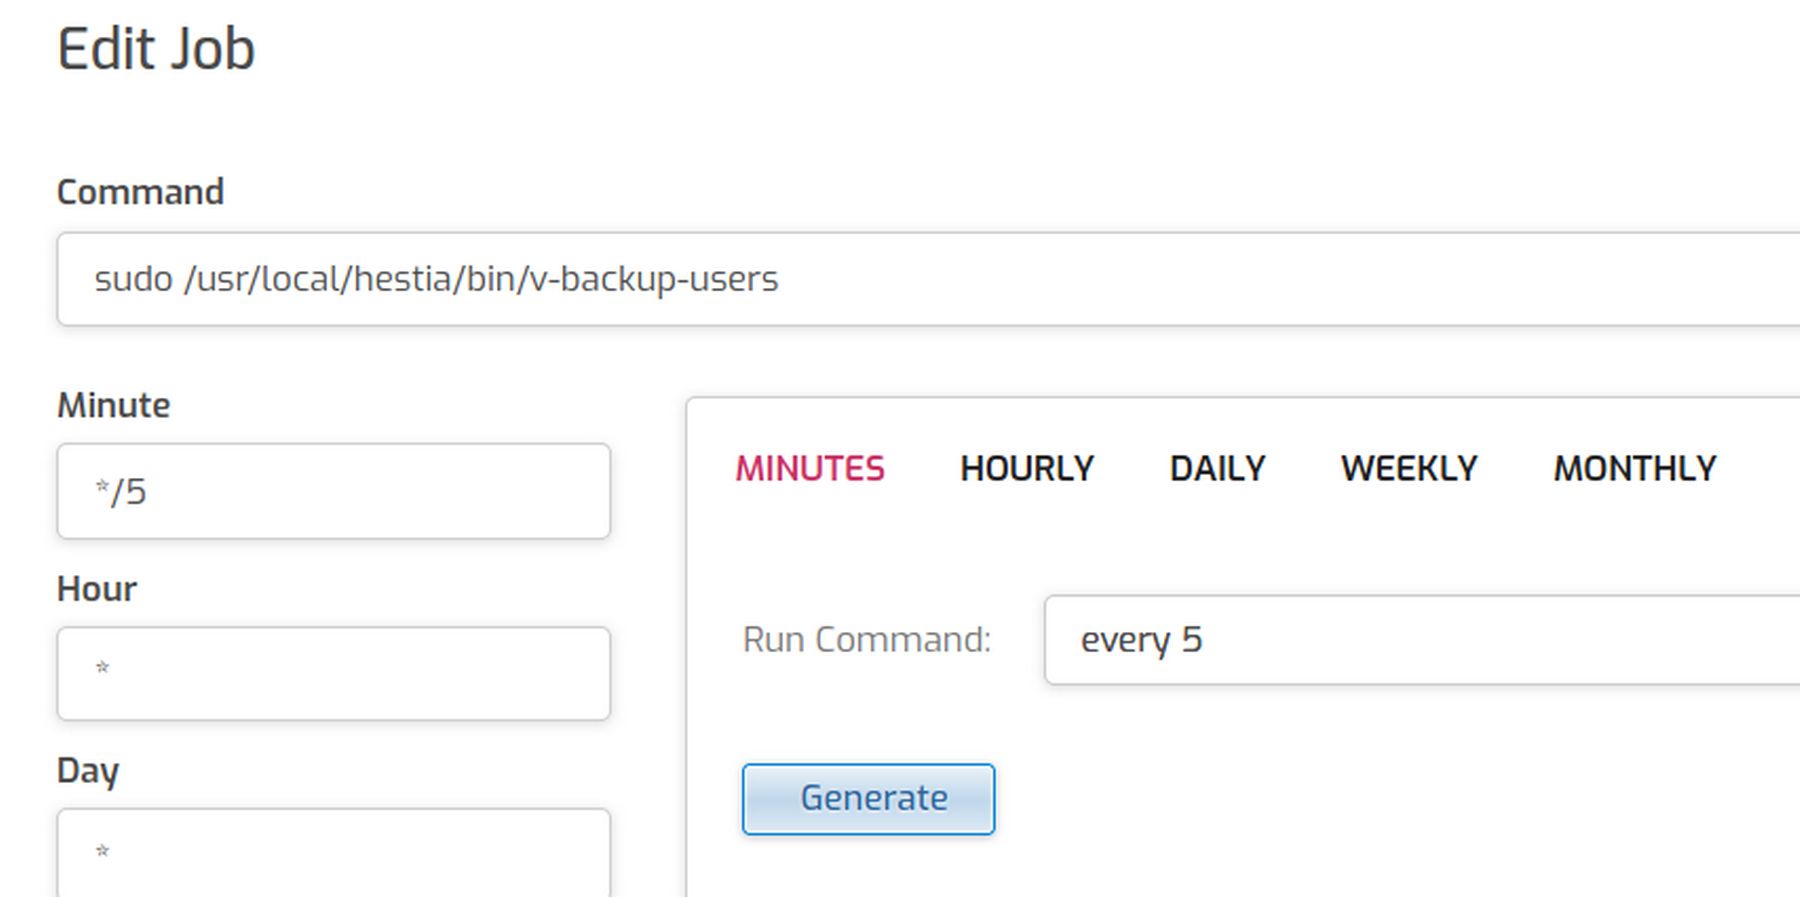
Just for practice, we have set the command to run every 5 minutes. Click Generate. This will fill in the boxes to the left of the word Generate with their proper values. Then click Save. Then click Back.
We will test this shortly. But first a brief explanation of how to set whatever frequency you want for a cron job.
Using Minutes, Hours, Days or Weeks
Minutes are represented by an asterisk (*) symbol.
Daily Tab
The Daily tab allows the cron job to be scheduled every single, every odd or even, or every 3, 5, 10, or 15 days. In addition, the cron job can be scheduled to the exact hour and minute during the day that the cron job is run.
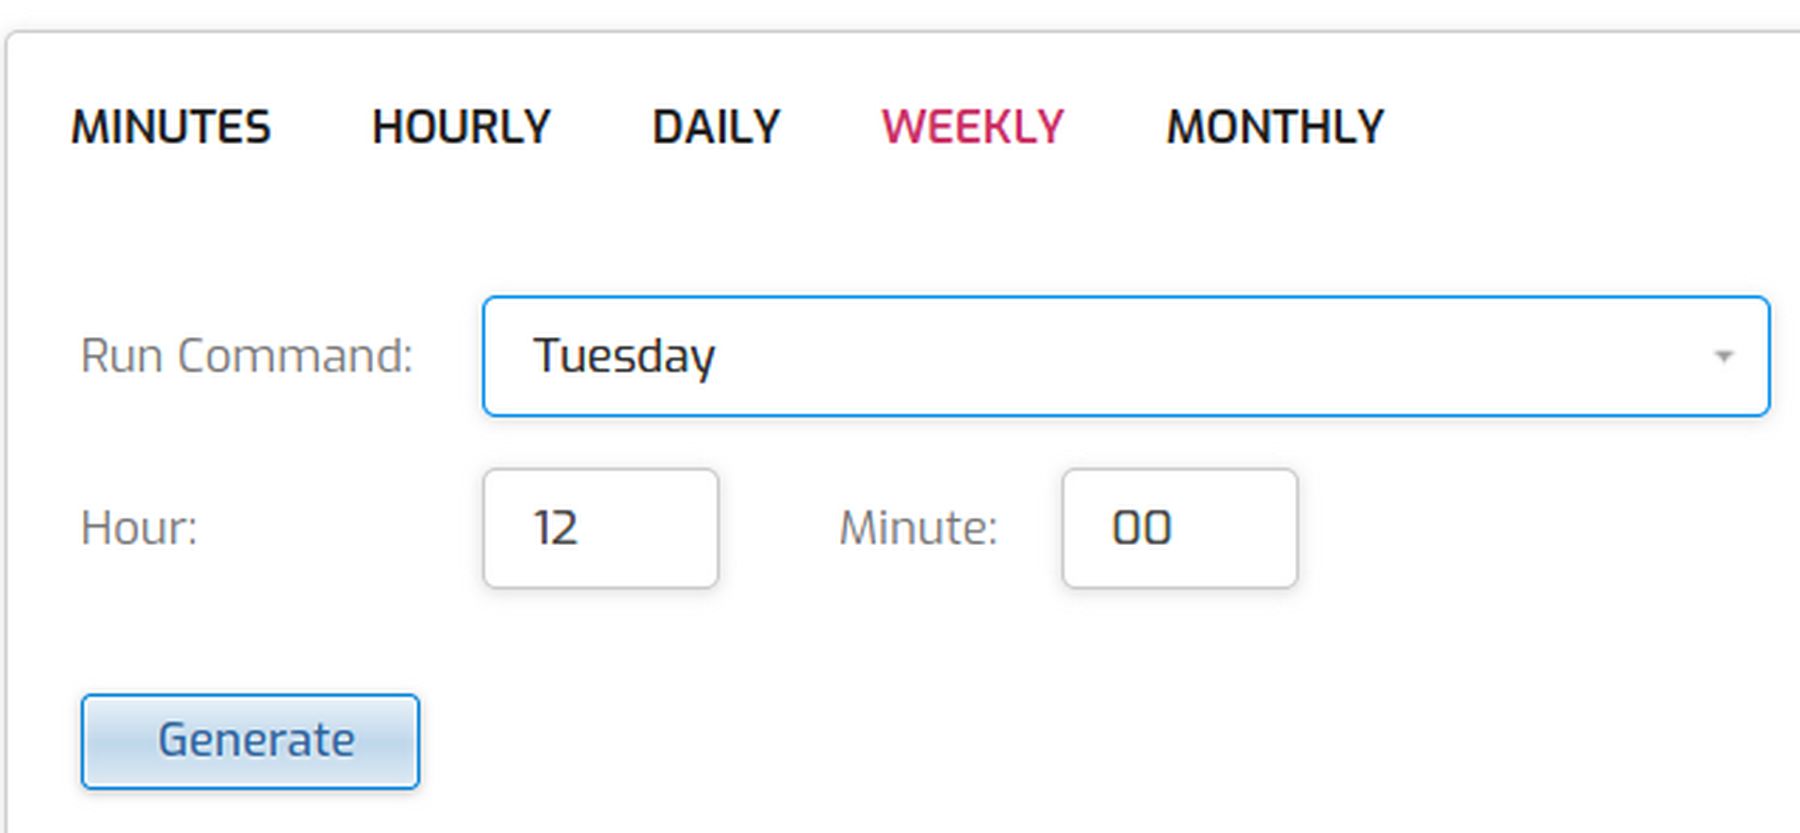
Weekly Tab
The Weekly tab allows scheduling for weekdays only, weekends only, every day, or specific days of the week. Then the hour and minute can be specified.
Wait 15 minutes to verify that three user backup files have been created and show up on the User Control Panel Backups page:
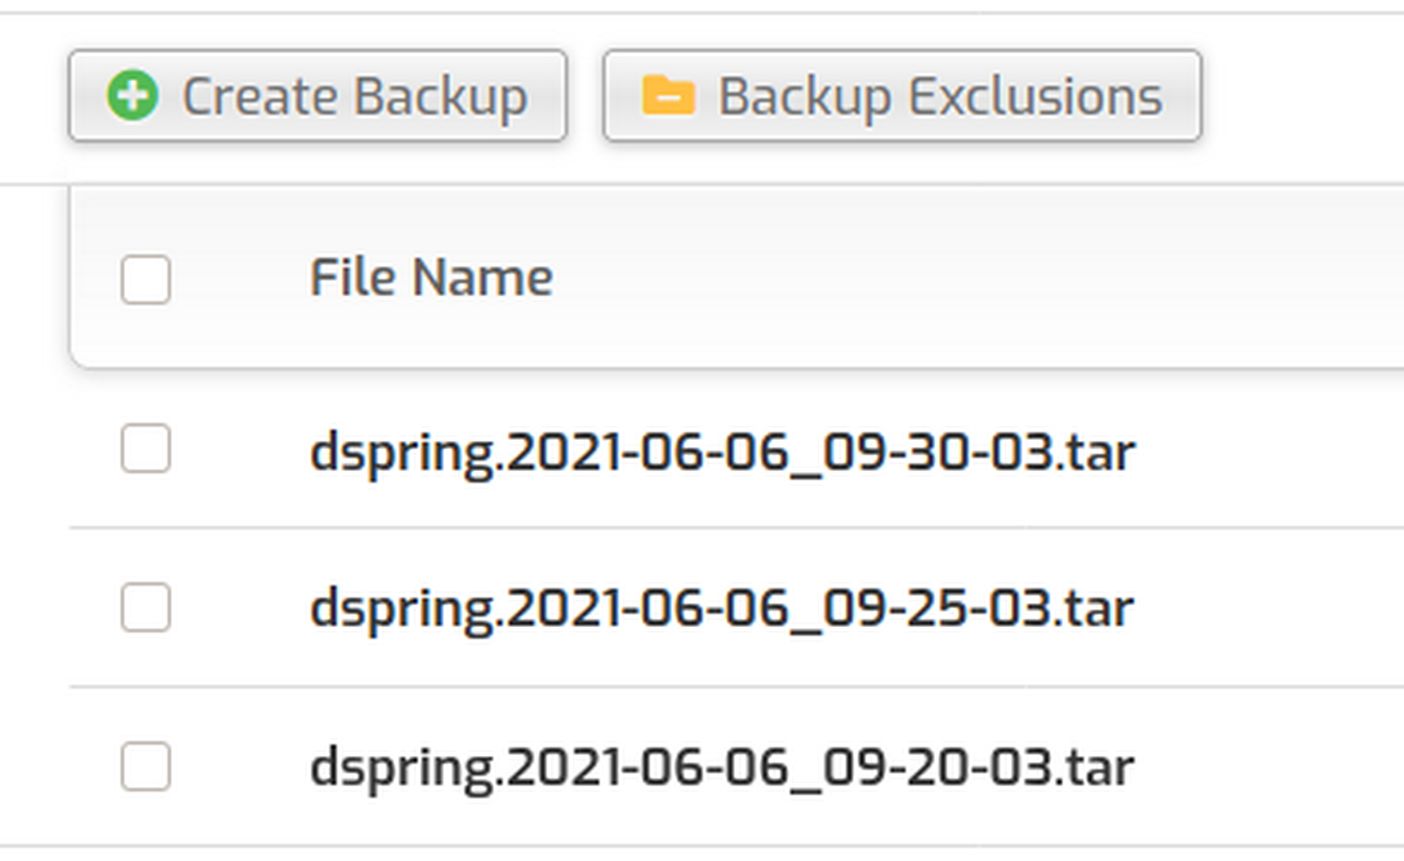
You can also view your stored user backups by logging into the admin control panel and clicking on Files. Then click on the backup folder to open it:
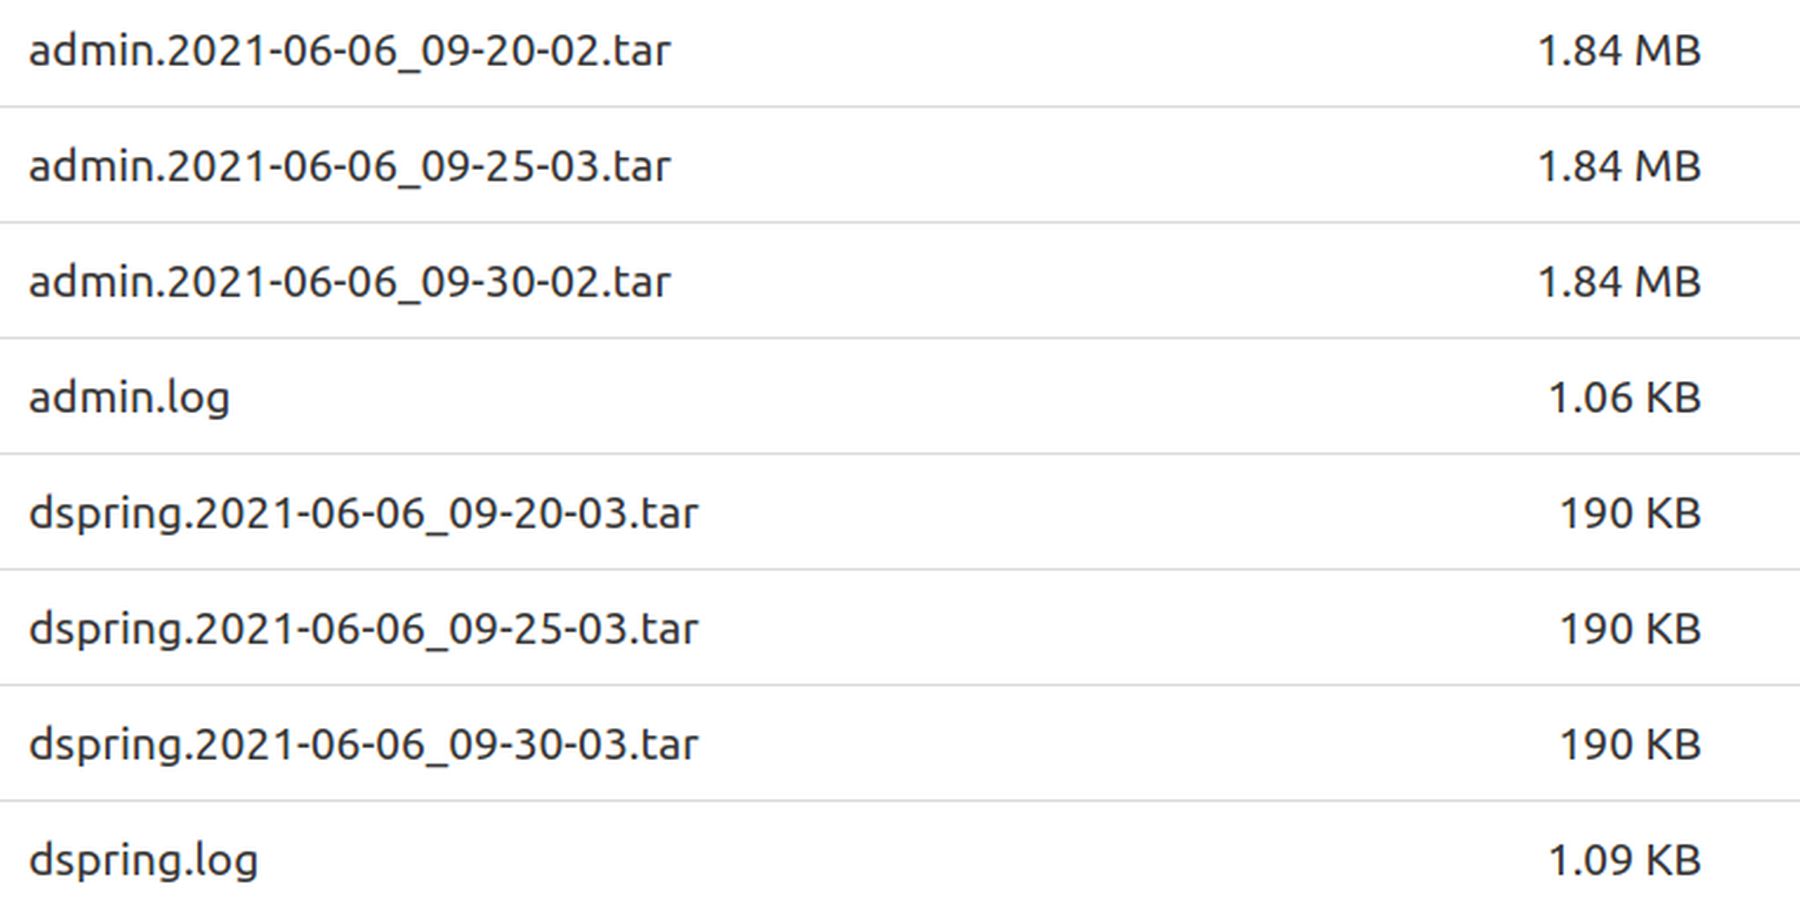
It appears that all backup files must have the same frequency!
Congratulations! You have now learned not only how to change the frequency of user backups, but you have also learned how to run a cron job as a Hestia user on any of the eleven tasks set for cron jobs in the Hestia Admin Cron screen.
Adding Remote Server Storage to your Backup System
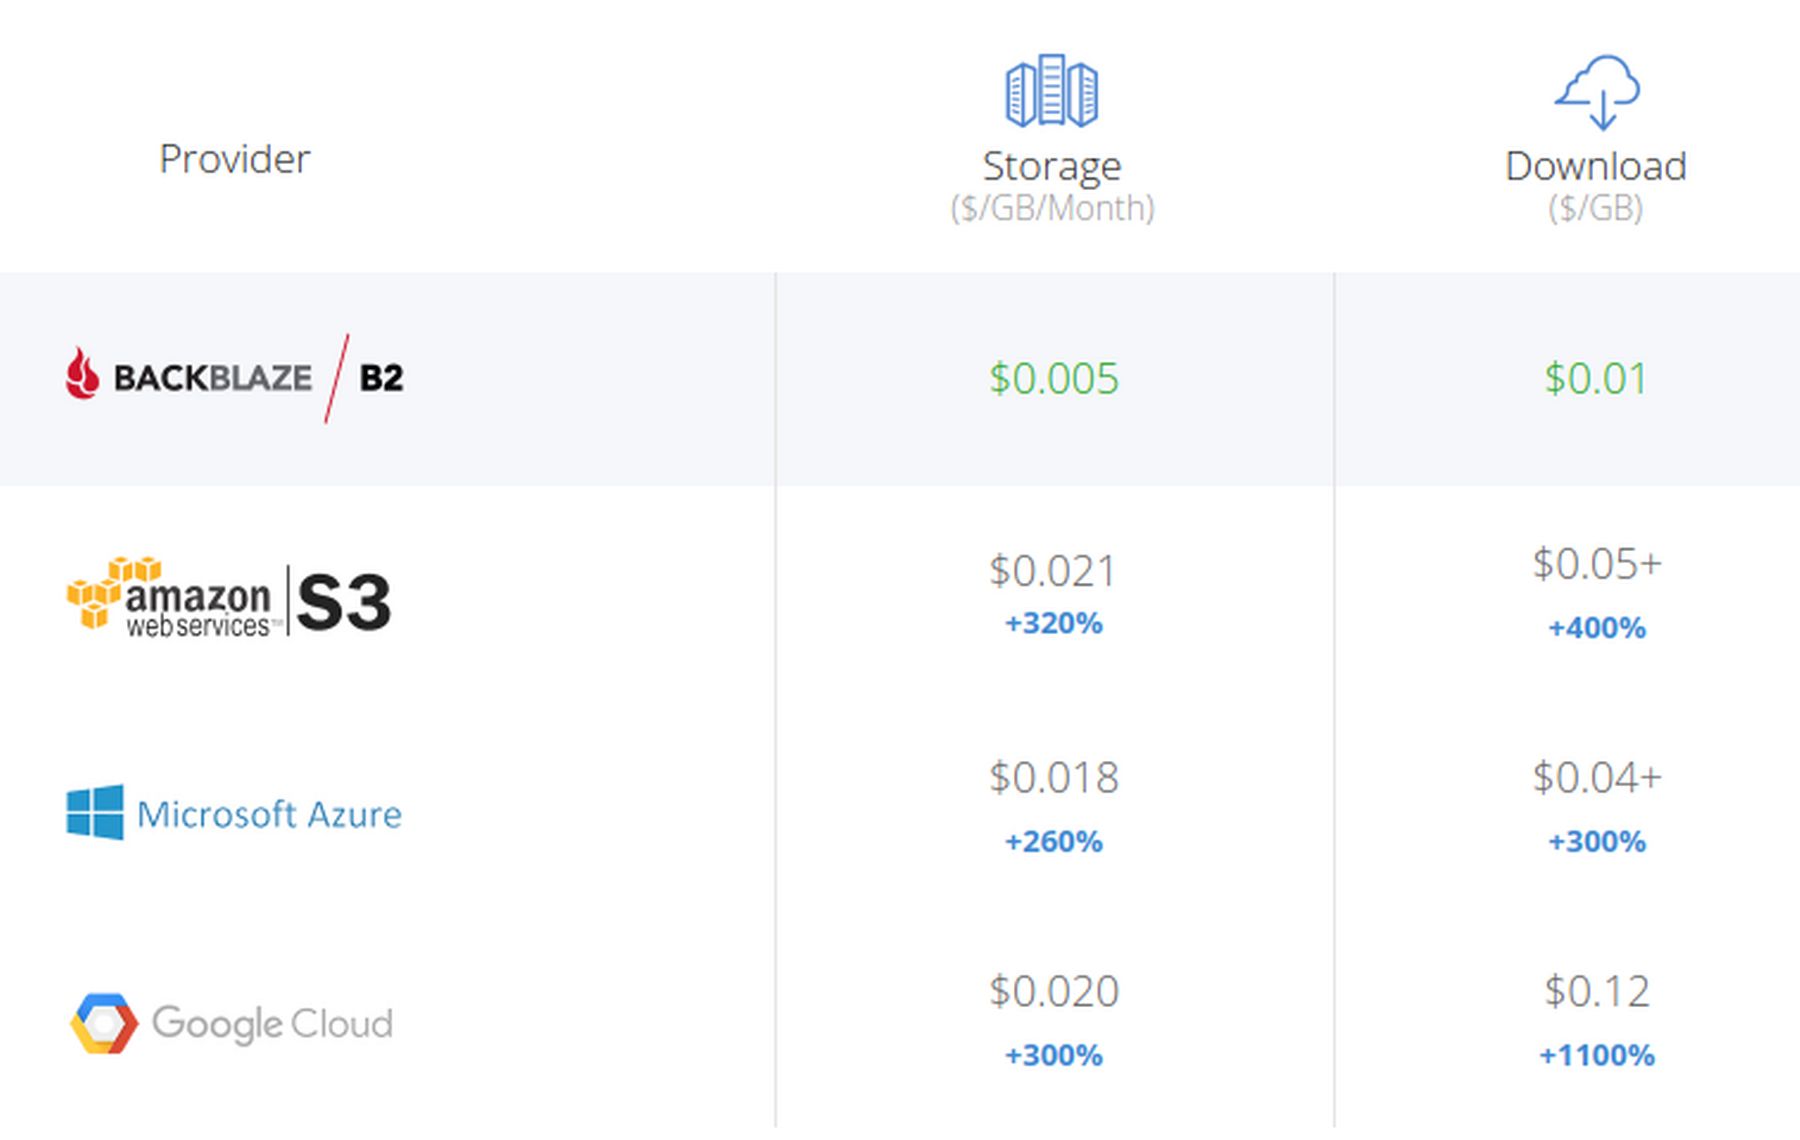
In addition to storing backups on your server, Hestia also provides a process for storing backups on a remote server. In June 2021, Hestia added support for a cloud storage system called Backblaze (aka B2).
Backblaze (aka B2) has 10 GB Free Storage and integrated with Hestia
Here is a link to their prices page:
https://www.backblaze.com/b2/cloud-storage-pricing.html
200 GB is only one dollar a month. This is much less than any of the mega monopolies charge!
Here is a link to their signup page:
https://www.backblaze.com/b2/sign-up.html?referrer=nopref
Mega.io offers 50 GB of Free fully encrypted storage.
Using the Hestia Backblaze System
In Hestia control pane, go to Server (cog icon) > Configure (button)
https://myhost.com:8083/edit/server/
In the backup section, you can select Remote and then Backblaze, and then you have three boxes to fill in.
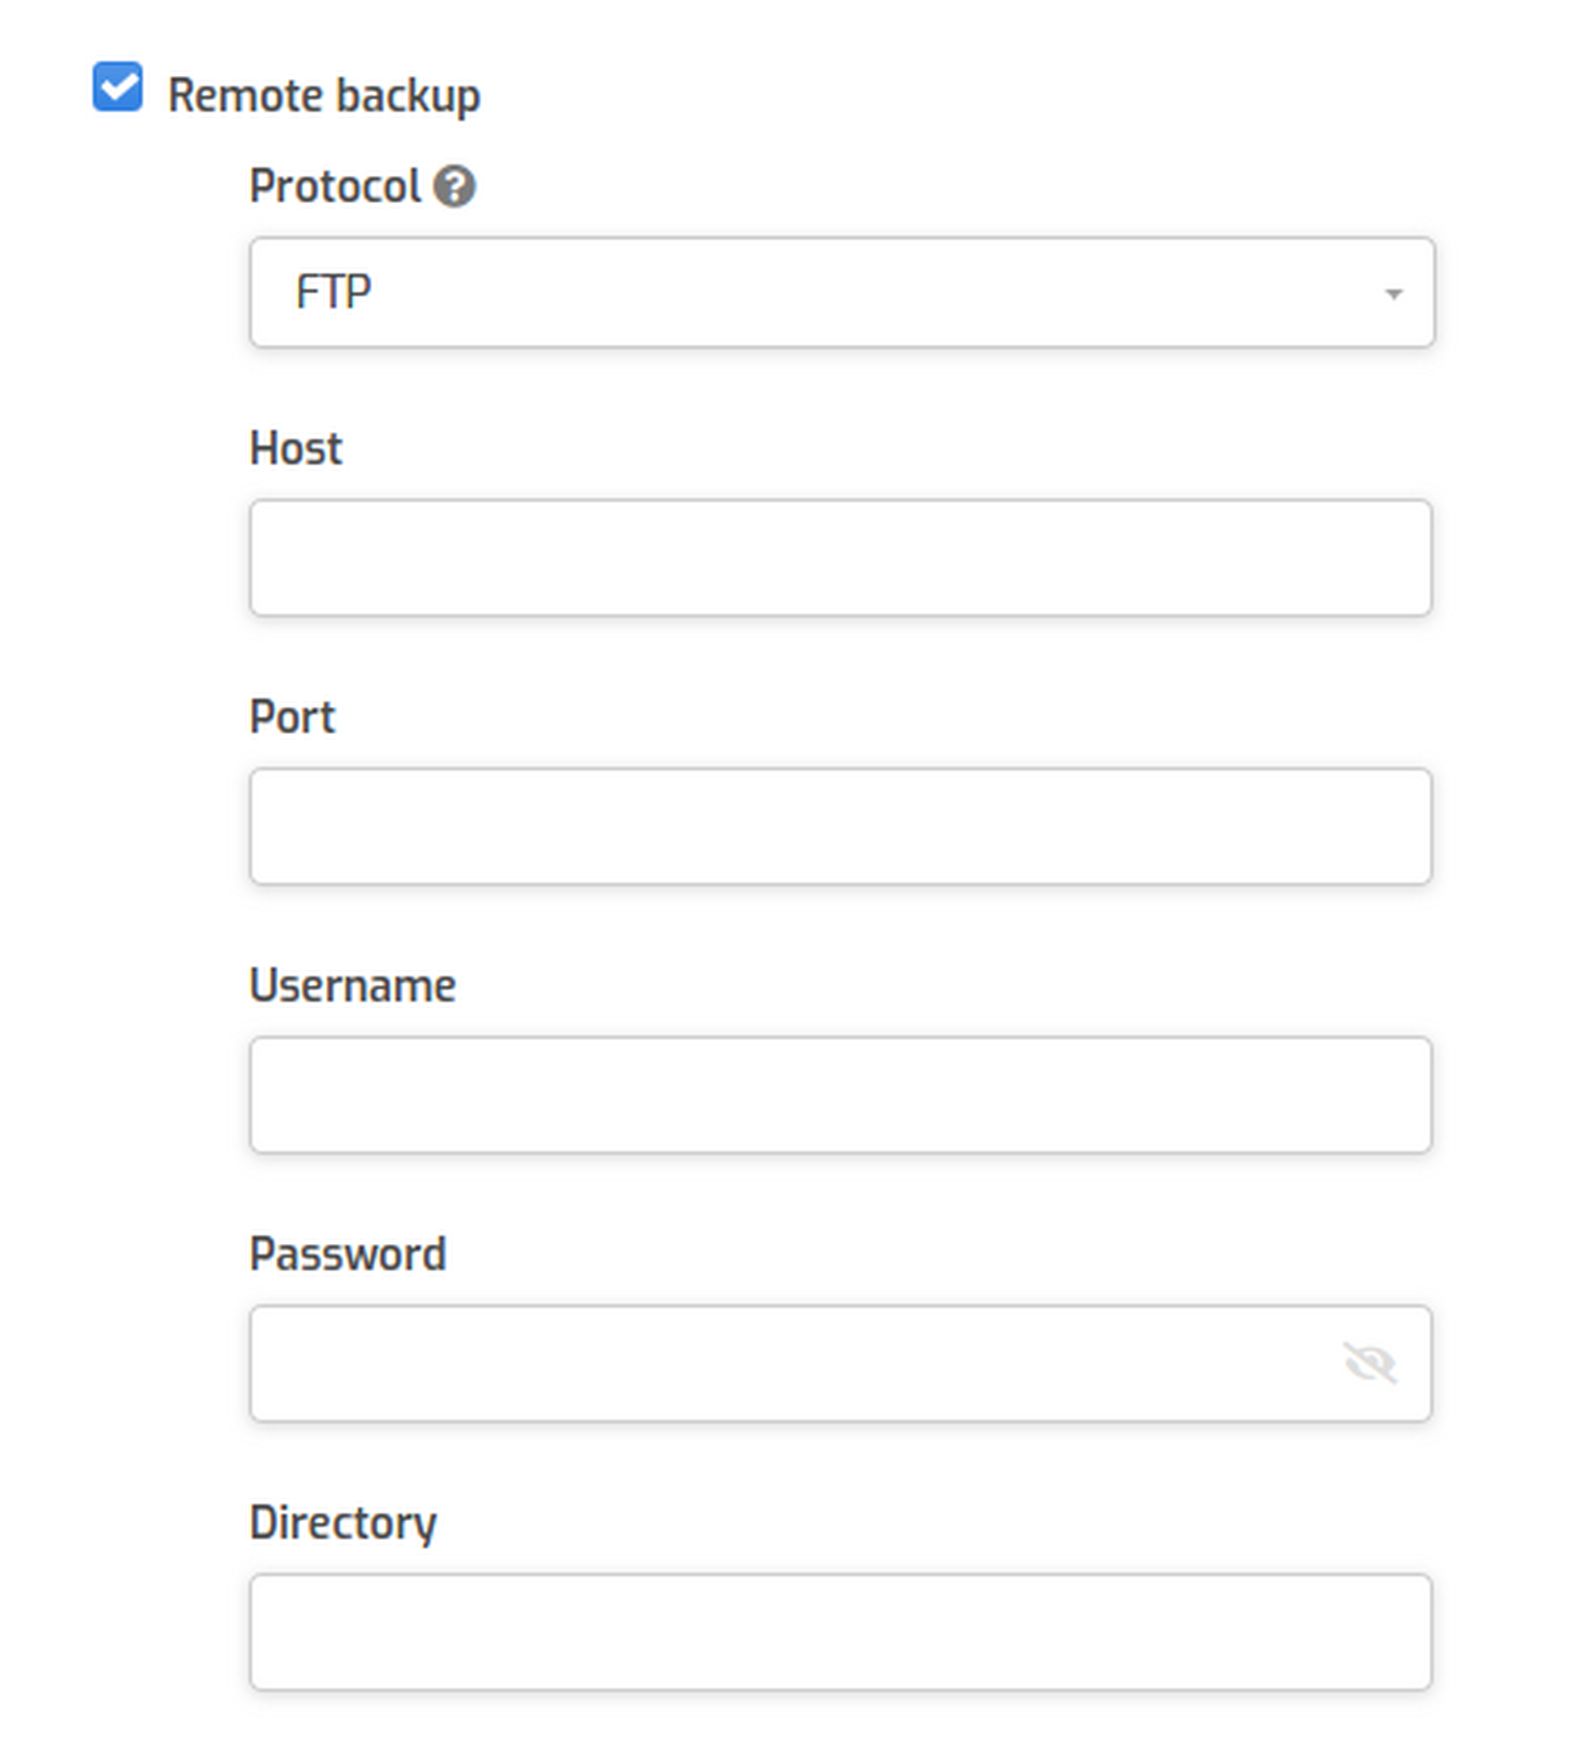
Bucket
Application ID (KeyID)
Application Key
You need to set up a bucket first in Backblaze and issue an Application Key for it,
“Bucket” keyName
“Application ID” = keyID
and Application Key = secrect key
Using an improved version of the Hestia Backblaze System
software called restic, and a bash script run by crontab. The advantage of this approach over the built-in hestia version, is that instead of producing one, large tar.gz file per user per day, you can make an incremental backup, which is much more space efficient.
The basic form is very simple (mine has a few bells and whistles, but this is basically it)
#!/bin/bash
# KeyID on Backblaze
export B2_ACCOUNT_ID="xxxxxxxxxxxxxxxxxx"
# Application Key on Backblaze
export B2_ACCOUNT_KEY="yyyyyyyyyyyyyyyyyyyy"
export RESTIC_REPOSITORY="b2:my-unique-reponame"
export RESTIC_PASSWORD="zzzzzzzzzzzzzz"
RESTIC=/usr/local/bin/restic
# Backup files
$RESTIC backup /home/user/path1/
$RESTIC backup /home/user/path2/
$RESTIC backup /home/user/path1/
## Clean up
export B2_ACCOUNT_ID=""
export B2_ACCOUNT_KEY=""
export RESTIC_REPOSITORY=""
export RESTIC_PASSWORD=""
Once a week I’ll run the prune command, hopefully self explanatory:
$RESTIC forget --prune --verbose --keep-daily 7 --keep-weekly 4 --keep-monthly 6
With this in place it will keep 7 daily snapshots, 4 weekly snapshots and 6 monthly snapshots, allowing me to roll back any file to the version present in any of those snapshots, while keeping the whole size of the repository just a little larger than a single Hestia tar.gz file.
What’s Next?
In the next article, we will review how to customize the appearance of our Hestia Control Panel.