
Once you have created a copy of all of your documents and placed them on a separate USB drive and made a list of all of the programs you want to replace once you have reflashed your computer, you are ready to start the reflashing process.
First, it is best to have your laptop connected to your router with an Ethernet cable (it is also possible to use WIFI but it is not as secure or as faster as using an Ethernet connection).
Then place your Linux Debian Live USB into a USB 3 port on your computer. Generally USB 3 ports are on the left side of your laptop as you are facing your open laptop screen. Then turn on the computer and immediately press whatever keys are needed to enter your BIOS settings. On a Dell computer, it is usually F2. On a Lenovo, it may be the Function key plus the F2 key. On an HP laptop, it might be the Escape key.
Once you enter your BIOS, go to the Boot Settings to make sure that the laptop is set to boot from a USB drive before booting from the internal hard drive. If your laptop has the option to boot from Legacy or UEFI, choose the Legacy Mode. If your laptop has the option to turn off secure boot, then turn off secure boot. You may need to do an online search to determine the best options for your particular computer. Here we will review the process for a Dell E6520.
Once the BIOS has been set to boot from a USB in Legacy mode, click Save and Close. In a few seconds, you should see the GRUB2 screen with Linux Debian as the first option. Wait a few seconds and the first Debian Installer screen will appear.
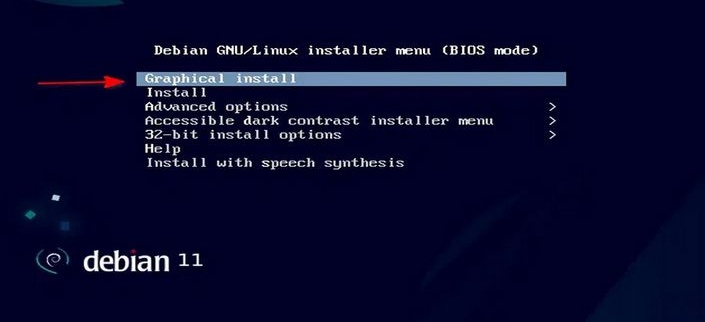
At the Debian installer first screen, leave it as the default Graphical Install option. Press Enter on your keyboard to get to the next screen. Expand the bottom of the screen to see the Continue button. For Language, choose English. Then click Continue. For Location, choose US. Then Continue. For Keyboard, choose American English and click Continue. Debian 11 will then load.
The next screen is called Configure the Network. We are asked to enter a Hostname with the default option being the word debian.
What does Debian mean by a hostname?
The hostname is what a device or computer is called on a network. On a local network, such as you may set up in your home, the hostname is used to distinguish one device from another device within your local network. Note that the hostname will be part of the terminal prompt: user@hostname:
Leave the host name at the default setting of debian.
Then click Continue. The next screen is called Domain Name. Use the domain name example.com.
Skip the root password we may add a root user later. Click Continue.
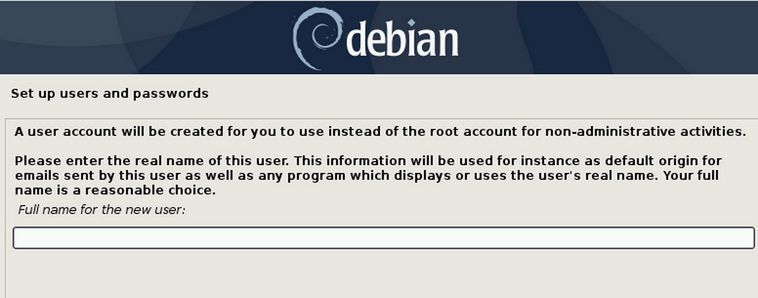
Enter your first name for the user account. Then click Continue. The next screen allows you to enter a user name which is shorter with lower case letters and no spaces. Use your first name. You will need this username later to log into your server. Click Continue. Enter your password twice.

Then click Continue. Then select your time zone and click Continue.

Use the default hard disk (Guided - use entire disk). Just click Continue.
The next screen allows you to create a separate Home partition or separate home var and temp folder partitions. We will put everything in one partition. Click Continue.
The next screen shows the Partition table. Just click Continue. On the next screen, for Write the changes to the disk, change the select from No to Yes and click Continue.
The base system will then be installed. The next screen will ask if you have additional discs you want to add. The correct answer is No. Then click Continue. Then choose the US Package Manager and click Continue. Then choose deb.debian.org. Then click Continue. Leave the next screen (Proxy Package Manager) blank and click Continue. For the popularity contest, leave it at no and click Continue.
The next screen is called Software Selection.
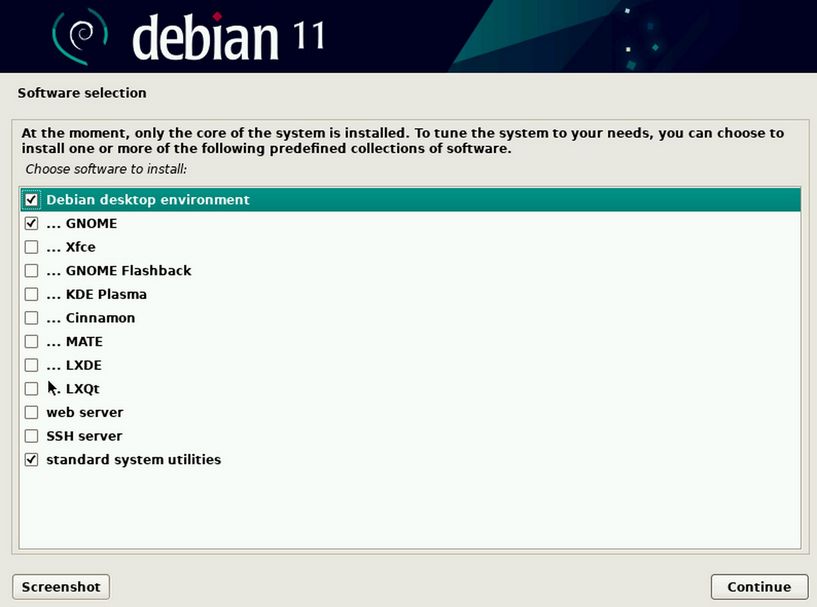
By default, the GNOME desktop is selected. Uncheck GNOME and check Cinnamon. Then click Continue.
Leave Install the Grub Boot loader set to Yes. Then click Continue. Then on the next screen, select the sda drive as that is where Grub should be to start our computer. Then click Continue.
The next screen lets you know that your Debian installation is now complete. Click the Continue. Wait a few seconds for the screen to change back to black. Then when the screen is black, quickly pull the Debian Live USB stick out of the USB port.
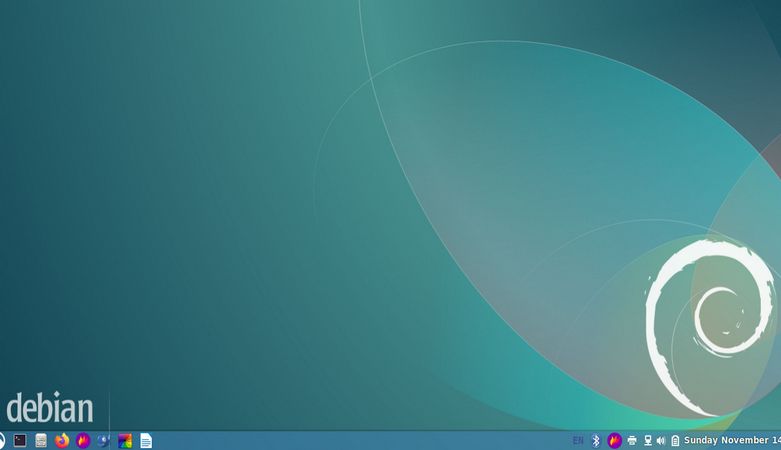
The computer will then start from the internal hard drive and bring up the password screen. Type in your username and password to reach the Debian start screen.
What’s Next?
In the next section, we will review some important First Steps for completing the initial configuration of Linux Debian.