
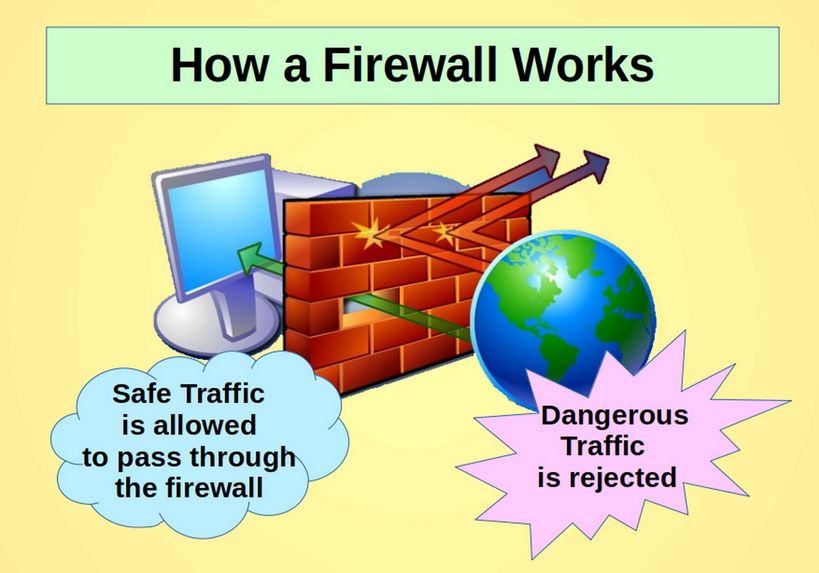
One of your first lines of defense against hacker attacks is a Firewall. A firewall is a series of rules that control access to your server and control access to your websites and databases. Think of your firewall as a security guard at the front door of your business monitoring incoming and outgoing traffic based on a set of rules. A good security guard helps keep the bad guys out while letting the good guys in.
Several Firewalls are Better than One
While Hestia provides an excellent firewall called Fail2ban which we will review in a moment, the truth is that hackers tend to attack business servers from either the website or the email system.
We will therefore rely more on our Joomla website firewall tools to block hackers than we will on the Hestia firewall tools. Joomla offers a series of tools that directly protect the website from brute force attacks and database attacks. These tools are all covered in a separate book, course and website called Create your own interactive website.
Hestia Firewall is called Fail2ban
The primary Hestia firewall is a free open source program called Fail2ban. Fail2ban bans IP addresses that try to log into your pages using password breaking programs. Thus, Fail2ban can protect your server from brute-force attacks and some Denial of Service attacks. However, the best solution to protect SSH is to prohibit SSH direct root log in with passwords and only allow SSH log in with keys (again as we explained earlier).
By default, IP banning will be taken when three authentication failures have been detected in 10 minutes. The default ban time is 10 minutes. The default for number of authentication failures necessary to trigger a ban is overridden in the SSH portion of the default configuration file to allow for 6 failures before the ban takes place. These settings are entirely configurable by the administrator.
Hestia Fail2Ban Default Settings
To see the Hestia Fail2Ban default settings, log in as Admin and go to Settings, Configure, Firewall. The first screen is the list of open ports:
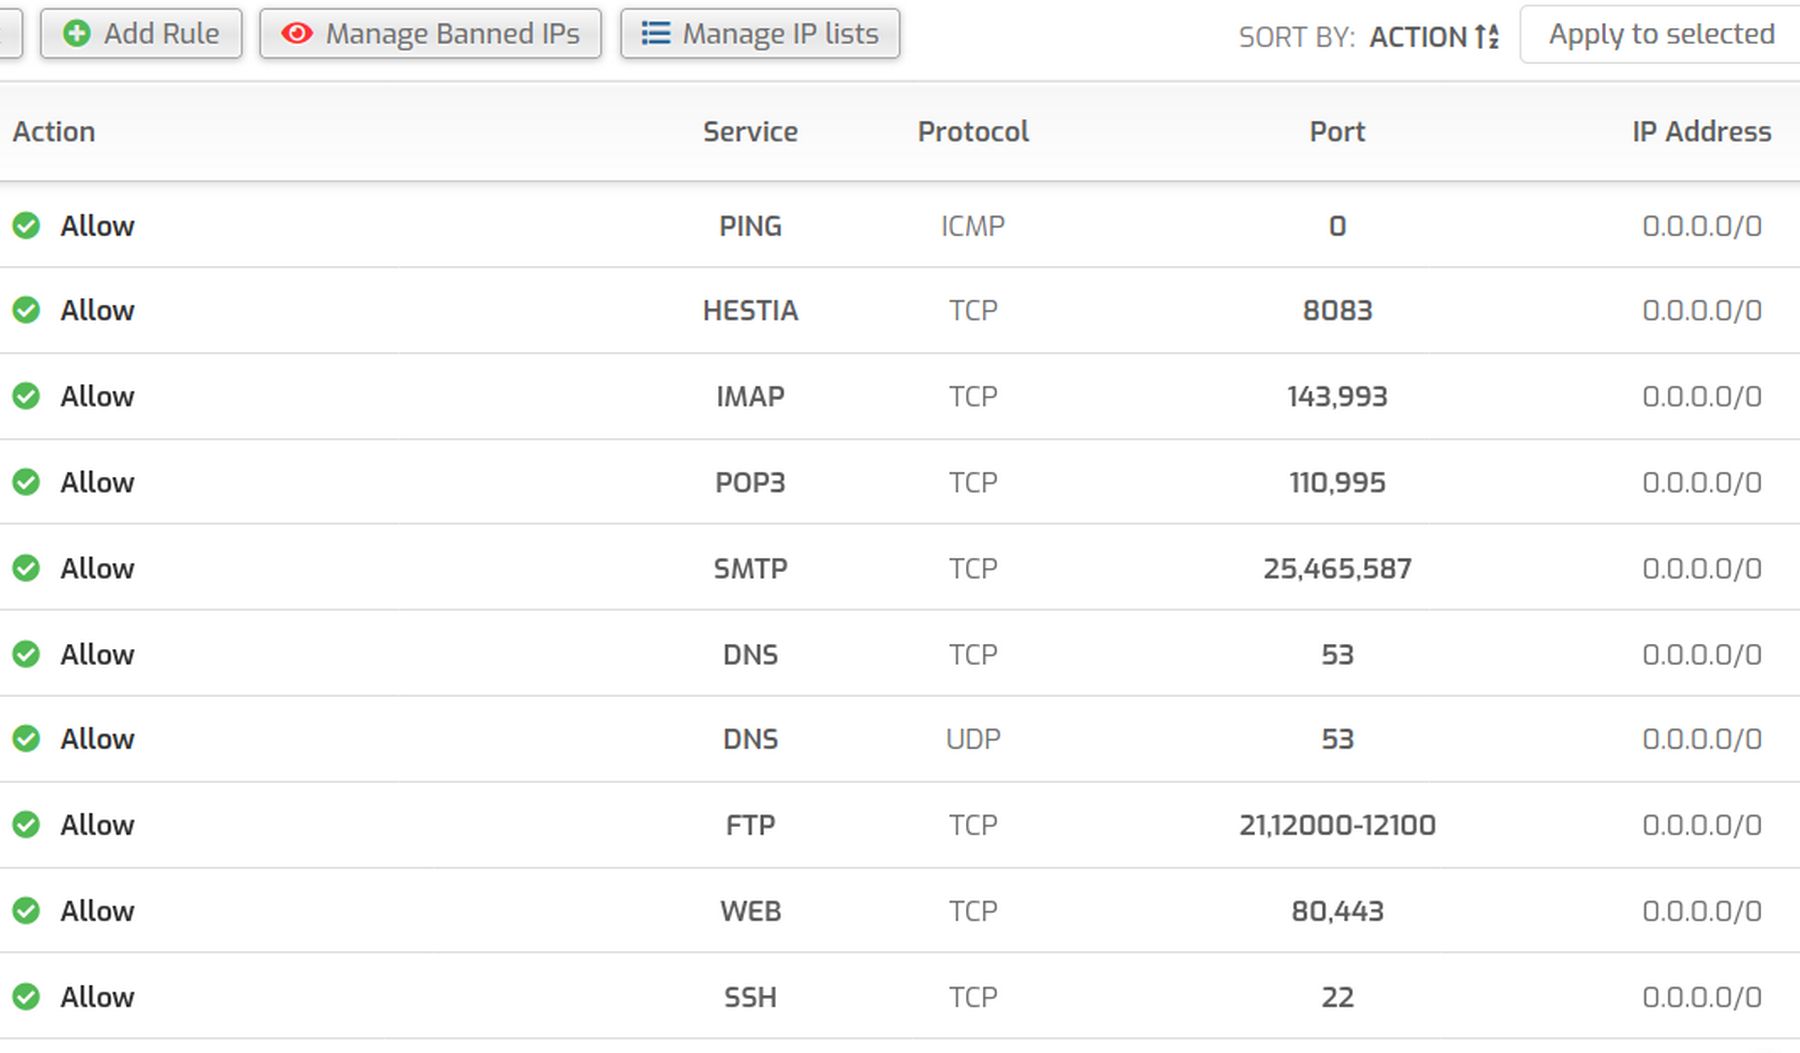
As we explained in a previous article, this is where we would add a new open port if we wanted to move the Hestia log in page from Port 8083 to Port XXXX.
To see the list of Banned IP addresses, click Manage Banned Ips:
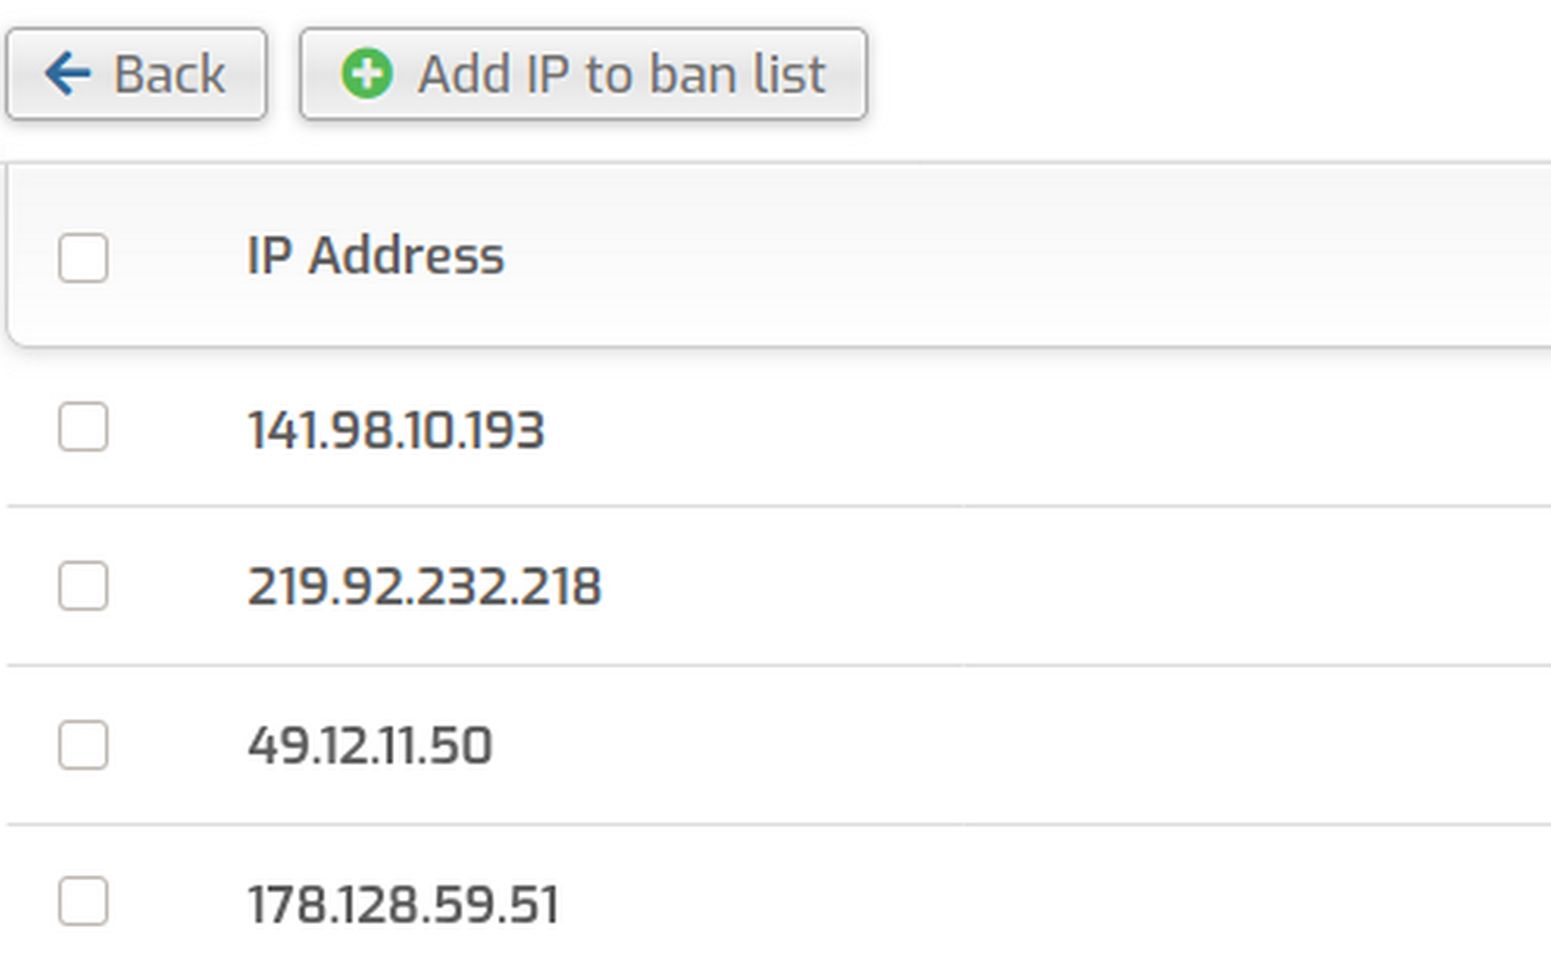
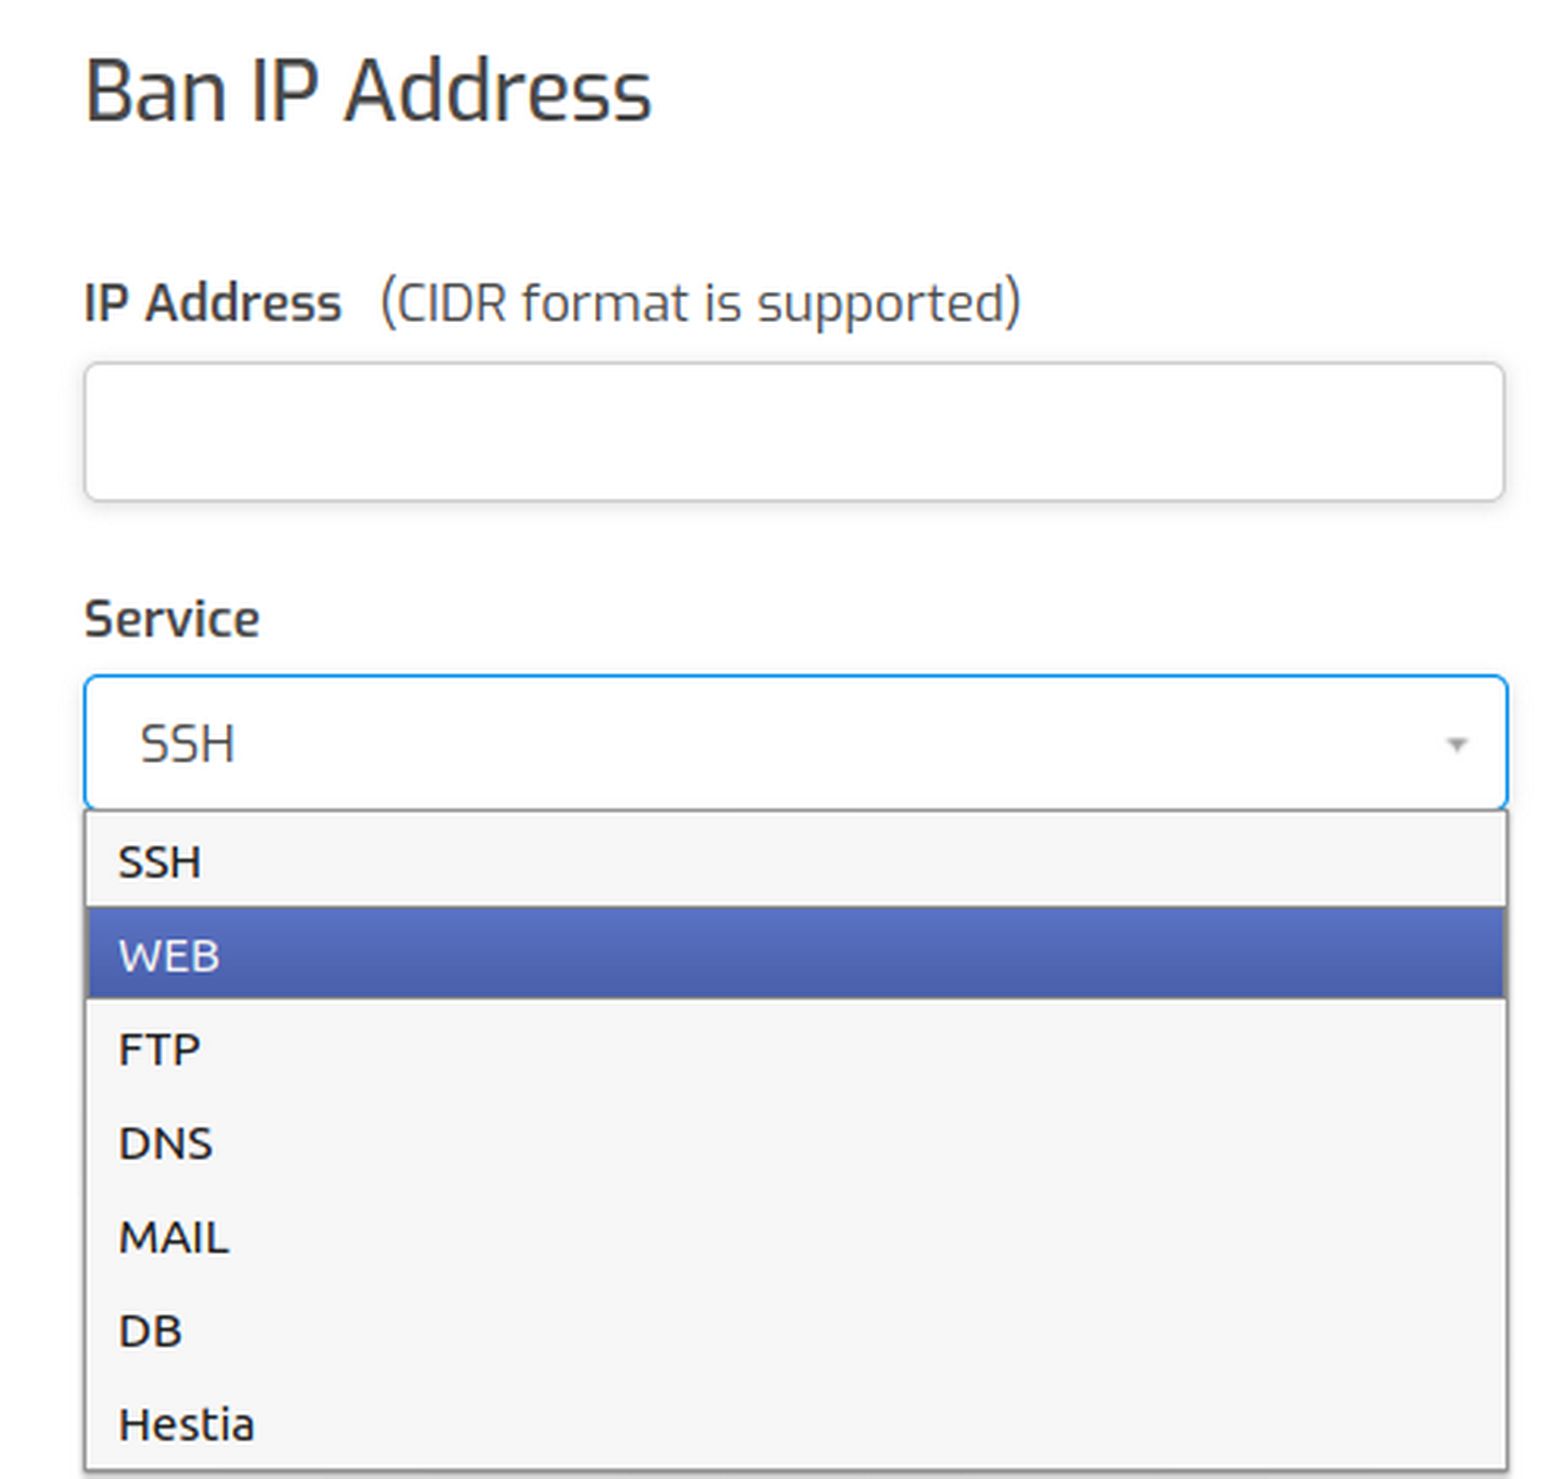
Fail2ban will automatically add more IP addresses to this list over time as hackers try Brute Force attacks against your login pages. You can also add IP addresses to the banned list by clicking on Add IP to ban list:
For beginners, these graphical tools may be enough to know. However, if you are subjected to repeated hacking attacks, then you may also need to change some settings with the Hestia File manager.
Change Fail2Ban File Settings
With the Administrator SSH access set for BASH (Admin Edit, Advanced Options), click Files in the Hestia top menu. Then click on the etc file to open it. Then click on the fail2ban folder to open it. Here you will see 4 folders and 7 files:
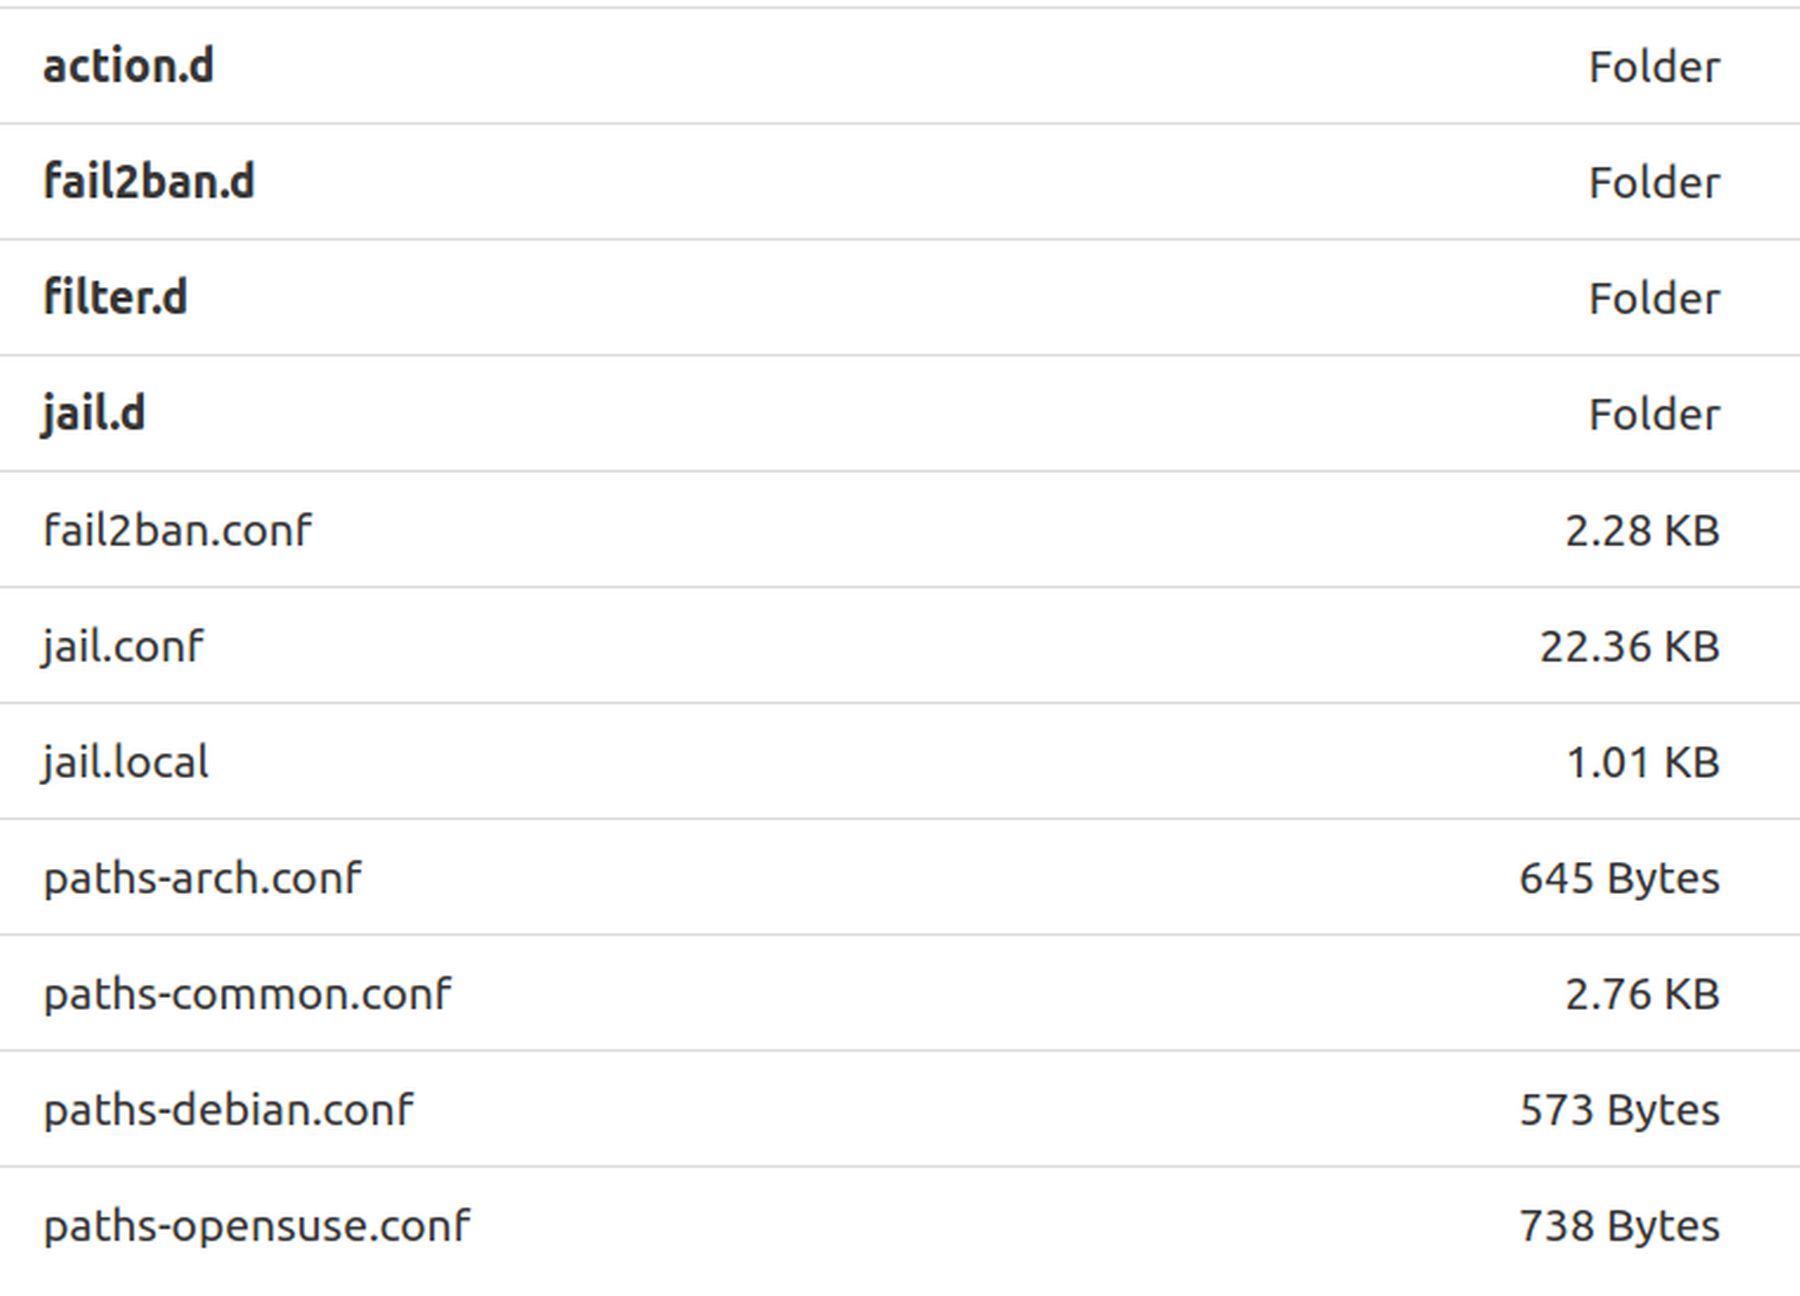
The Fail2ban global configuration file is called jail.conf. However, because this file is overwritten with every Hestia update, you should not make any changes to the jail.conf file. Instead, any changes should be made in the “jail.local” file. You can see from the table above that jail.conf is 22KB and jail.local is only 1 KB.
The process is to first open and copy some or all of the content of jail.conf. Then paste this content into jail.local. Then make any changes you want to jail.local. Click on jail.conf to open it and you will see that it is about 800 lines long.
Then click on jail local and it does not want to open. So start an SSH session and use Midnight Commander to navigate to this folder.
ssh
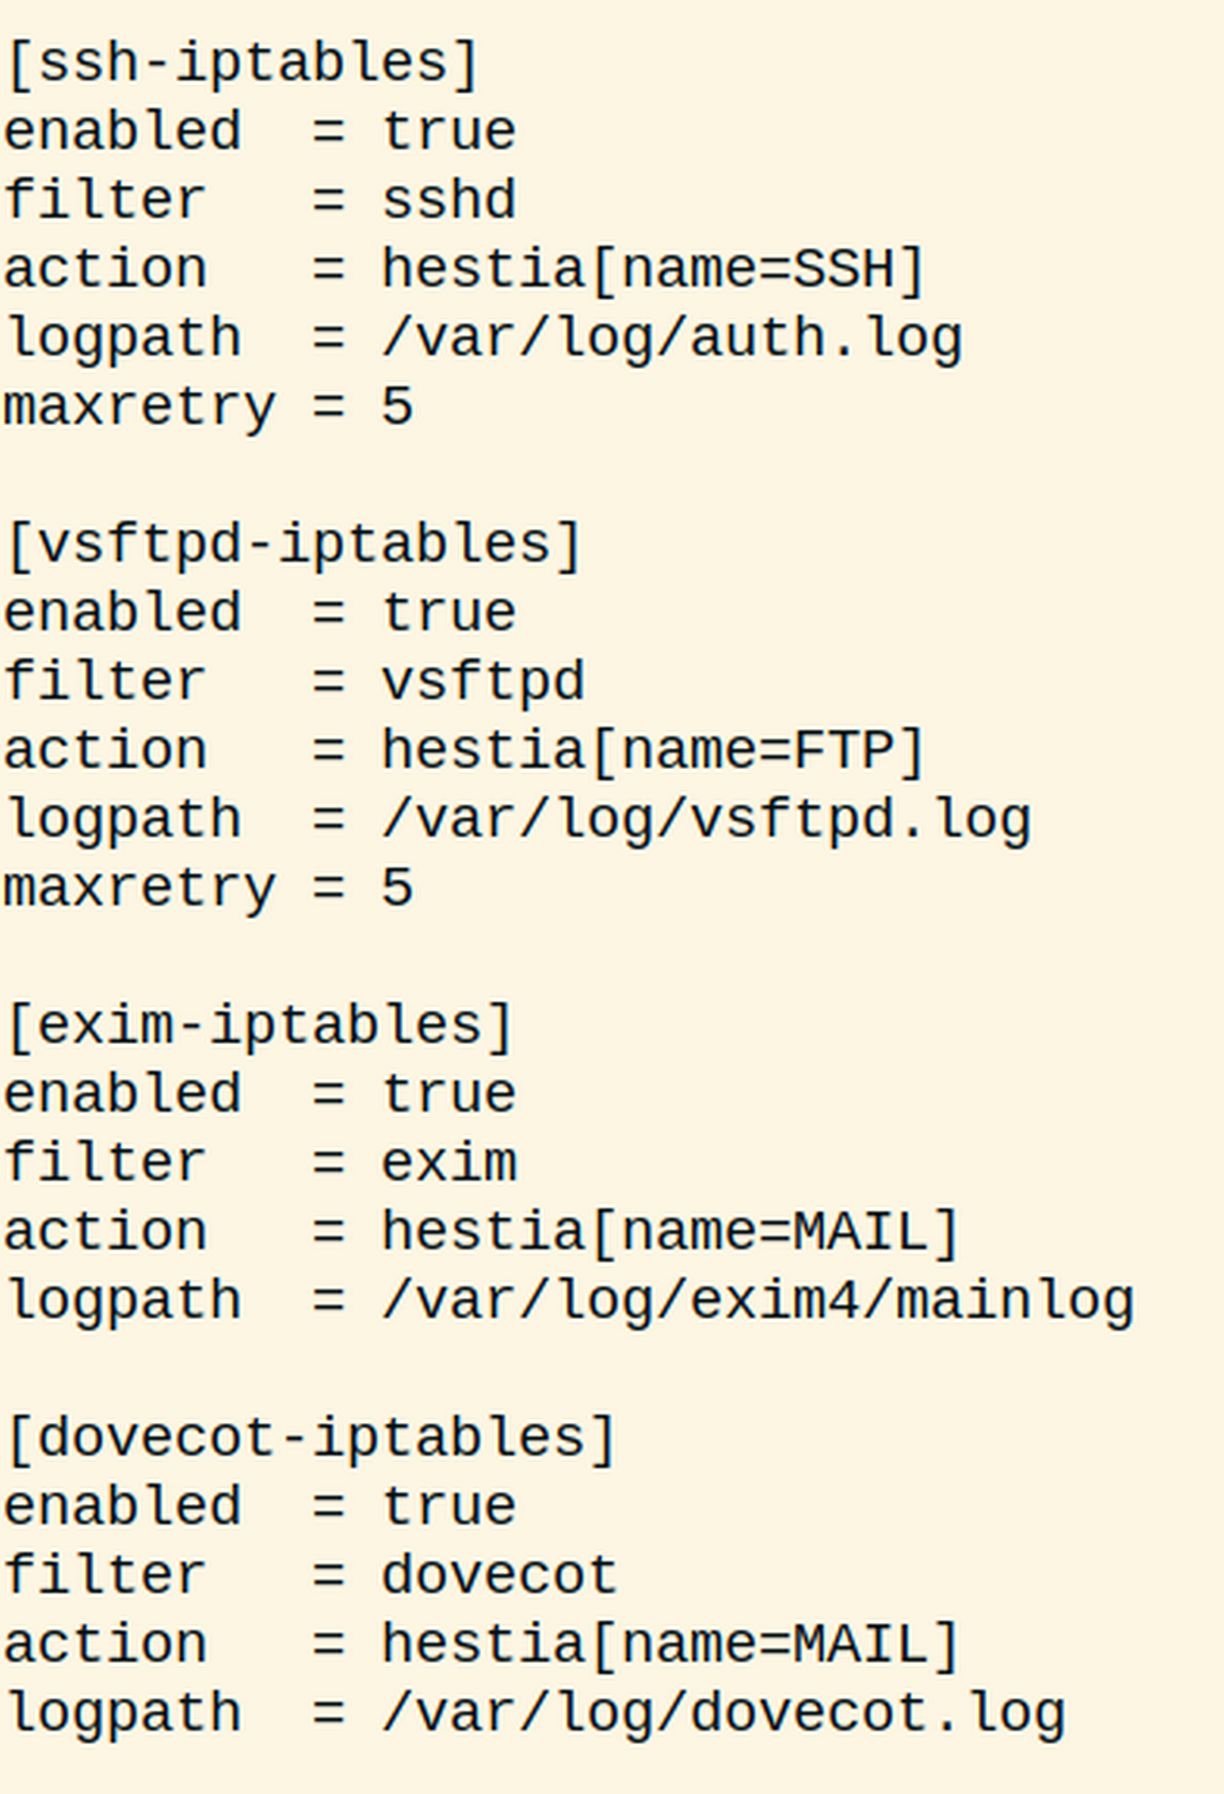
The local file opens in the nano editor. It is 55 lines long. Here are the first four sections at the top of the file:
Here are the final four sections:
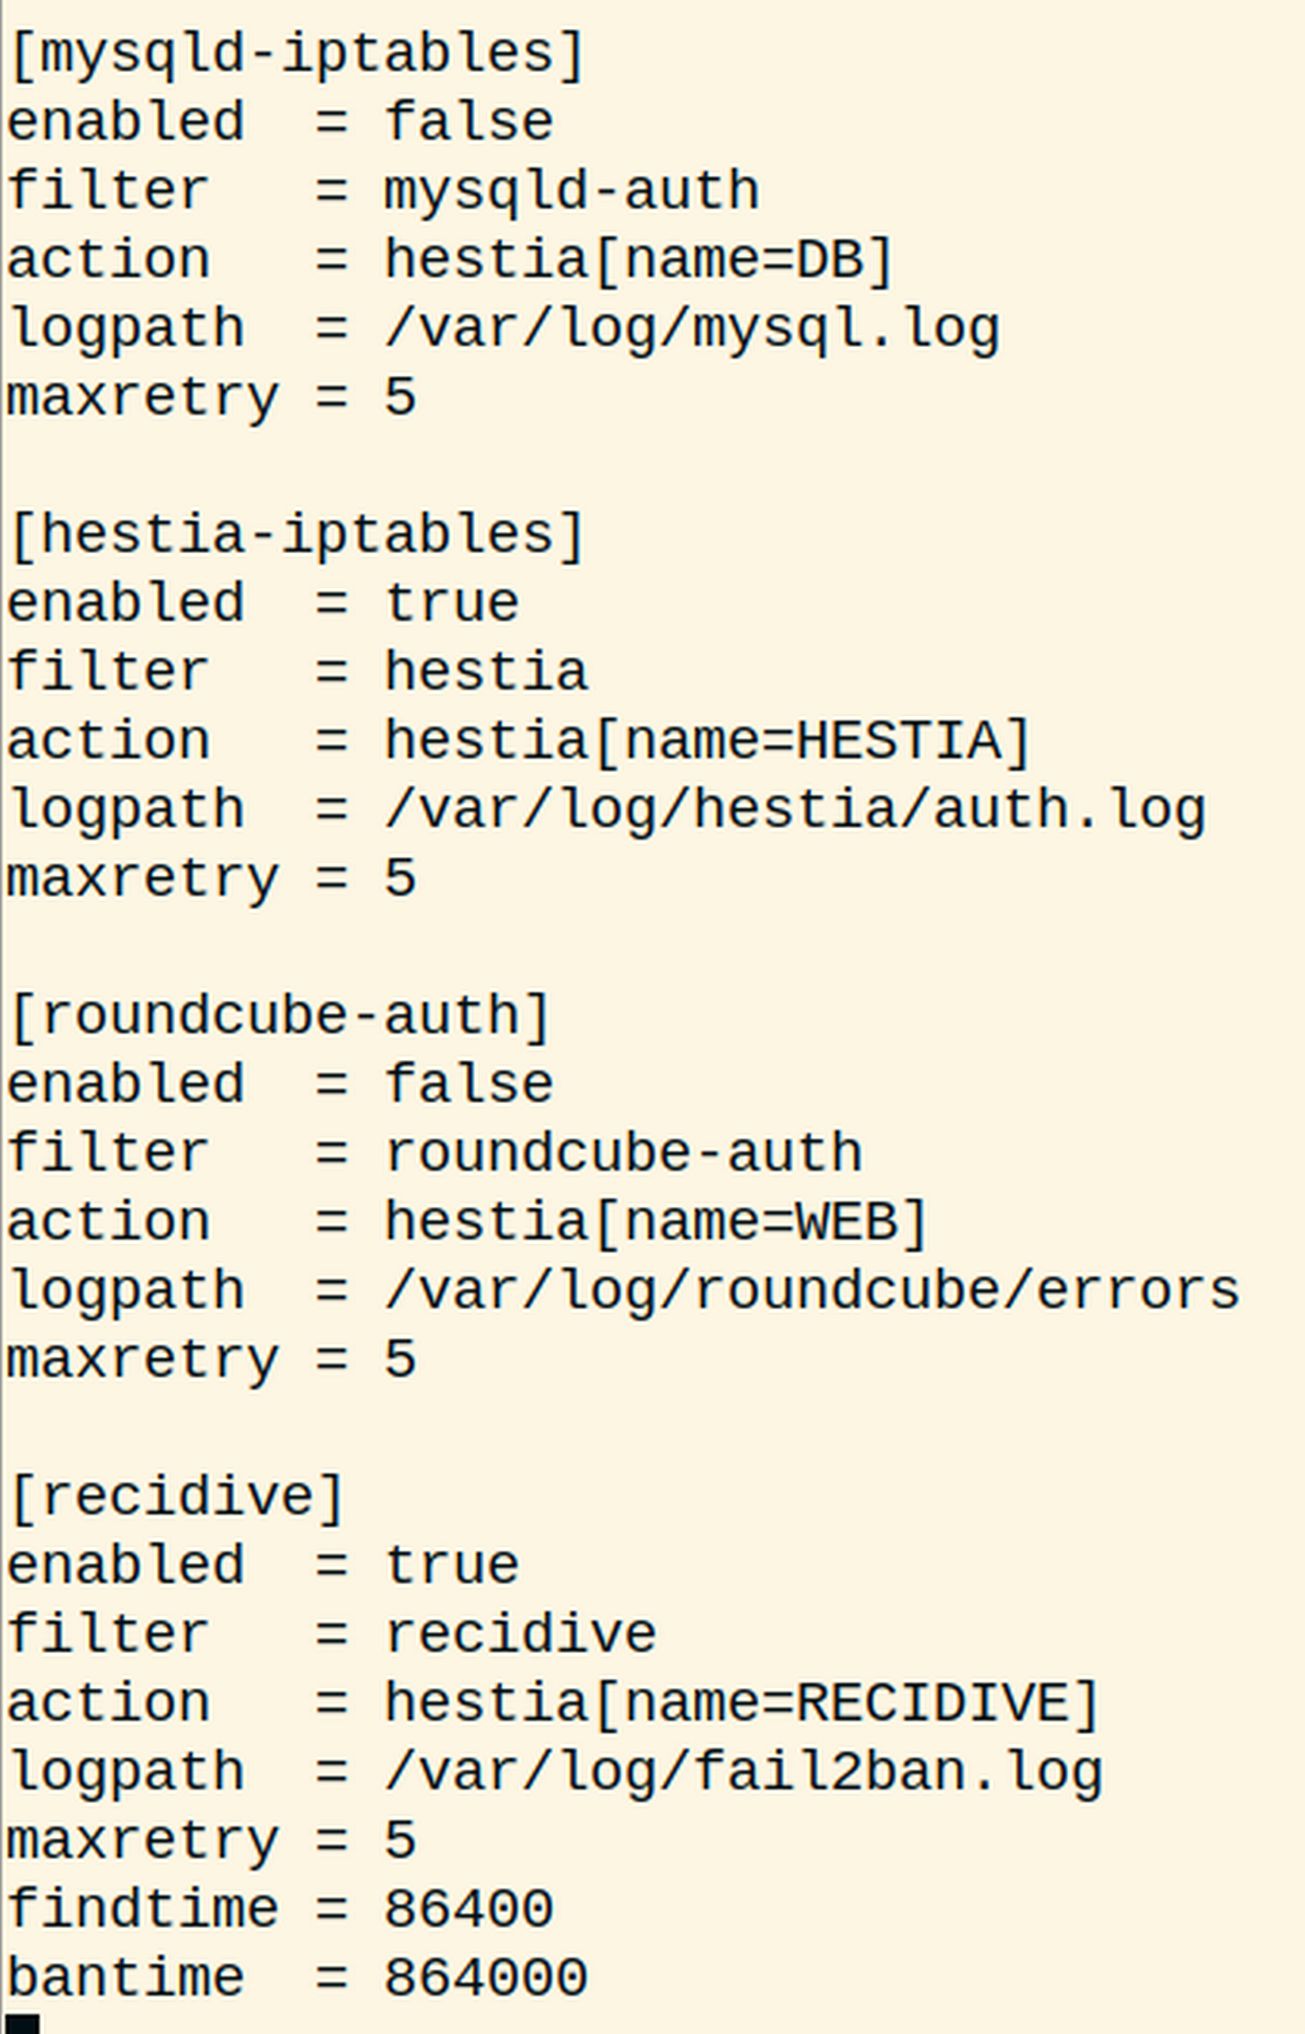
There are different sections in Fail2Ban configuration files. Maxretry is the maximum number of log in attempts will be allowed before blocking. Bantime is the time in seconds for which the ip is banned by fail2ban.
How to White List an IP Address
The [DEFAULT] section is applied to all services enabled for fail2ban. If you want to ignore some particular ips by Fail2ban then you can enter it in the ignoreip section.
[DEFAULT]
ignoreip = 127.0.0.1/8
Write the IP address into the ignoreip line that you want to white list. You can give multiple IPs, space separated to make sure they are not locked out.
Configure mail settings in Fail2Ban
The mail settings are used to send an email whenever an ip is blocked by Fail2Ban. The mail settings can be configured by modifying the following variables:
destemail = fail2ban@localhost>
If you would like to configure email alerts, you can change the value from action_ to action_mw.
Configure Fail2Ban for Apache/Nginx Web Server
logpath = /var/log/apache*/*error.log
sudo systemctl restart fail2ban.service
Test Fail2ban to make sure it is working
In the next article, we will look at how to use Hestia to create and restore admin and website backups.