
We have now added a second wired connection device and shortened its name to enx0 using udev. We have also turned off our Wireless network connection. In this article, we will first use the Network Manager Network Connections graphical interface to create a Bridge0 connection. We will then create a new virtual server with VVM - NAT and then replace NAT with Bridge0. Finally, we will create a third virtual server using the Bridge1 connection in the Installation process so that we determine if one bridge creation process is better than the other.
Create a Bridge0 Connection with Network Manager Network Connections
We will be using our USB3 to Ethernet device to create our bridge0 connection. At the end of the previous chapter, we shortened the name of this device to enx0. Before we create our new bridge0 connection, we need to make sure that any Wired connections which uses the USB3 to Ethernet device enx0 are not active. Open a terminal on your home computer and type ip addr:
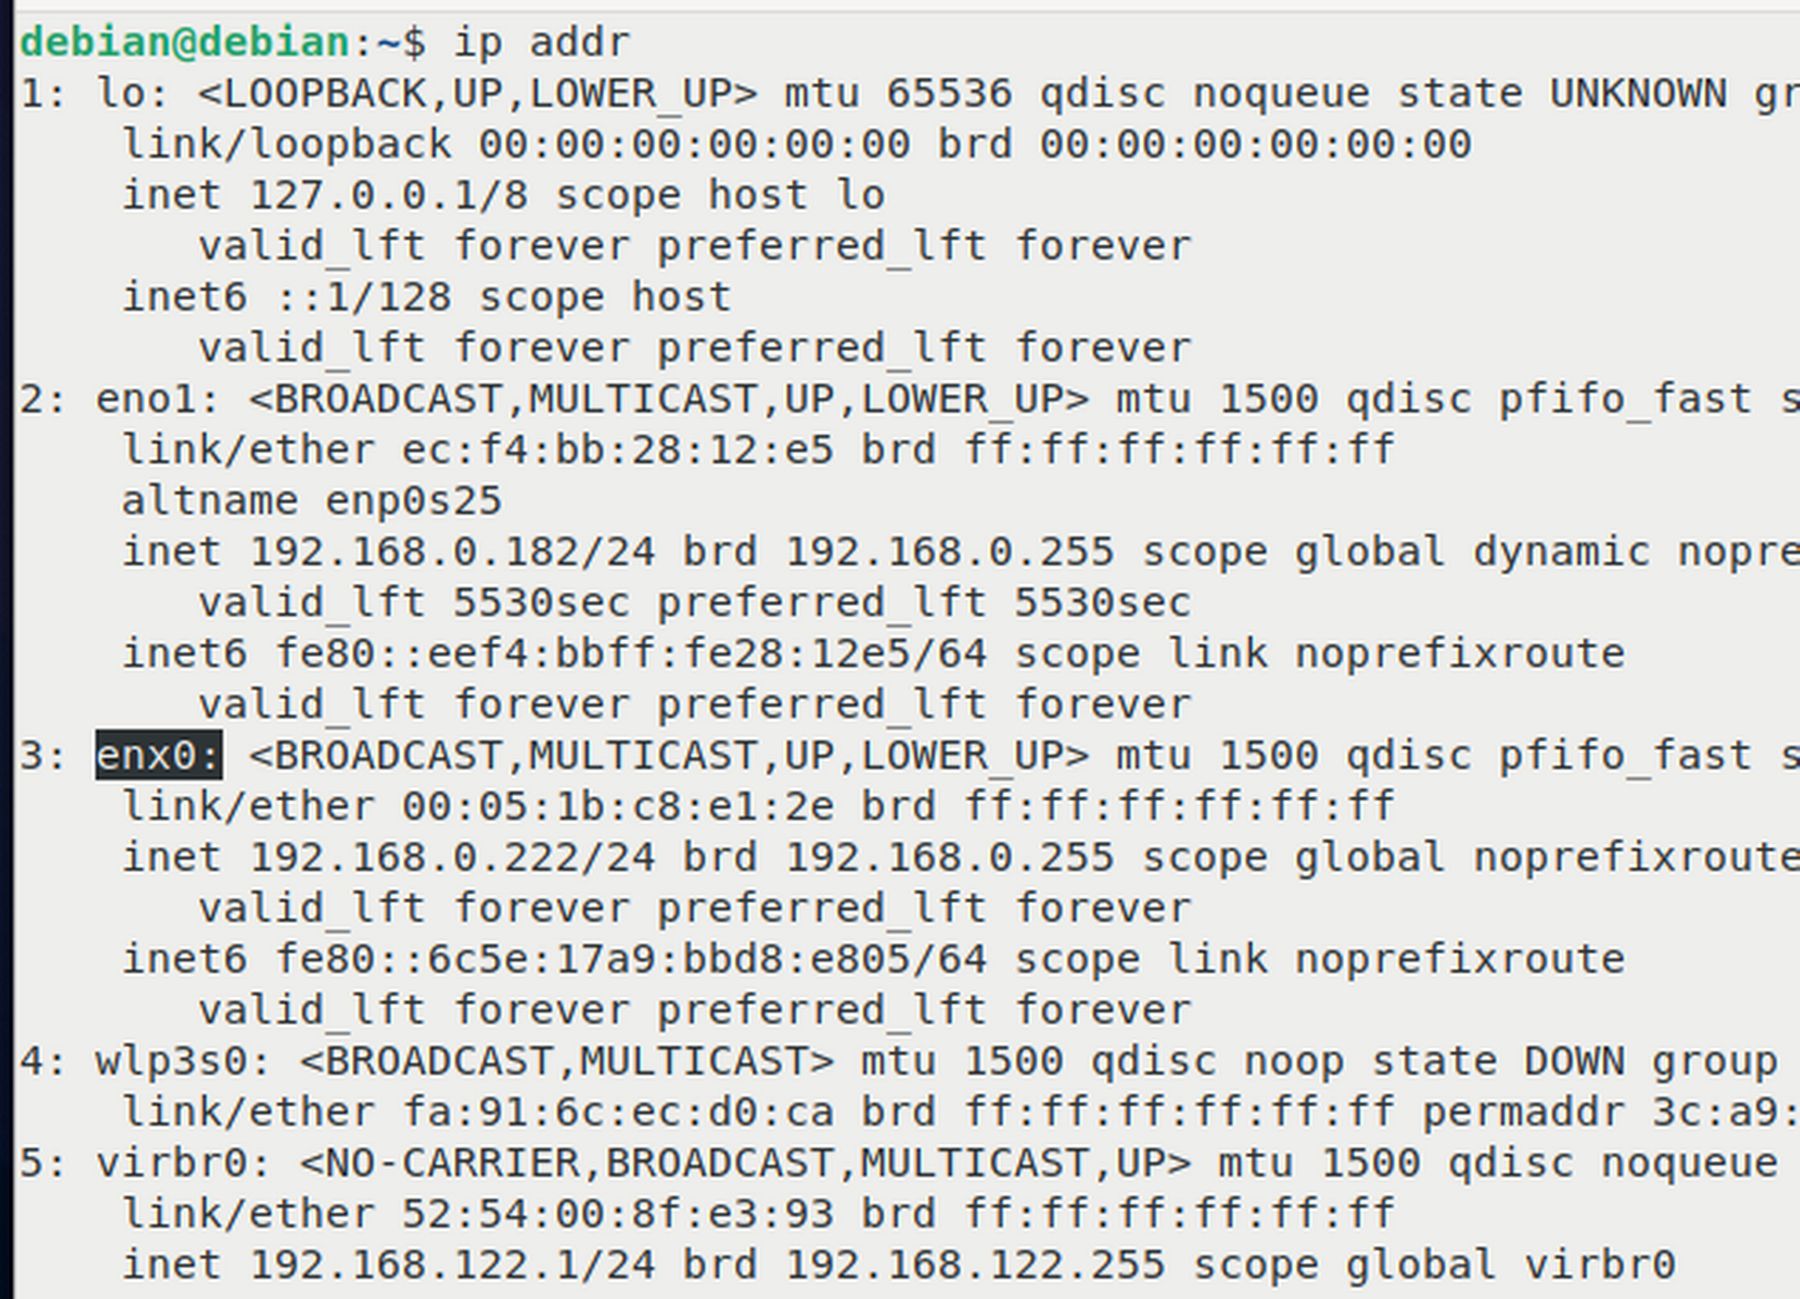
The above image shows that we have five devices. The first called lo is a local device. The second device, called eno1, is our laptop's normal Ethernet device. This is automatically set to be used by our Wired connection 1. The third device is enx0 which we will use to create our bridge0 connection. Sadly, it is being used with Wired Connection 2 and our Static IP address and is active. We will need to change Wired Connection 2 to the enx0 device before we can use enx0 to create our Bridge0 connection. The fourth wlp3s0 is our laptops wireless device which we have turned off and will not be using. The fifth device (virbr0) were created when we created our first VPS with VMM. It is our NAT connection. Close the terminal.
Change Wired Connection 2 from Enx0 to Eno1
Open Network Connections and click on Wired Connection 2 Edit wheel. Then use the drop down to change the device from enx0 to eno1. Then click Save and close Network Connections. Then restart your laptop. Then open a terminal and type ip addr again. You should see that eno1 now has the static IP address and that enx0 has been assigned a random IP address. This means that enx0 is still active.
Turn ENX0 (the USB to Ethernet Device) Off
Click on the Network icon in the lower right corner of your Taskbar.
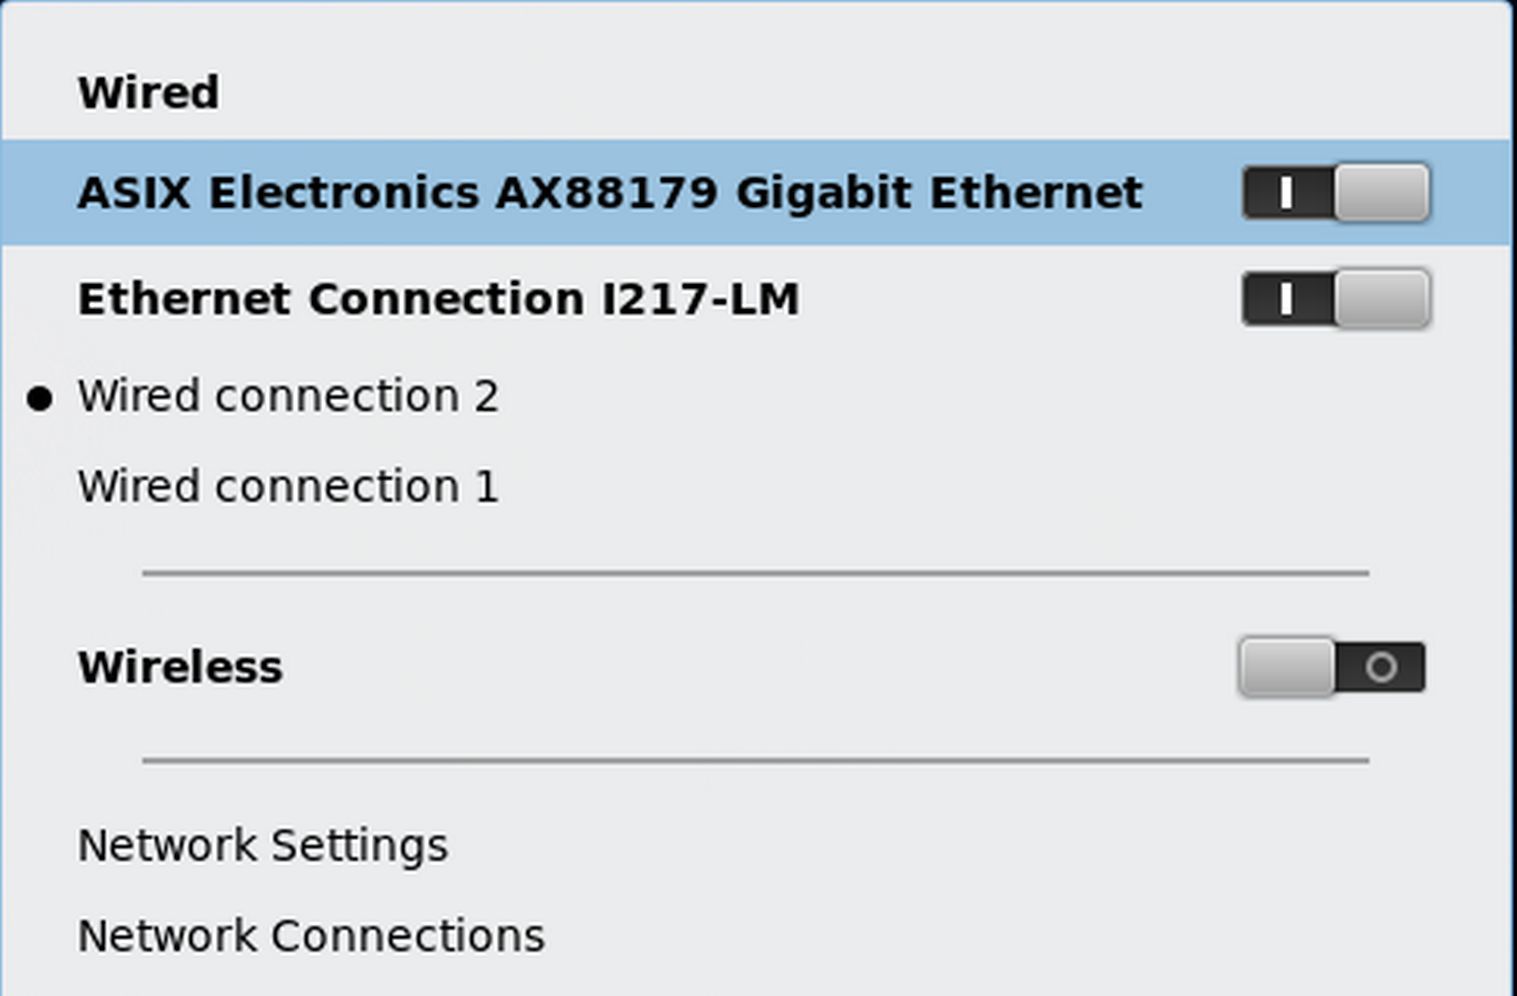
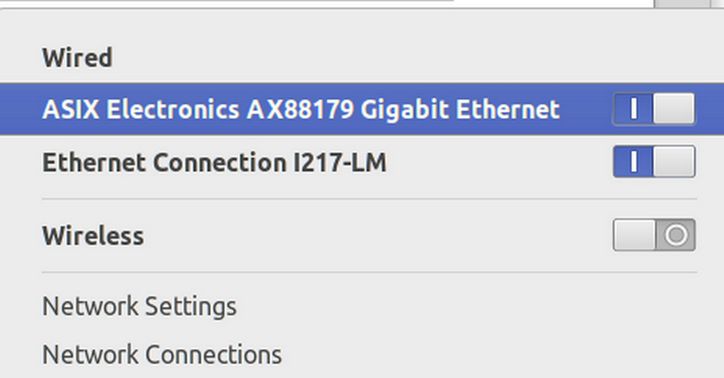
Click on the Wired Gigabit Ethernet Device to turn it off. The box should turn from blue to gray. Then click on Network Connections.
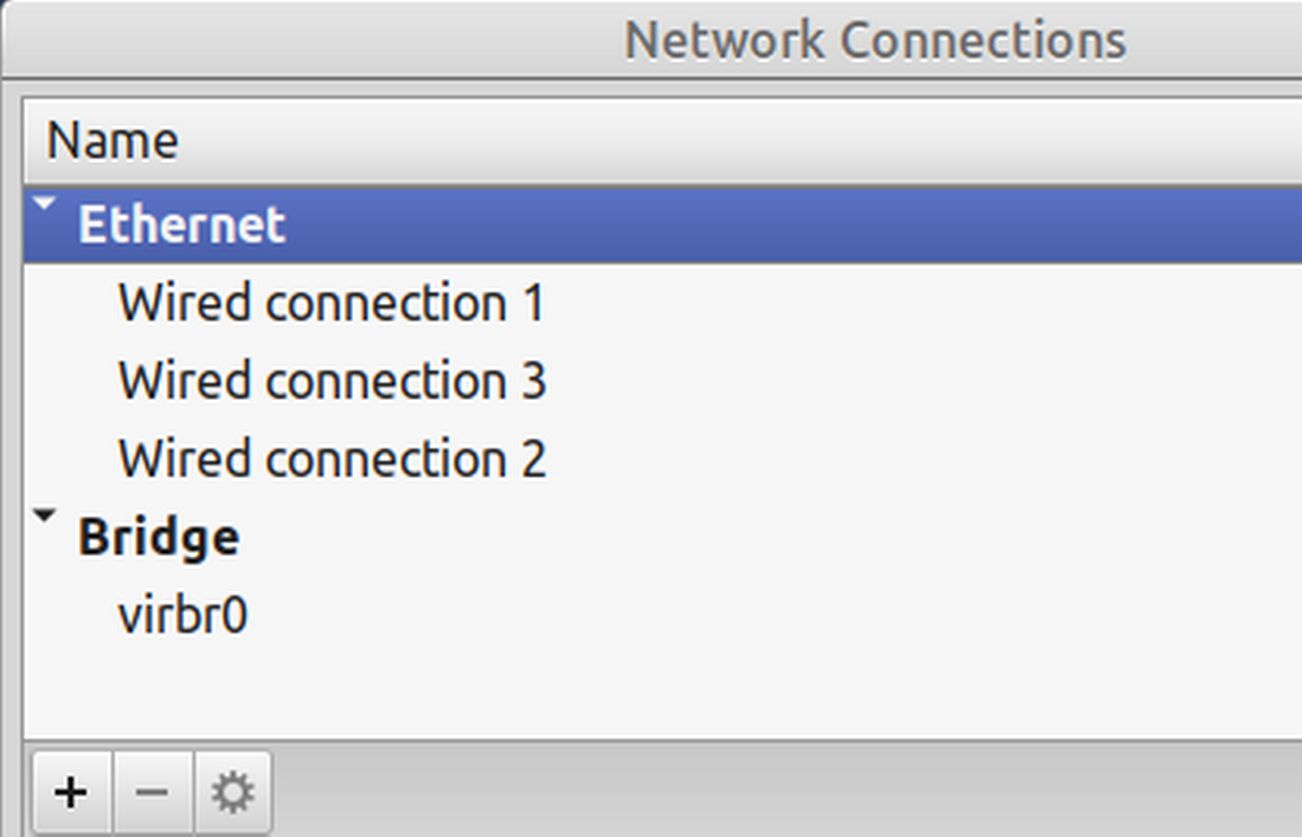
If you have a Wired connection 3, it was likely created when we shortened the name of our enx0 device. We do not need it. To delete it, click on it to select it. Then click on the minus sign at the bottom of the screen. Then click Delete. Then close Network Connections.
Verify that enx0 is not being used
Open a terminal on your home or host computer and type ip addr. Hopefully, enx0 is no longer being assigned an IP address and is thus no longer active. Once enx0 is no longer actively connected to some other connection, we can use it as the device for our bridge0 connection.
Create a new bridge0 connection
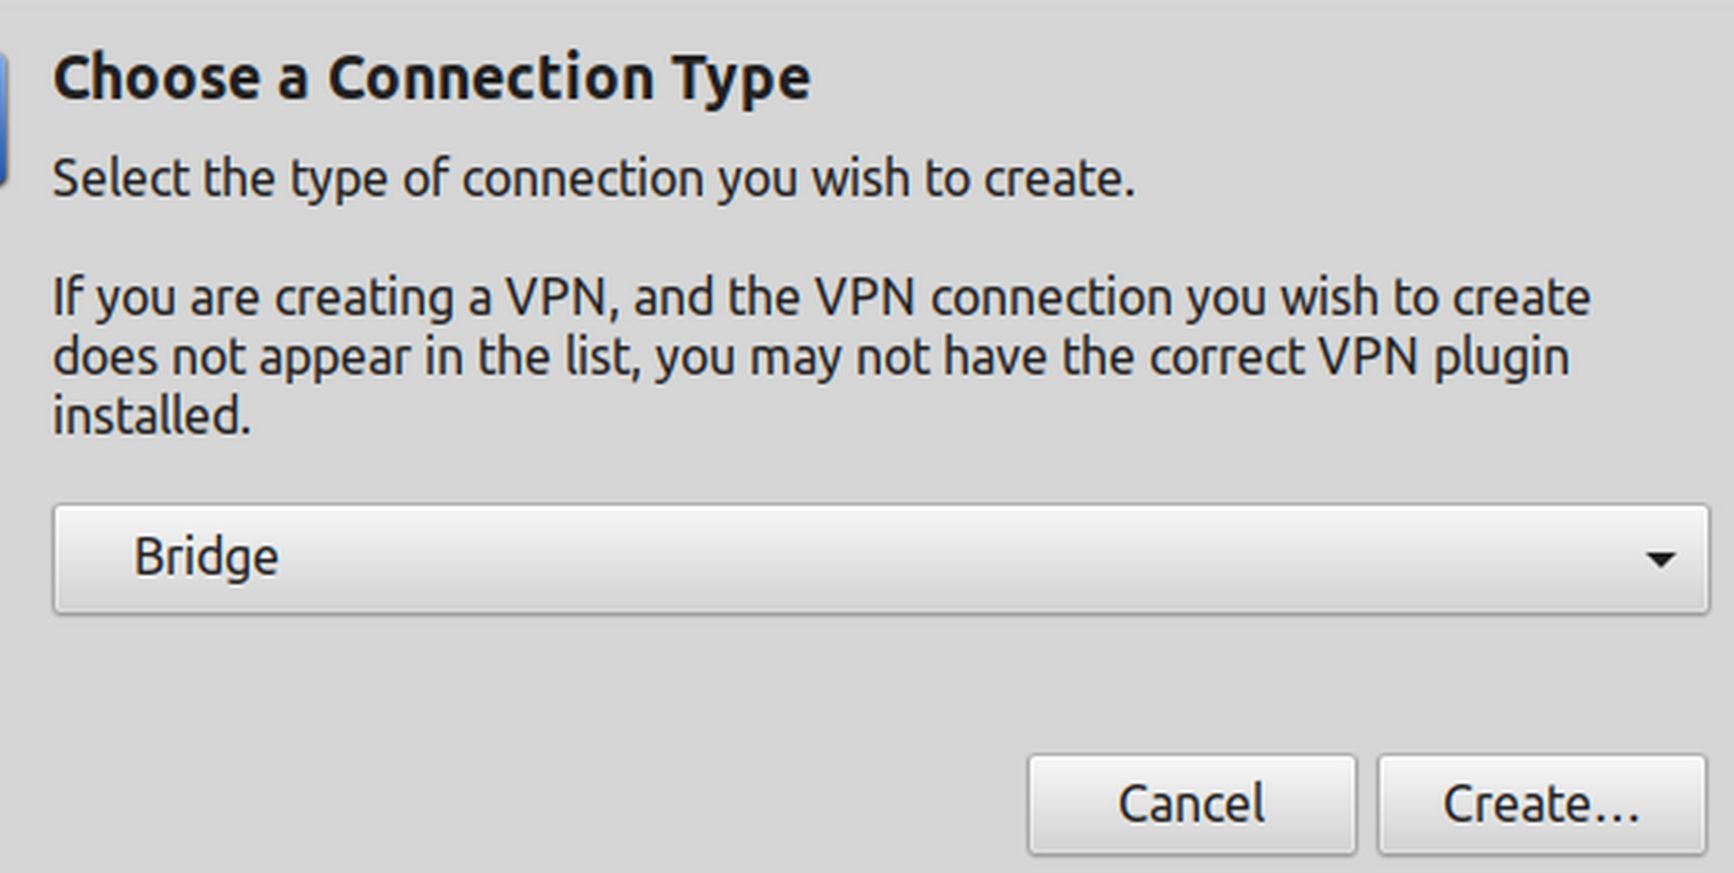
Now that the enx0 device has been turned off, let's create a new bridge0 connection. Open Network Connections, then click on the Plus sign in the lower left corner to create a new connection. Then choose bridge.
Click Create.
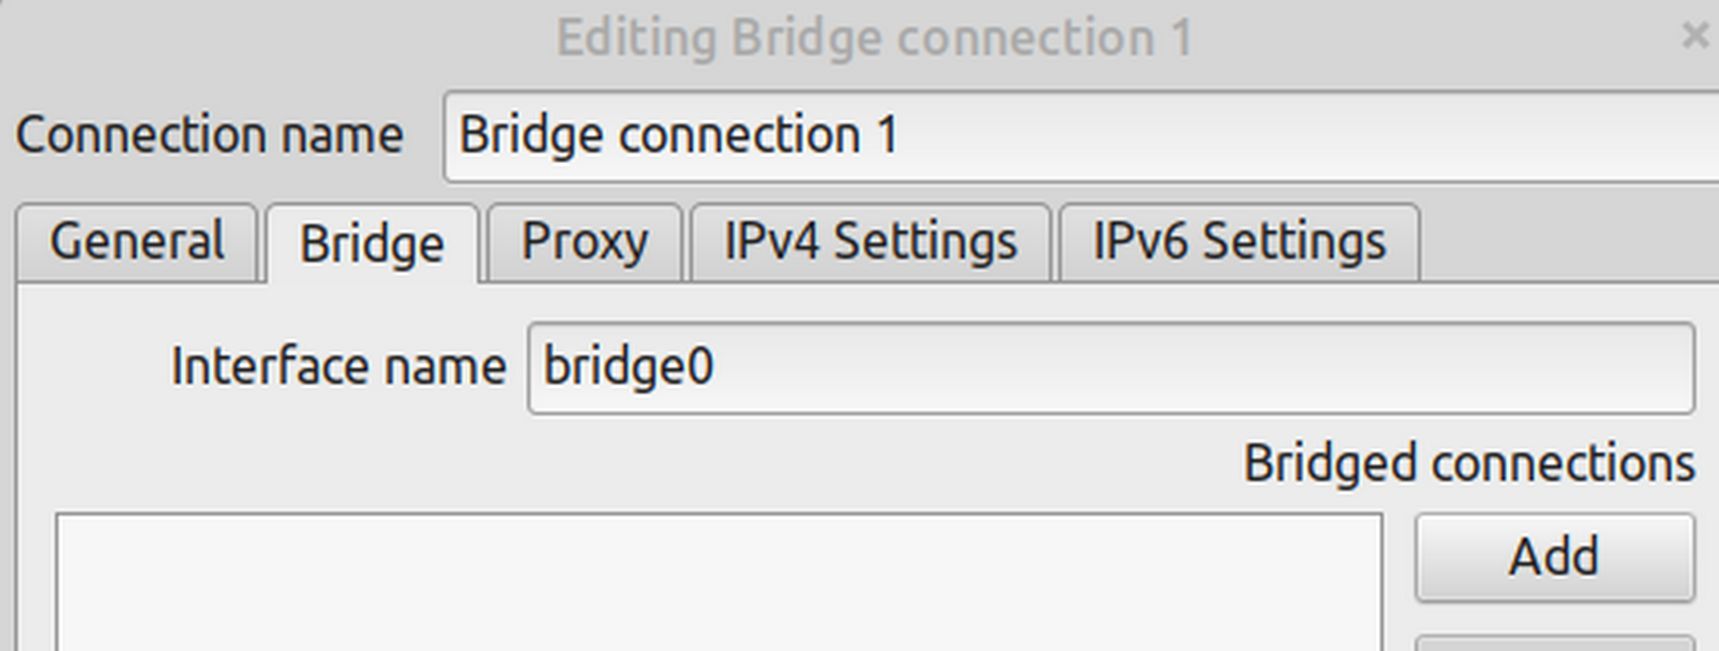
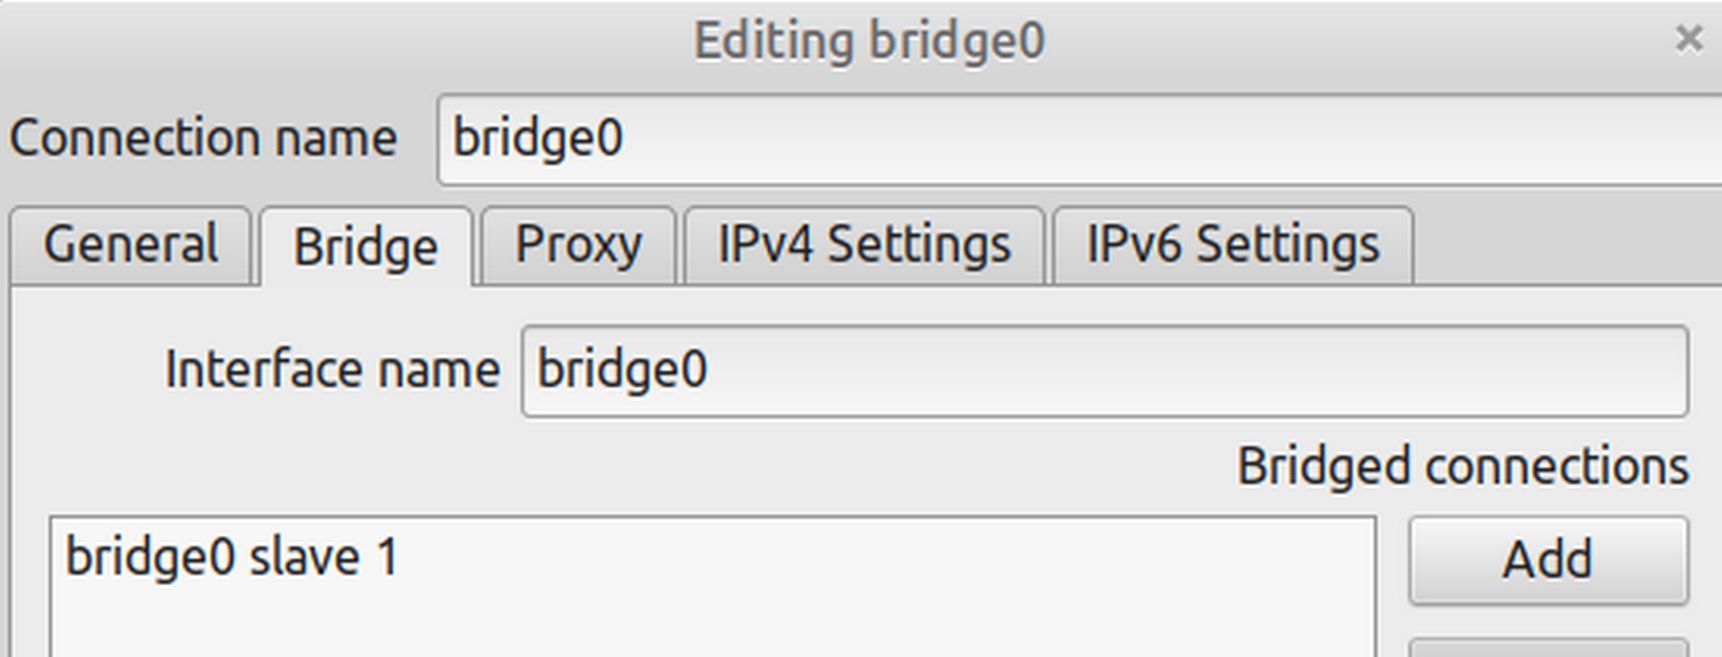
Change the Connection name from Bridge connection 1 to bridge0 so that the connection name and the Interface name are the same. Then click Add.
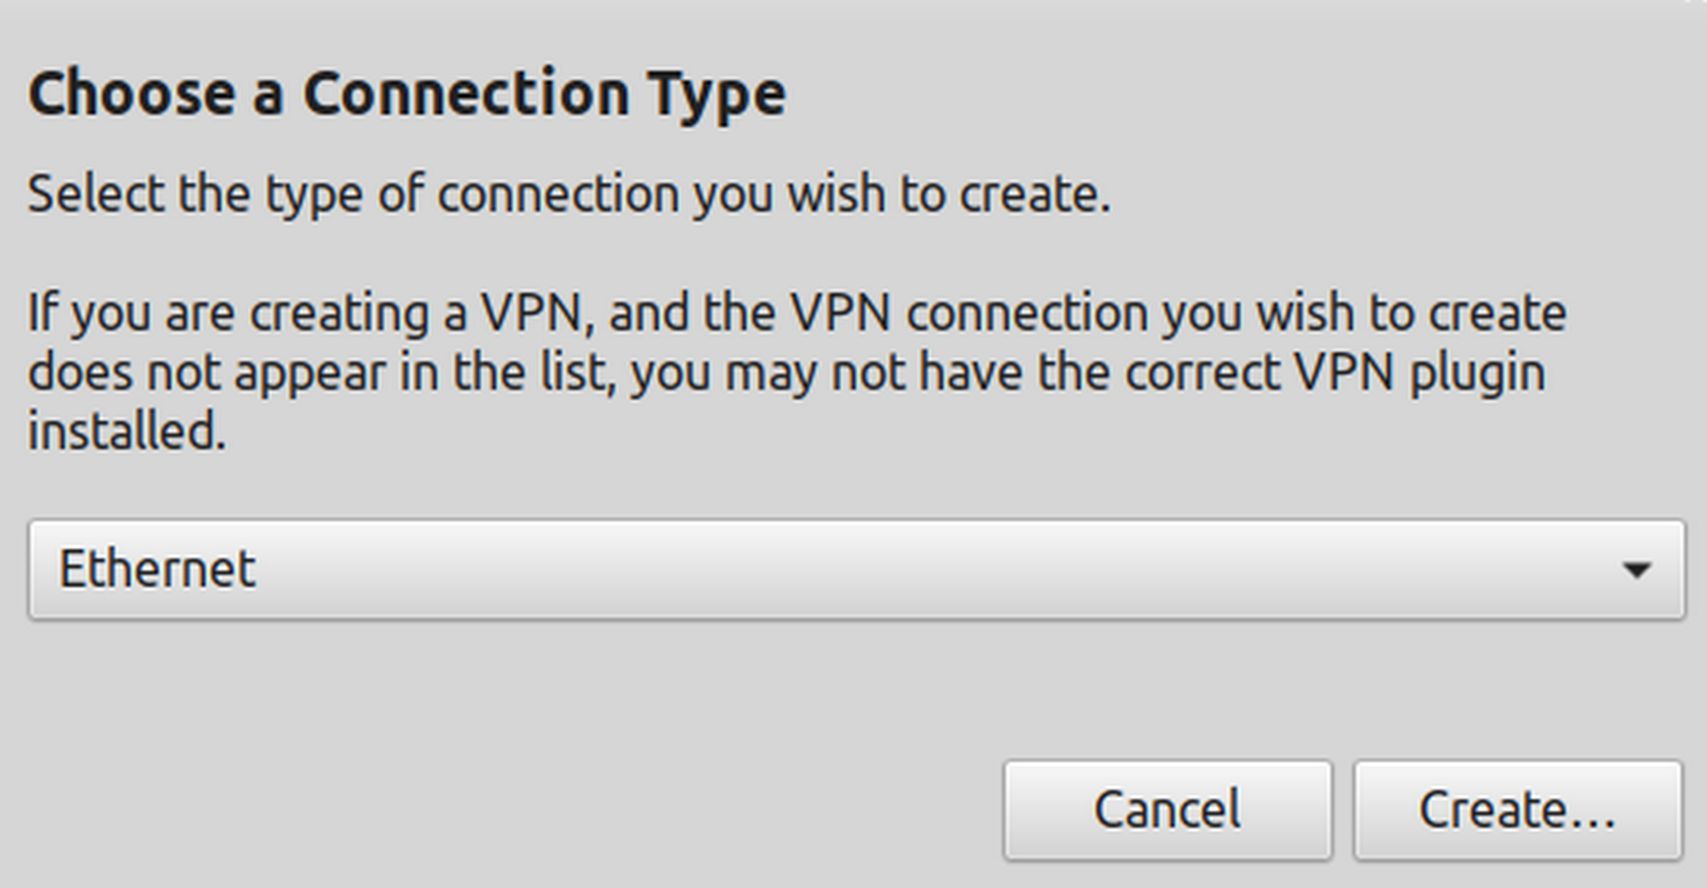
Leave the Type at Ethernet and click Create.
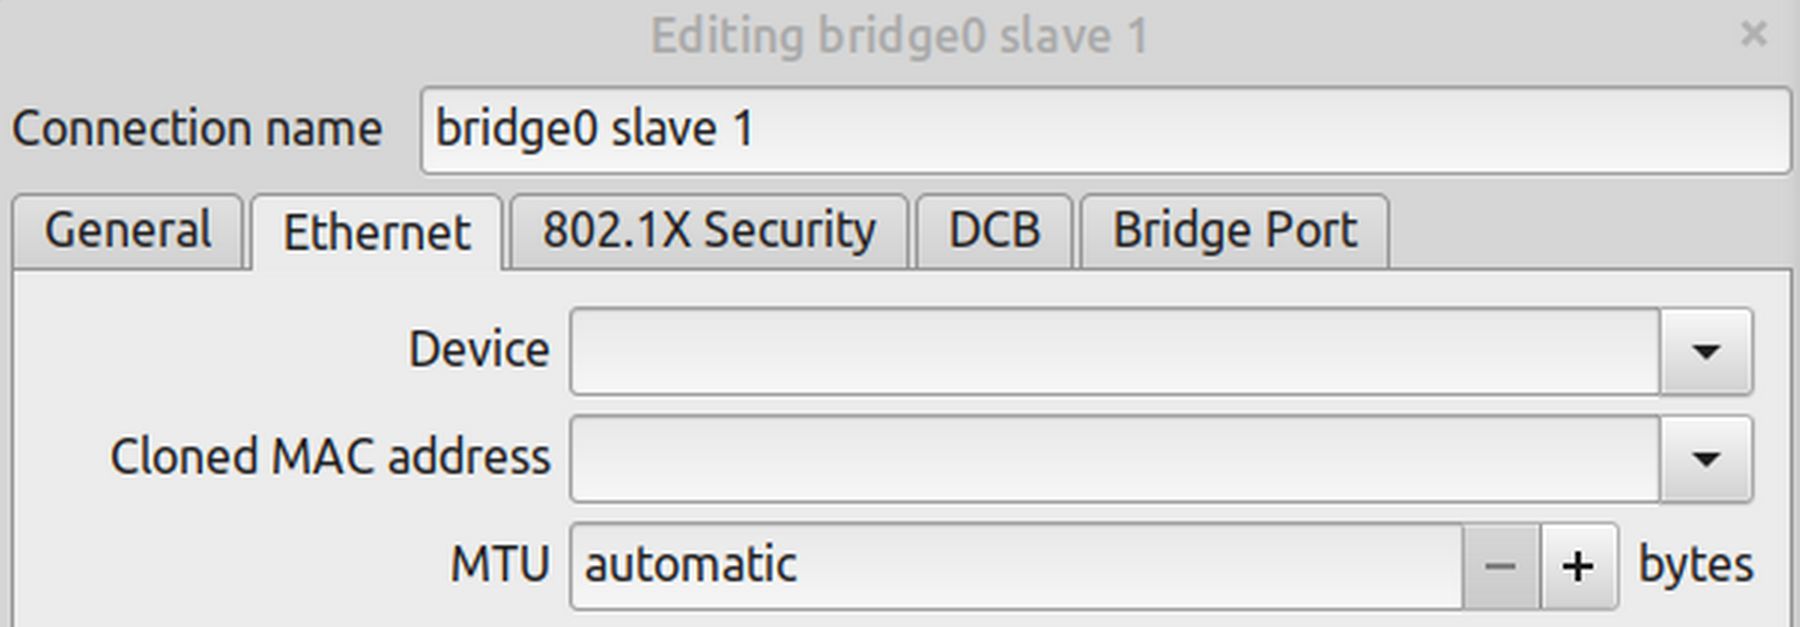
This will create a new connection called bridge0 slave 1. For Device, use the drop down arrow to choose enx0. Then click Save.
Click on the IPv4 tab which by default is set for Automatic (HDCP). Because we want to create static IP addresses for Virtual Machines made with a bridge0 connection, change the Method from Automatic to Manual. Then add a local static IP address (in my case 192.168.0.111). Also add the Netmask 24 and the Gateway 192.168.0.1.
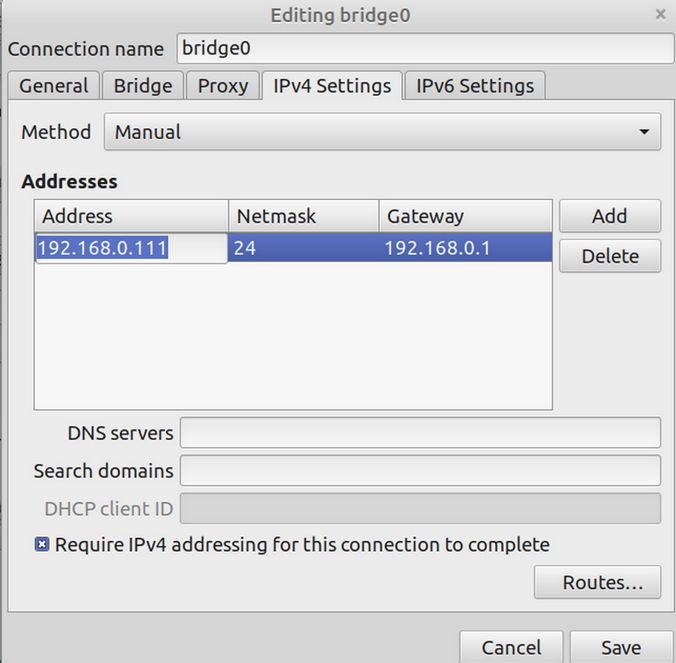
Also check Require IPv4 address. Then click Save. This returns us to the Network Connections screen:
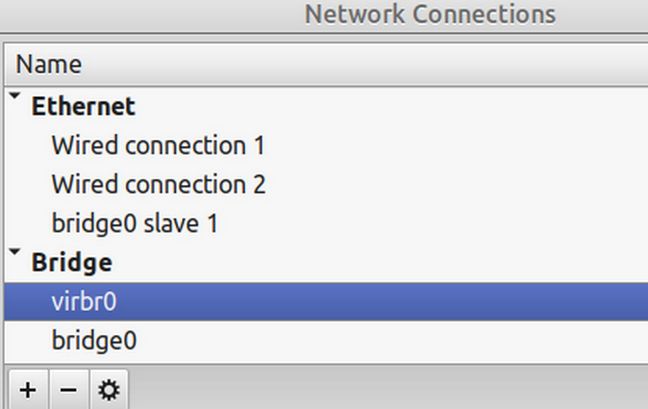
Because bridge0 is now using the enx0 device and because the enx0 device can only be used by one connection, we should now delete Wired connection 2 so that it does not try to steal the enx0 device from bridge0. Select Wired connection 2 and delete it by clicking on the minus sign at the bottom of the screen. Close the Network Connections screen.
Then click on the Network icon to turn the Gigabit Ethernet Device (aka anx0) back on.
Restart your laptop. Then open a terminal on your home computer and type ip addr.
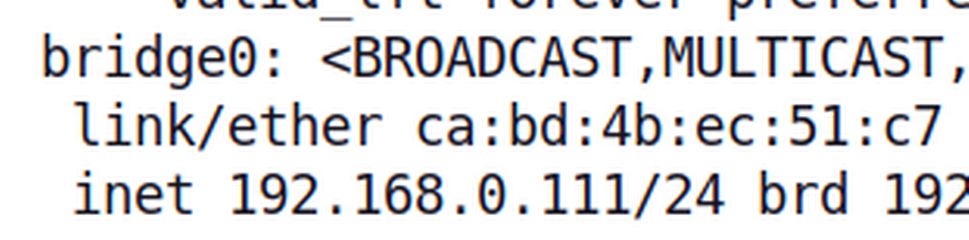
There are now six connections. We are only interested in number 4 (enx0) and number 5 (bridge0. Both connections are in the state UP. enx0 has a master called bridge0 and does not have an IP address. bridge0 has the IP 192.168.0.111 which means that it is part of our normal LAN network and VMM should assign normal IP addresses when we use the bridge0 connection instead of NAT. Close the terminal.
Create an XML file for our bridge0 connection
For Virtual Machine Manager to be able to use our bridge0 connection, we need to create an XML file for it. Open your File Manager and click File System. Then click on the etc folder to open it. Then click on libvirt folder to open it. Then click on the qemu folder to open it. Then click on the networks folder to open it.
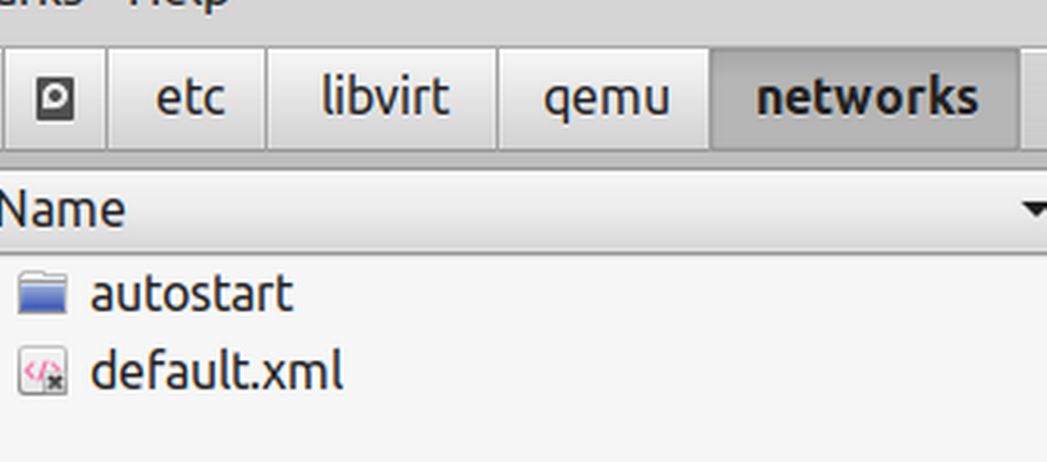
There is a file called default.xml and a folder called autostart. Right click on the screen and click Open as Root. Then right click again and click Create New Document, Empty document. Call the file bridge0.xml. Then right click on the new file and open this new file with Bluefish. The copy paste the following into the file:
<network>
<name>bridge0</name>
<forward mode="bridge"/>
<bridge name="bridge0" />
</network>
Then click Save and Close and close the file manager. Then open your terminal and copy paste this command:
sudo virsh net-define /etc/libvirt/qemu/networks/bridge0.xml
The terminal should reply;
Network bridge0 defined from /etc/libvirt/qemu/networks/bridge0.xml
Then start the network with this command:
sudo virsh net-start bridge0
It should reply that Network bridge0 started. Then set the network to autostart with each reboot with this command:
sudo virsh net-autostart bridge0
It should reply that Network bridge0 marked as autostarted.
Then to confirm the network status, copy paste this command.
sudo virsh net-list –all
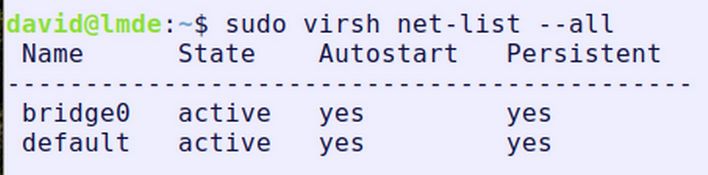
Close the terminal and open Virtual Machine Manager. Then click on Edit Connection Details, Virtual Networks.
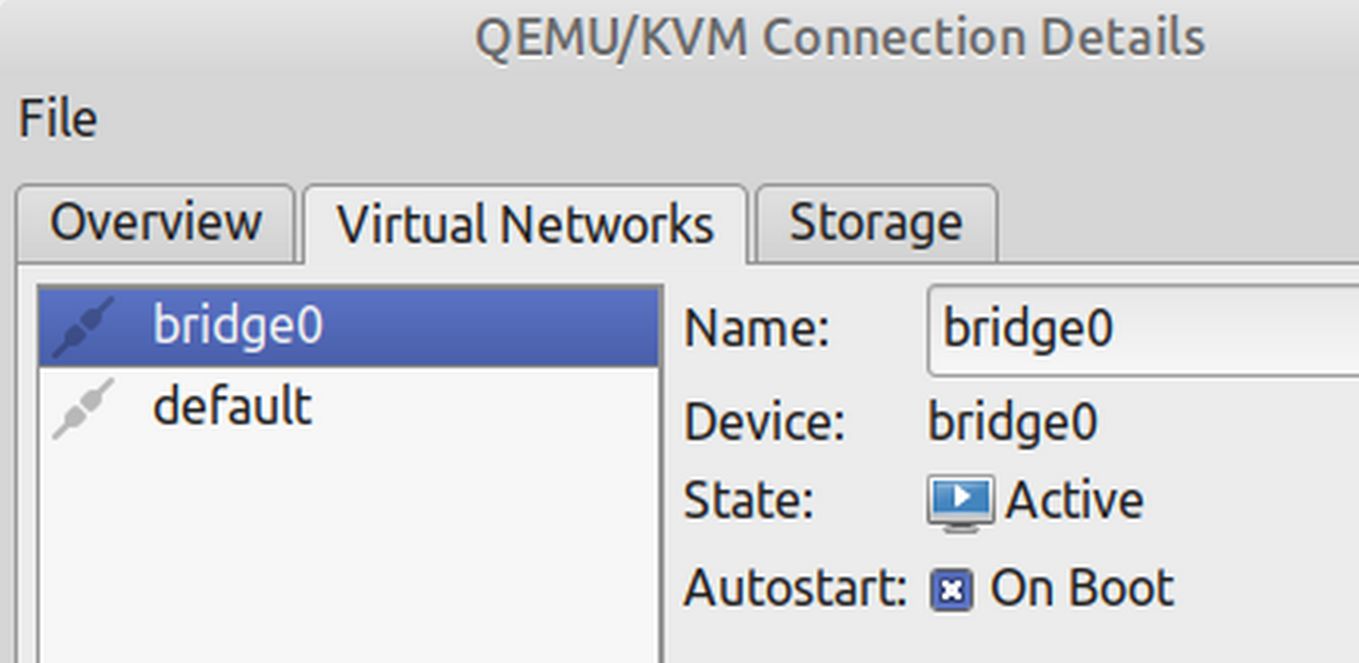
Bridge0 has been added to the list of Virtual Networks and set to Active and Autostart on Boot. Close the Connection Details screen. But leave the Virtual Machine Manager screen open.
Now that we have an active bridge0 network, we are ready to add it to a VMM VPS. We will review two different ways to add the bridge0 connection to a VPS created by VMM.
Method 1: Create a normal VPS using the default NAT Connection. Then replace the NAT connection with the bridge0 connection.
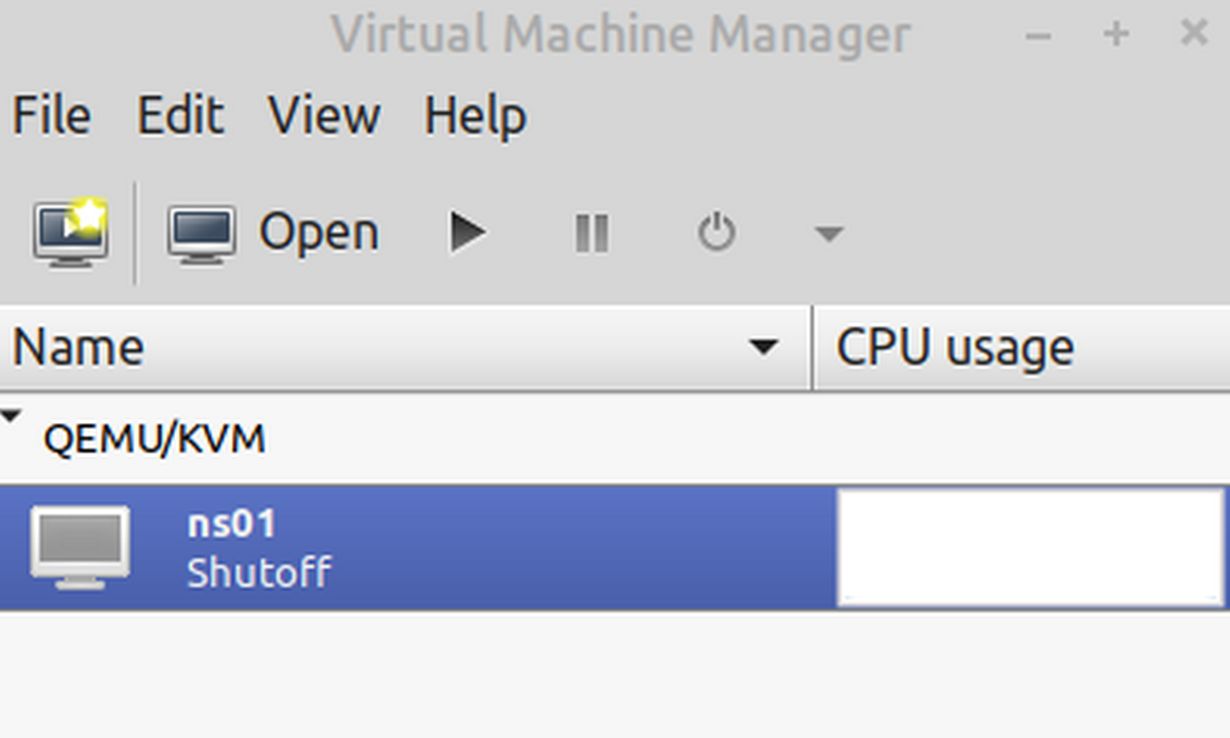
Open Virtual Machine Manager. You should see ns01 that we created in a previous exercise using the default NAT connection.
Recall that the IP address for a NAT connection begins with 192.168.122.xxx. While ns01 is shut off, click on Edit, Virtual Machine Details. Then click on NIC in the left side menu.
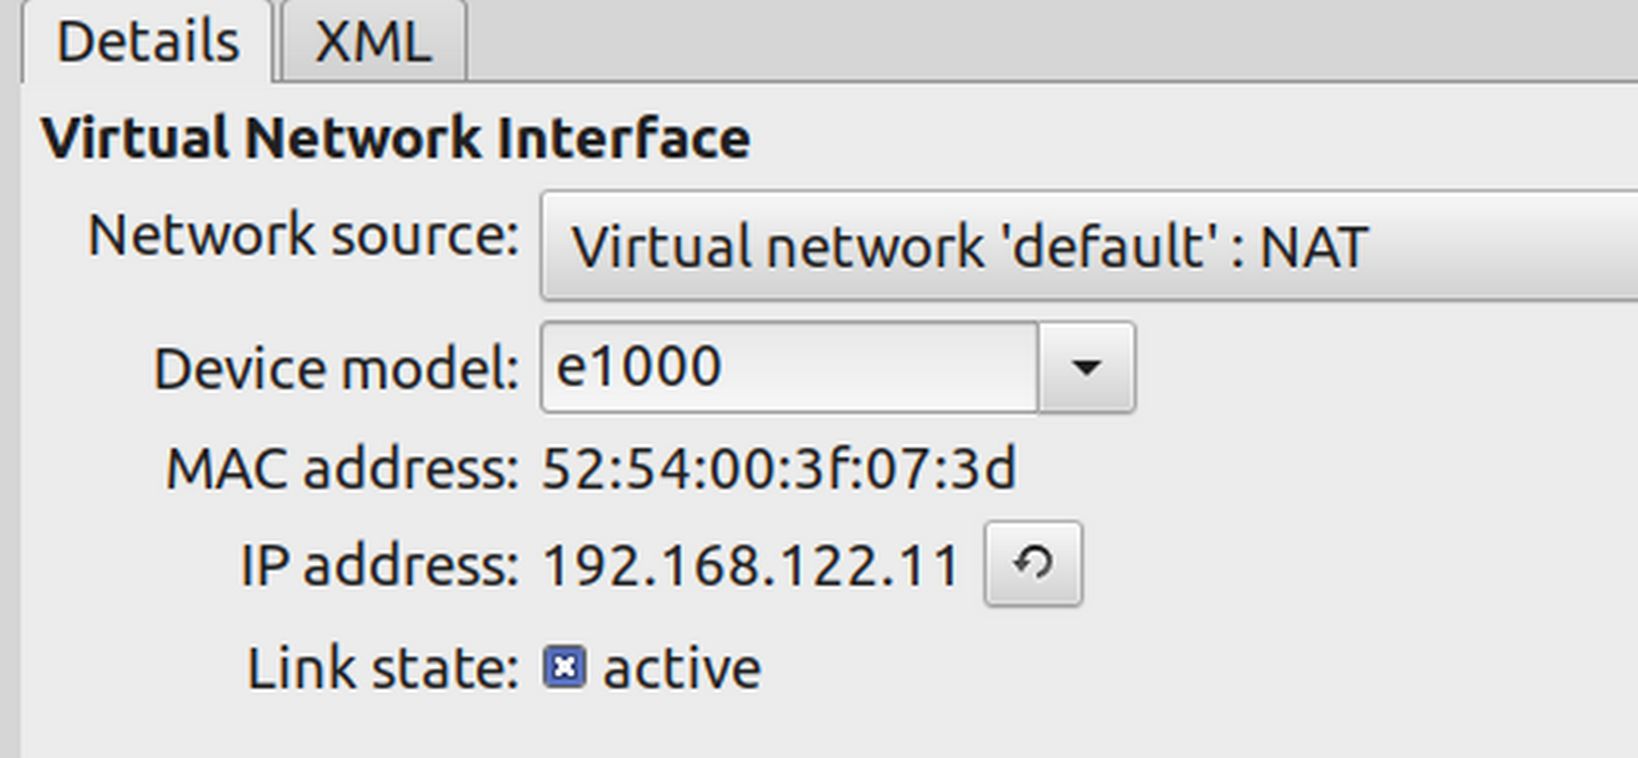
The Network Source is listed as NAT and the IP address is listed as 192.168.122.11. Use the drop down to change the network source from NAT to Bridge0. Then click Apply.
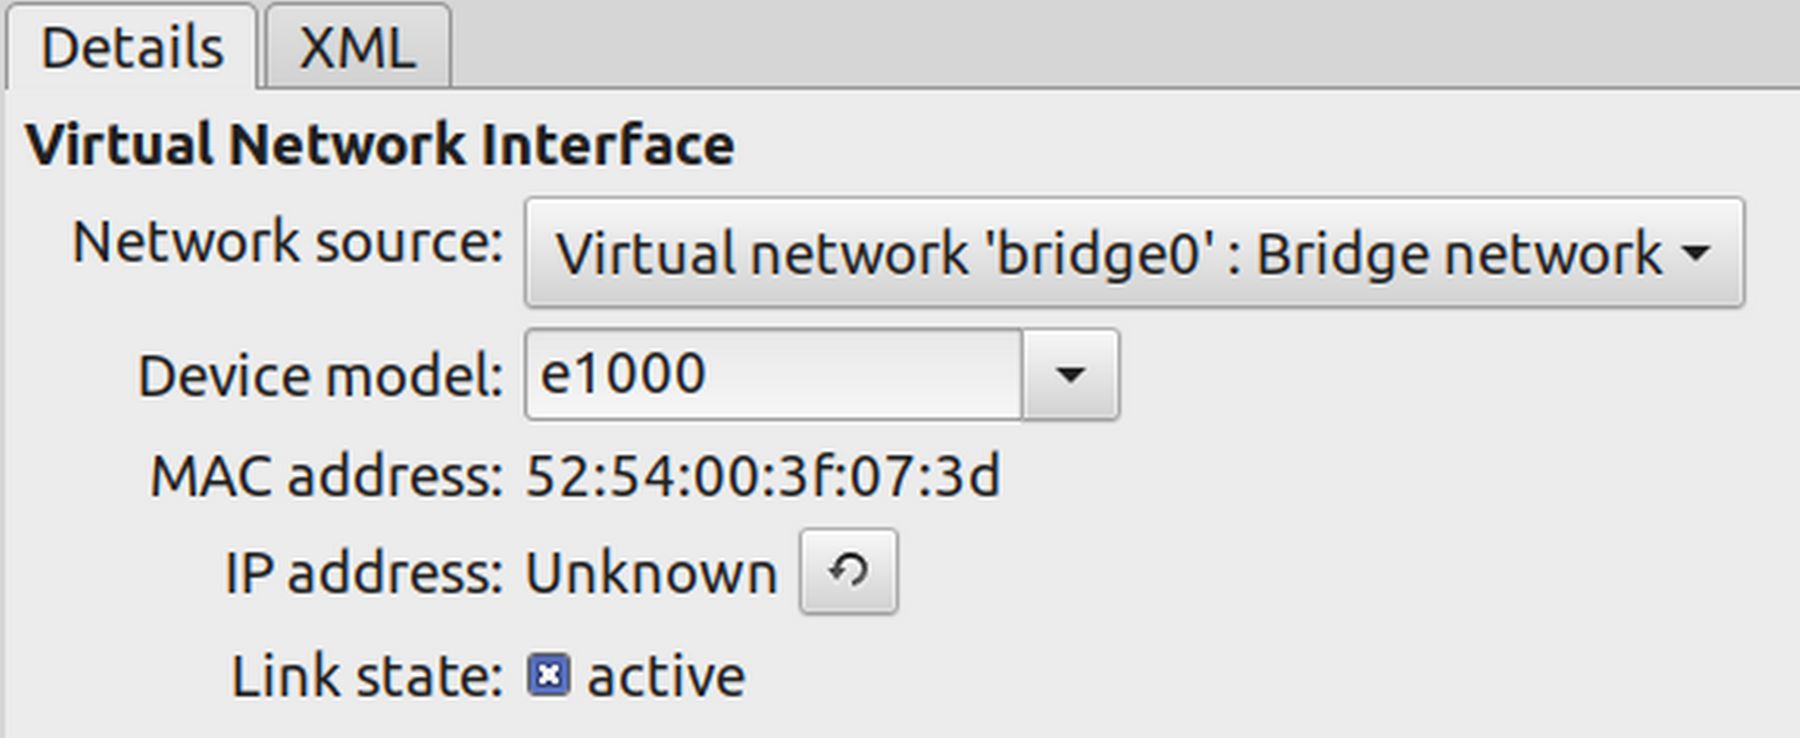
The IP address will change to unknown. But the MAC address stayed the same. Now restart your laptop. Then with your file manager, open the ns02.xml file and scroll down to the interface section, line 74. Note that the source network has changed to bridge0. Close the file and the file manager. Then use VMM to start ns01. Click Open. Then View Console.
Then log in. Type ip addr. Note that if there is no IP address for ens3, you may need to wait one minute and type ip addr again. It may take up to three attempts to get the IP address to show. The IP address for ens3 has changed from a NAT address to the local area network address of 192.168.0.xxx (in my case 105). Type sudo poweroff to close ns01.
Method 2:Use the VMM installer to install bridge0.
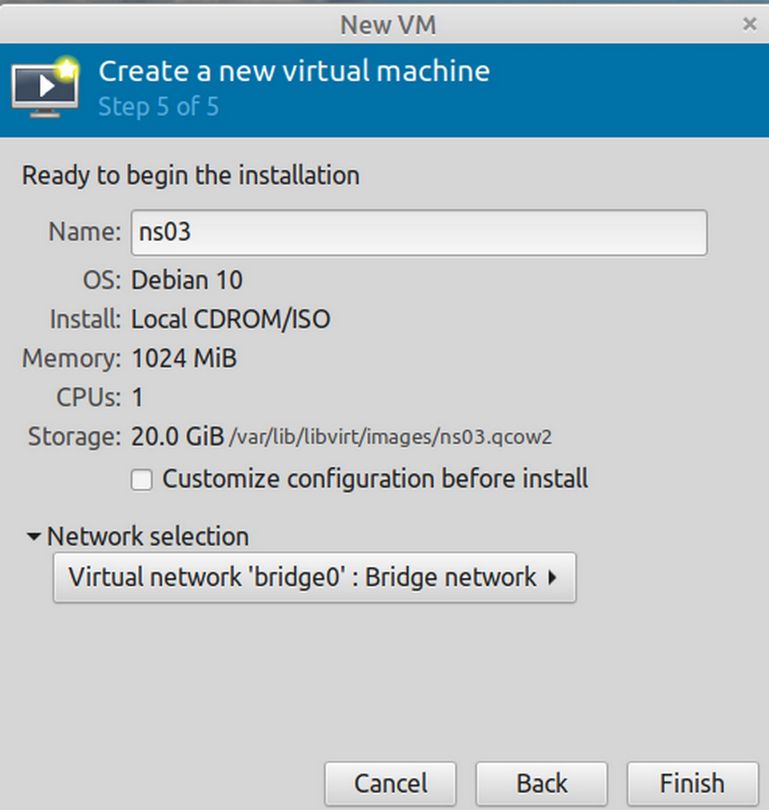
In the Virtual Machine Manager initial screen, click on the gold star to create a new VPS. Then Local install and click Forward. Then browse to the Debian 11 iso to select it. Click Forward. Memory OK. Click Forward. Disc Space OK. Click Forward. On Step 5 of 5, change the name to ns03. Then click Network Selection. Use the drop down to change the network from NAT to bridge0.
Then click Finish. This will bring up the Debian installation wizard. Leave it at Graphical Install and press Enter. Then click Continue. Continue. Continue. Then components will load.
For Configure the network, change the hostname from debian to ns03. Then click Continue. For domain name, type dev.test. Then click Continue. Leave the root password blank and click Continue.
Type your name and click Continue. Then type your username and click Continue. Then enter a short and easy to remember password. Type it twice and click Continue. Choose your Time Zone and click Continue. Use Guided entire disk and click Continue. Continue. Continue. Continue. Change Write changes from No to Yes and click Continue. The base system will then be installed.
Leave scan at No. Click Continue. Leave package manager at US. Click continue. Then continue. Then continue. Leave the survey at No and click Continue. Uncheck Desktop and Print and check SSH server. Then click Continue. Leave boot loader set for Yes and then continue. Change device to vda and continue. Then continue to complete the installation. Then log in. Type ip addr.
The local IP address may not be shown on the first try. However, if you type ip addr again and press Enter, ens3 should show a local IP address (in my case 192.168.0.214).
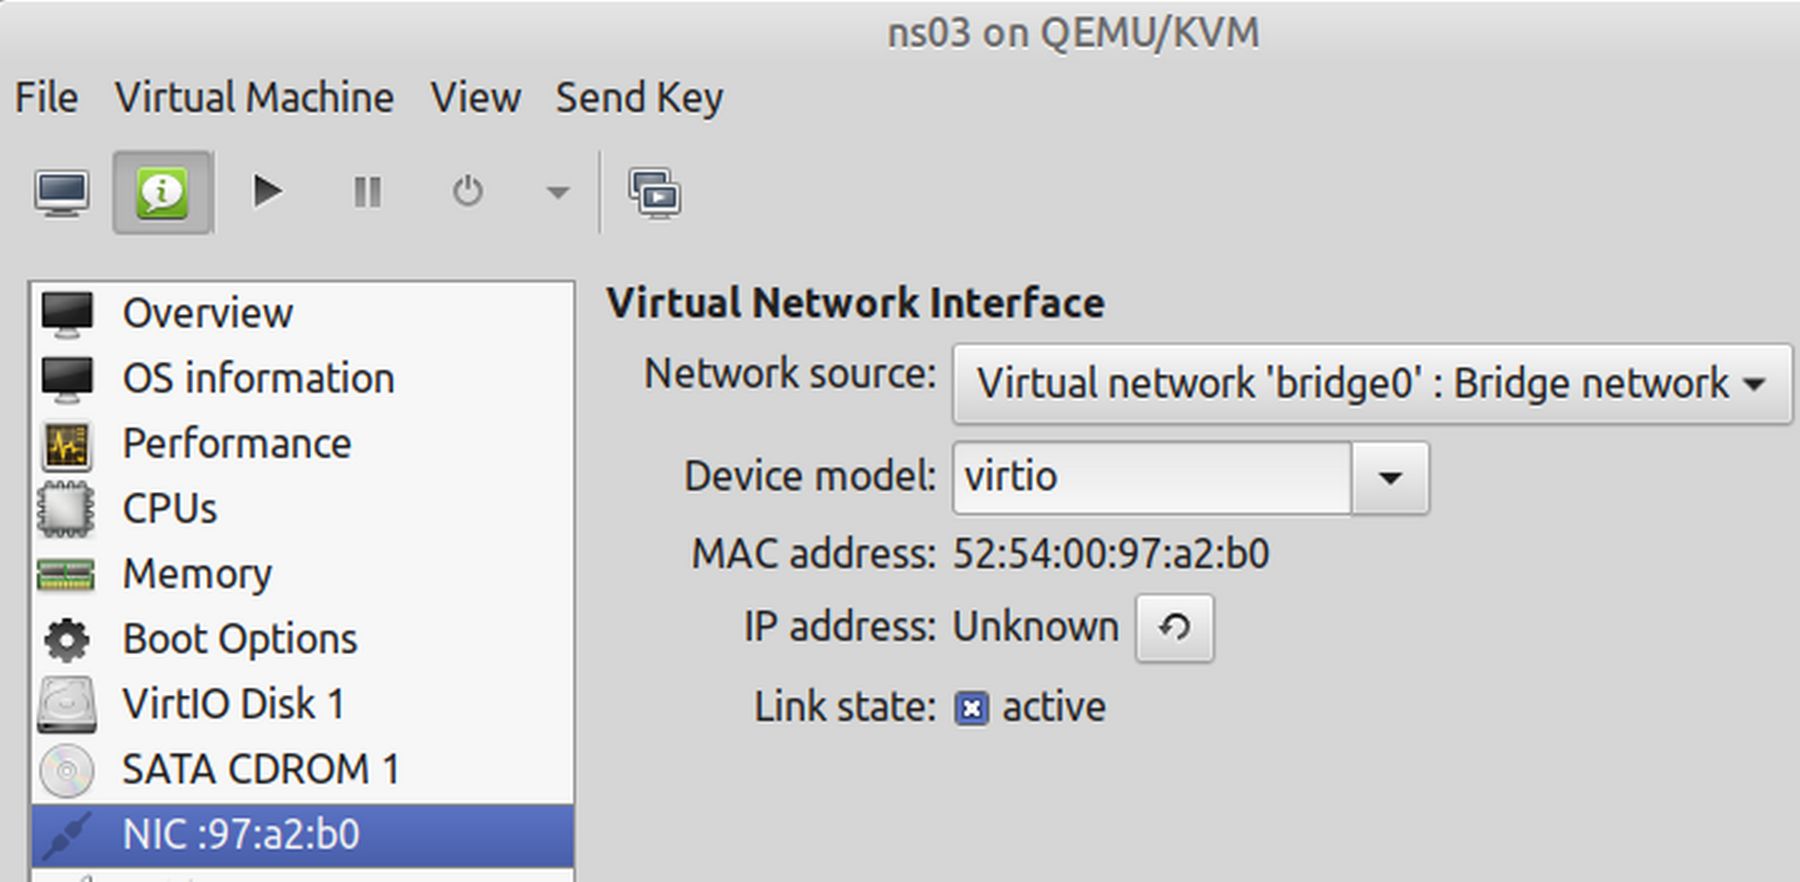
Type sudo poweroff. Then click on the info circle. Then click on NIC in the side menu.
The second method has a result very similar to the first method and is slightly easier. We will save ns01 ns02 and ns03 to see if one has more success with installing the Hestia Control Panel than the other.
What's Next?
In the next chapter, we will learn how to configure their DNS settings.