
In August 2021, Debian released version 11 with hundreds of improvements over Debian 10. A few days later, the Hestia Control Panel team released a version of Hestia CP that was compatible with Debian 11. Debian and Hestia have since offered tutorials on how to update Debian 10 to Debian 11. These tutorials typically involve copy pasting a series of commands in the terminal and changing the source links to point from the Debian 10 repositories to the Debian 11 repositories. I tried these command line steps and sadly was confronted with errors I could not resolve. I am certain that the fault is entirely my own and that a more competent user of the terminal would have no problem updating their from Debian 10 to Debian 11using the terminal. However, for those like me who may be challenged by the terminal, in this article, I will review the graphical process I used to update a Hestia VPS from Debian 10 to Debian 11.
Reflashing versus Updating your VPS
Many Linux distributions have “easy” up paths. However, I have never had good luck with these update processes. What I have had good results from has been completely reflashing the hard drive – also known as a “clean” install of the new version of the operating system. This is more work because some programs need to be reinstalled and some settings in some files need to be updated manually. However, the end result has always been a fully functioning computer.
There is an added challenge with a VPS because the VPS may have many user accounts, many website files, many databases and many email accounts in addition to custom DNS settings for each of the websites. In the past, using Cpanel, I have found this process of transferring users from an old server to a new server to be a challenge because all of these things are backed up and restored separately. However, Hestia creates user backup files that include EVERYTHING in each user account. Thus, we can simply download the User Backup File, then replace Debian 10 with Debian 11 and then add the backup files back to the user accounts. Most important, we can do nearly all of these steps graphically by clicking on buttons rather than by entering complex commands in the terminal.
Step 1 Download the Hestia User Backup Files
You should have copies of all of the content and data on all of your websites on your home computer in case this process fails for some obscure reason. In my case, the process worked very well and I did not actually need to restore anything from the files on my home computer. Hestia created an exact copy of everything.
Log into your Hestia Admin Panel and then go to the Users screen to view a list of your Hestia Users. I did not download a backup of my Admin user because my admin user does not have any websites and because Hestia will automatically create a new admin user when it is reinstalled on your VPS.
I did have several normal Hestia Users. Each user has its own website files and its own backup file. Click on the arrow to the right of the first user to go to the user account. Then click on Backups. Then select the backup file (by default there is only one – but it is updated every day). Select the file and click on the first icon on the right of the file which is the backup download icon:
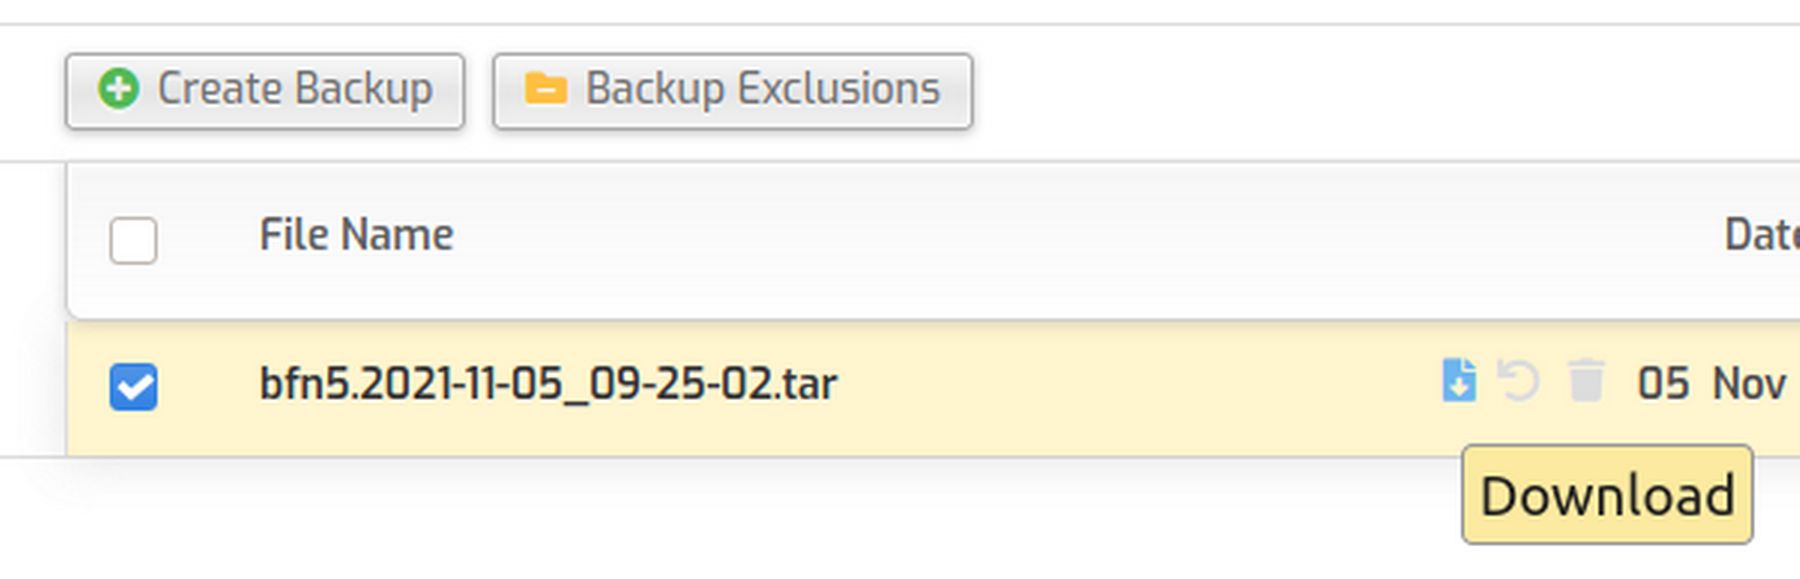
This will place a TAR file in your home computer Downloads folder. Repeat this step to create a TAR file for each Hestia User in your Downloads folder. Note the Hestia names for each user as we will recreate these after installing a new version of Hestia on our new Debian 11 server. (Note: Hestia developers have said the backup will automatically recreate the users. However, it is very easy to create the users yourself before restoring the backup files for the users).
Step 2 Replace Debian 10 with Debian 11
This process varies from one VPS host to another. Here I describe the process of replacing Debian 10 with Debian 11 used by an excellent Canadian Web Host called Canhost dot ca.
Log into your Canhost account and click on Services. This will show a list of your virtual private servers. Click on the ACTIVE button for the server you want to reflash. . Then scroll down and click Reinstall. Then choose the Debian 11 Template. Then confirm you want to install the new operating system. It will then take a few minutes to replace Debian 10 with Debian 11.
Step 3: Log into your new Debian 11 VPS
Open a terminal on your home computer and type ssh followed by a space followed by your Canhost User Name. Then type (at) followed by your server primary IP address. ssh
Because the IP address is the same but the server is new, your terminal will complain that you cannot connect with this account. However, the complaint will end with a command you can copy paste into the terminal to replace your old SSH credentials with new ones. After executing this command, you will be allowed to create a new SSH link to the IP address. Type yes. Then enter your Canhost password. If you forgot your VPS user name or password, you can submit a ticket and Canhost staff will help you. The remaining steps are identical to the steps used to install Hestia on your Debian 10 VPS.
Step 4: Create a Root User and Root Password
You can later disable the root user. But to install Hestia, we need to enable logging in to SSH as a root user and create a root password. To enable logging in to SSH as a root user, type or copy paste the following command into the terminal:
sudo nano /etc/ssh/sshd_config
Type Alt plus C to display line numbers. Then use the down arrow on your keyboard to scroll down to line 34 and delete the hash sign in front of Permit Root Login. Then use the right arrow to select and delete no and replace it with yes. Then Save the file with Control plus o followed by Enter. Then close the file with Control plus x. Then restart SSH services by copy pasting the following into the terminal:
sudo systemctl restart sshd.service
Then create a root user password by copy pasting the following into the terminal: sudo passwd root
You will then be prompted to type in a root password twice. We should also install Midnight Commander as it will be needed later. Here is the command: sudo apt install mc
Then exit the user ssh session without turning off the server by typing exit. Then close and reopen the terminal.
Step 5 Prepare your VPS to Install Hestia
Start a root SSH session with ssh
Then type in your root password. We next need to uninstall the firewall that Canhost adds to all new servers. Change to the firewall folder by copy pasting the following command into the terminal:
cd /etc/csf
Then uninstall the CSF firewall by copy pasting this command into the terminal:
sh uninstall.sh
Then go back to the root folder by typing this command into the terminal:
cd /
Update the server with this command:
apt-get update
followed by this command:
apt-get upgrade
Then verify your Fully Qualified Domain name with this command:
hostname -f
Step 6: Install Hestia
This step is done while still logged into your Root SSH session. To get the latest install command, visit the Hestia control panel home page at this link and copy paste the command shown in Step 3 Download the installer. Here is the command I used:
wget https://raw.githubusercontent.com/hestiacp/hestiacp/release/install/hst-install.sh
This will complete in just a few seconds. There is a command on the Hestia CP home page to download the complete version of Hestia. However, the complete version includes ClamAV which will use an entire GB of RAM on your server. I think this is crazy and that Clam AV is not needed. I therefore recommend copy pasting the following command which will install Hestia without Clam AV:
bash hst-install.sh --clamav no
You will then be asked three questions. For the first, type capital Y for Yes. For the second, type your secure email address. For the third, type your fully qualified domain name, which should be something like: ns1.mycustomserver.com
Then press Enter. It will take 5 to 10 minutes for Hestia to install. After the installer finishes, it will end with Press any key to continue. Do not press any key! First, scroll up the page and copy paste the Hestia log in URL and password!!! Then scroll back down the page and press Enter. Then close the terminal. The server will restart.
Step 7 Log into your Hestia Control Panel
Open a browser and copy paste the Hestia log in URL:
https://ns1.mycustomserver.com:8083
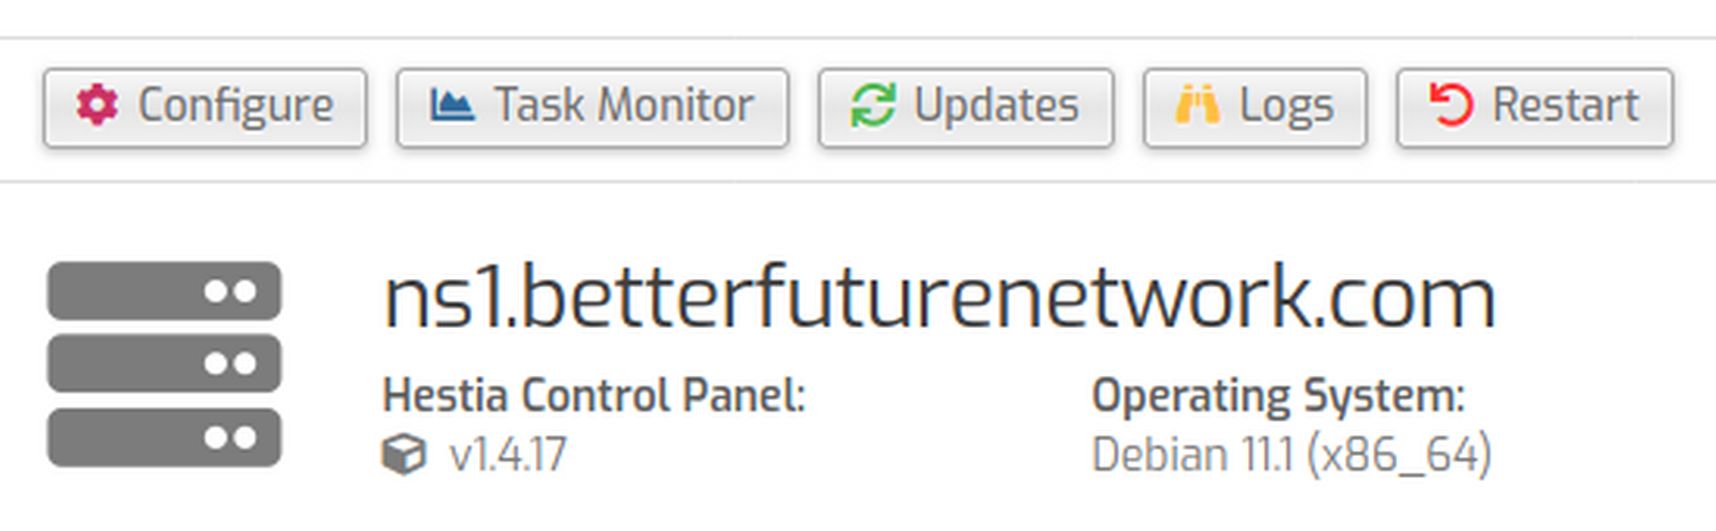
The port 8083 at the end is the default Hestia port and can be changed later. This will bring up the log in screen. Type admin. Then copy paste the password you got at the end of the Hestia installation process. This brings up the Hestia Admin screen. Click on the Server Settings wheel. Then click on Configure. Then click Basic Options and change Appearance from Dark to Default. Then click Save and Back. Here is our server showing it is now on Debian 11:
Click Users and change the admin password. Then click Save and Back. Then click Add User to add one of your Hestia Users. I used the exact username and website name as was on my Debian 10 Hestia admin panel.
Step 8 Add the First User Backup File to the Admin Temp Folder
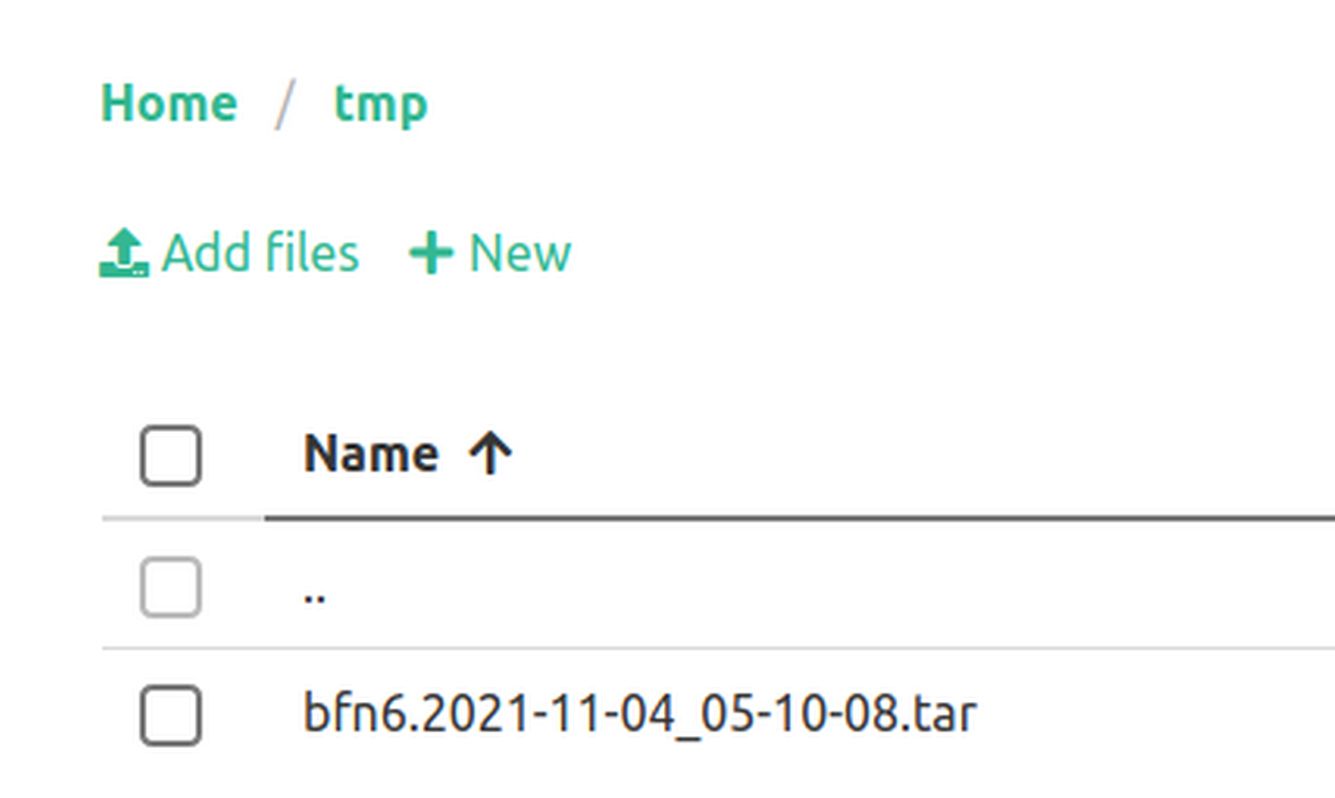
While in the Hestia Admin account, click on Files. Then click on the Temp folder. Then click on Add files. Then go to your Home computer Downloads folder to add the Hestia User Backup file to the Hestia Admin Temp folder:
Step 8 Use Midnight Commander to Copy the Backup File to the Hestia Backup Folder
Open a terminal and start a root SSH session with
ssh
Then type in your root password. Then type mc to open Midnight Commander. Midnight Commander has two panes. Use the left pane to navigate to the /home/admin/temp folder. Then use the right pane to navigate to the /backups folder. Then select the backup file in the admin temp folder. Then click Edit Copy which brings up this screen:
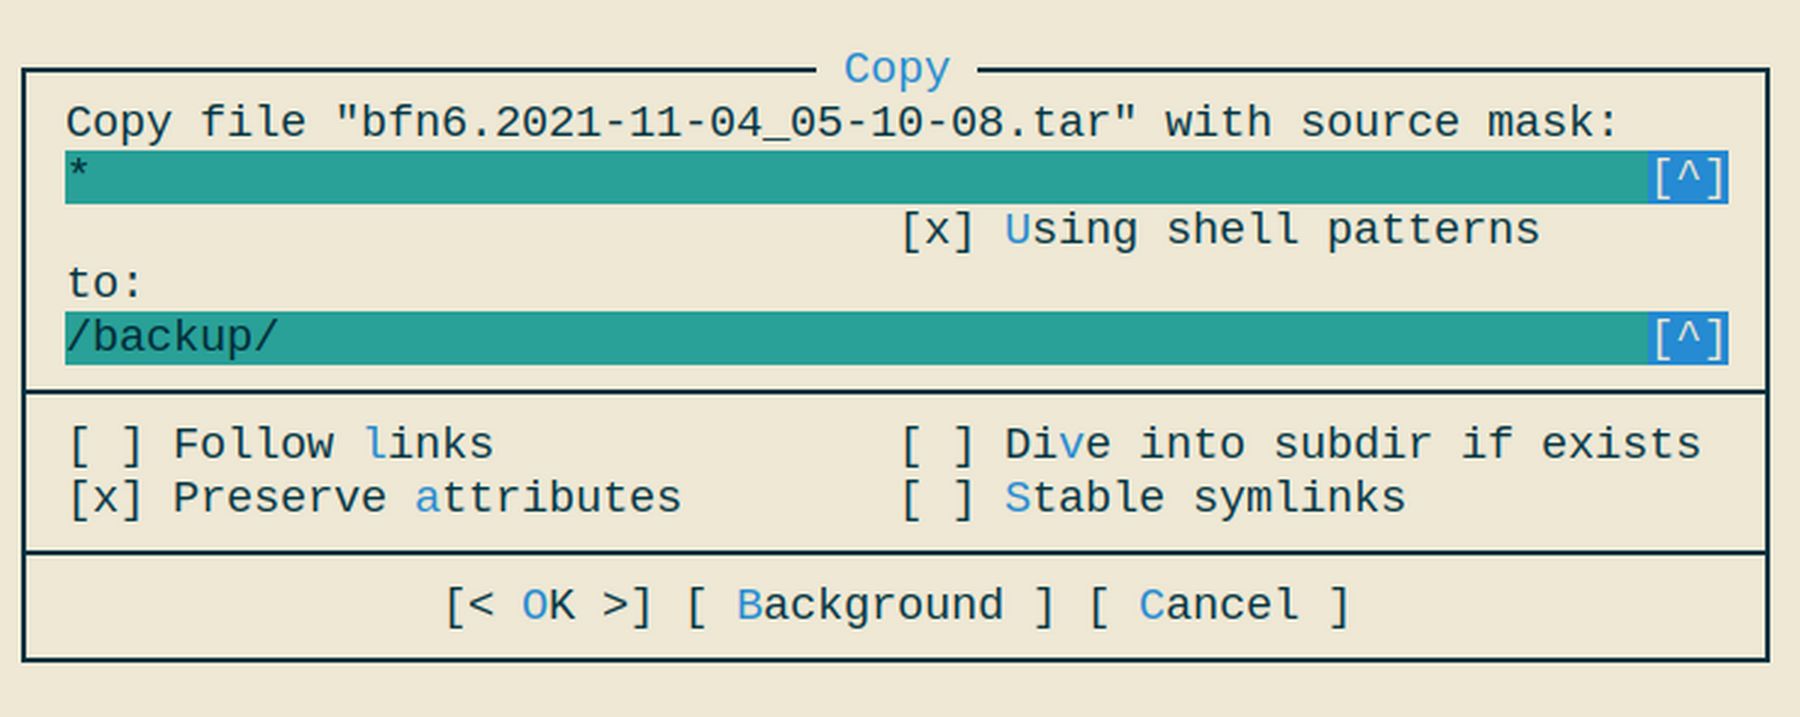
Click OK. This will copy the user backup file to your Hestia Backup folder.
Step 9 Use the Backup File to Restore the Hestia User Account
Type exit to exit Midnight commander and return to your terminal screen. Change folders to the Hestia backup folder with this command: cd /backup
Then copy paste the command to restore the Hestia user account:
v-restore-user user1 user1.2021-11-04_05-10-05.tar
where user1.2021-11-04_05-10-05.tar is the name of the user1 backup file. Then exit the SSH session by typing exit.
Step 10 Go to the Hestia User Account to Verify all was Restored
From the Admin Users screen, click on the arrow to the right of your Hestia User to go to that Hestia User Control Panel. Then use the up arrow to the right of the restored website name to visit the website. You can also click on the Mail screen to verify that the email accounts were restored and click on the DNS screen to verify that the DNS settings were restored.
Step 11 Delete the Hestia User Backup File
Go back to the Admin Control Panel and click Files, Temp. Then click on the three dots to the right of the user backup file. Then click Delete. Repeat the above steps for each Hestia User you want to restore.
Step 12 Fix your PHP INI file
Open a terminal and start a root SSH session with
ssh
Then type in your root password. Then type mc to open Midnight Commander. We next need to edit the PHP ini file which is in the following path: /etc/php/7.4/fpm/php.ini
Open to the etc folder, click on the php folder to open it. Then click on the 7.4 folder to open it. Then click on the fpm folder to open it.
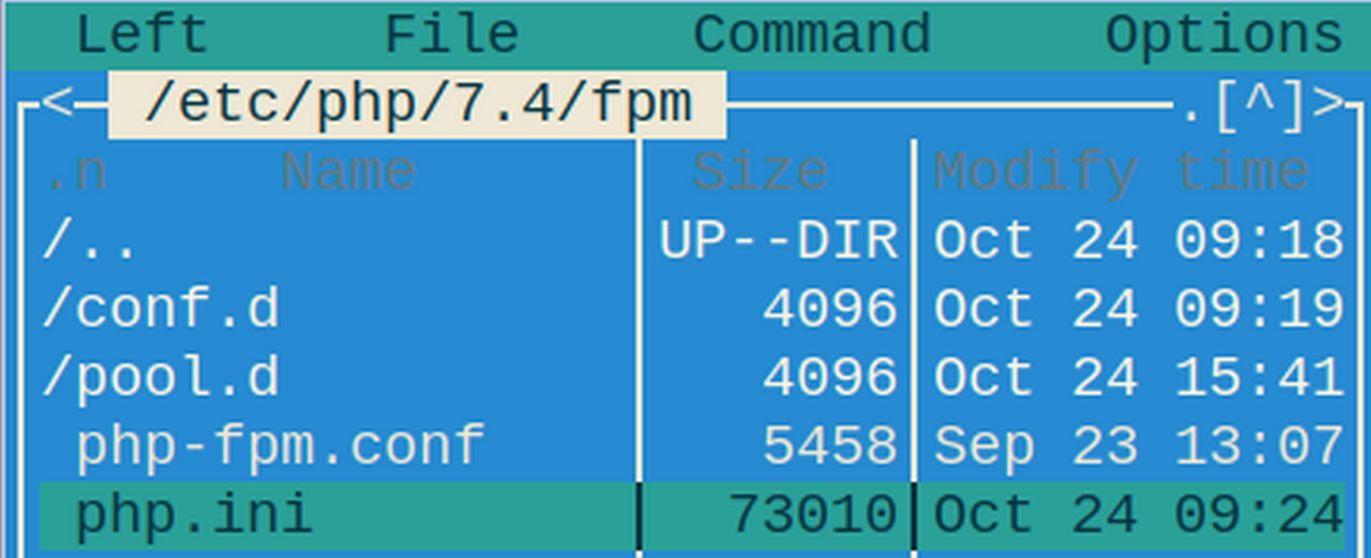
After selecting php.ini, click File Edit to open the php.ini file. To add line numbers to the Midnight Commander edit screen, press Alt plus c to show the line numbers. Scroll down to line 215 which does not have a semi-colon in front of it and is therefore active.
Change output_buffering = 4096 to output_buffering = Off.
Then scroll down to line 694 and increase post max size from 8M to 28M: post_max_size = 28M
Then scroll down to line 846. Increase upload max file size from 2M to 22M.
Then scroll down to line 849. Increase max file uploads from 20 to 30. This will allow us to upload up to 30 images at a time instead of the current 20.
Then save the PHP INI file with Control plus o followed by Enter. Then close the file with Control plus x. Then type exit to close Midnight Commander. Then type exit to close ssh session without turning off server. Then close the terminal.
Restart Several Hestia Services for changes to take effect
Back at the Hestia Admin screen, click on Server settings and restart php7.4-fpm.
Congratulations. You now have a fully restored Debian 11 VPS!
What’s Next?
In our last chapter, we will explain how to migrate existing websites from Cpanel to your new Hestia VPS.