
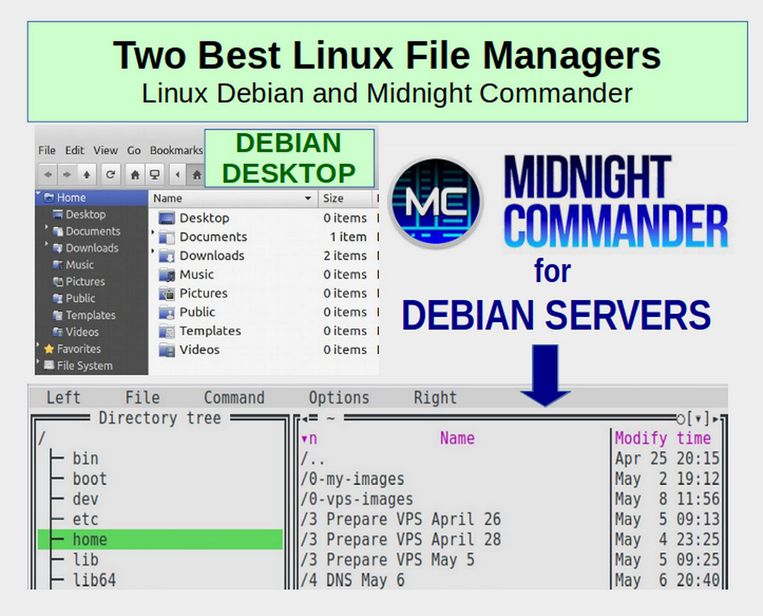
One of the biggest challenges of working with a virtual server is that it does not come with a desktop environment. Rather than clicking buttons, you need to enter commands in a terminal. The problem with the terminal is that, it can be very difficult for visual learners (who make up half the population) to be constantly entering a series of complex commands into an abstract tool like the terminal. Thankfully, the Linux community also provides a graphical user interface for a server File Manager called Midnight Commander. In this article, we will learn how to install and configure Midnight Commander - first on a Debian desktop and then on a Debian 11 VPS.
Why we need to learn how to use Midnight Commander
If you were only only using a desktop laptop like Linux Debian, and never using a VPS, you would not need to learn how to use Midnight Commander. This is because Debian Desktop comes with a great File Manager which is very easy to use. Sadly, the Debian Desktop File Manager can not be displayed on a Linux server. So installing and using Midnight Commander is the next best option.
But there is another more important reason to that it is essential for anyone working with a VPS to learn how to use Midnight Commander. When you have a server, you will frequently need to transfer files from your home computer to your server and download files from your server to your home computer. Historically, folks used FTP (File Transfer Protocol) to transfer files using a free FTP tool called FileZilla. But FTP has security problems and FileZilla has basically turned into malware.
This led to the creation of SFTP which stands for Secure File Transfer Protocol. SFTP uses the Linux Secure Shell also known as SSH. But it requires the use of an SFTP Client. The best and easiest SFTP client is Midnight Commander. We will cover SFTP later when we were review VPS security. Now that we understand how important it is to learn Midnight Commander, we will install it on our Home computer to see how it works. We will then install it on a Debian 11 server to see how the server version is different from the desktop.
Install Midnight Commander
The easy way to install Midnight Commander is to go to the Debian Software Manager and type Midnight Commander. Then select it and click Install. Alternately, you can open a terminal and copy paste:
sudo apt-get install mc
To install Midnight Commander on a Virtual server, your only option is to copy paste the above commands into the Server terminal. Either way, once Midnight Commander is installed, you need to first open a terminal and then type mc. Then press Enter. Here is the initial interface when opening Midnight Commander on a Debian laptop:
Here is the initial interface when opening Midnight Commander on a server:
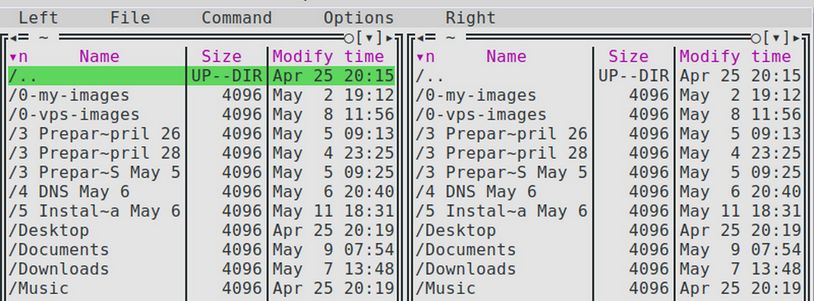
Both open in the User Home folders. One obvious difference is that your Desktop computer has folders called Documents, Downloads and Music while the Server only has a few hidden files. Another difference is that you can generally use your mouse on your Desktop.
On a server, you may need to navigate with the up and down arrows and select folders by pressing Enter on your keyboard. You can gain more function by using SSH to access the server from your home computer whenever the server is running. But be aware that, even when using an SSH session on your home terminal, the server version is not quite as easy to use as the desktop version is. Which is why were are starting by learning Midnight Commander on our desktop computer.
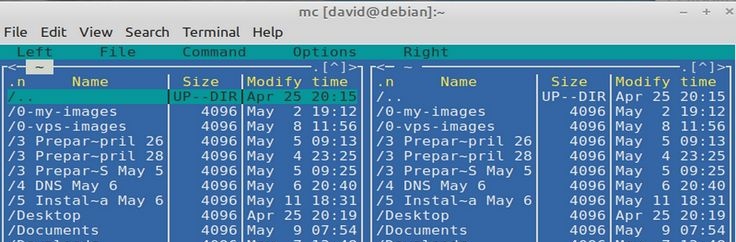
On the Desktop and the Server, Midnight Commander uses a double panel screen. The purpose of this double panel arrangement is to make it easy to copy files from one panel and paste them into the other panel. The panels are labeled Left and Right. Above the panels are a menu that applies to both panels with the menu items called File, Command and Options. Each menu item has a series of sub-menu items, some of which we will cover in this tutorial.
Configure Midnight Commander
Most server tutorials use the initials MC to stand for Midnight Commander. We will do the same in this tutorial.
Change the background to a lighter color
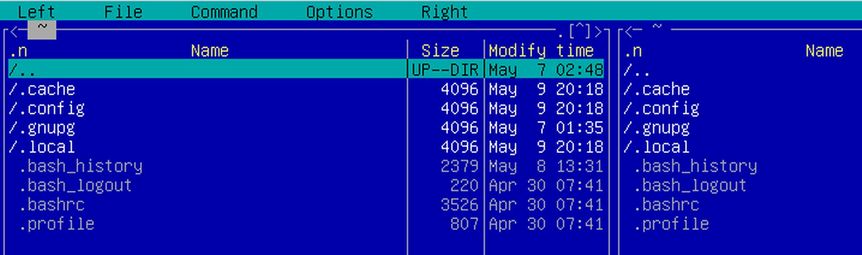
By default, MC comes with light letters on a dark background.
However, using dark letters on a light background is both easier to read and easier to see on screen shots. Therefore the first thing you should do after installing MC is to change the background color. To do this, click Options, Appearance.
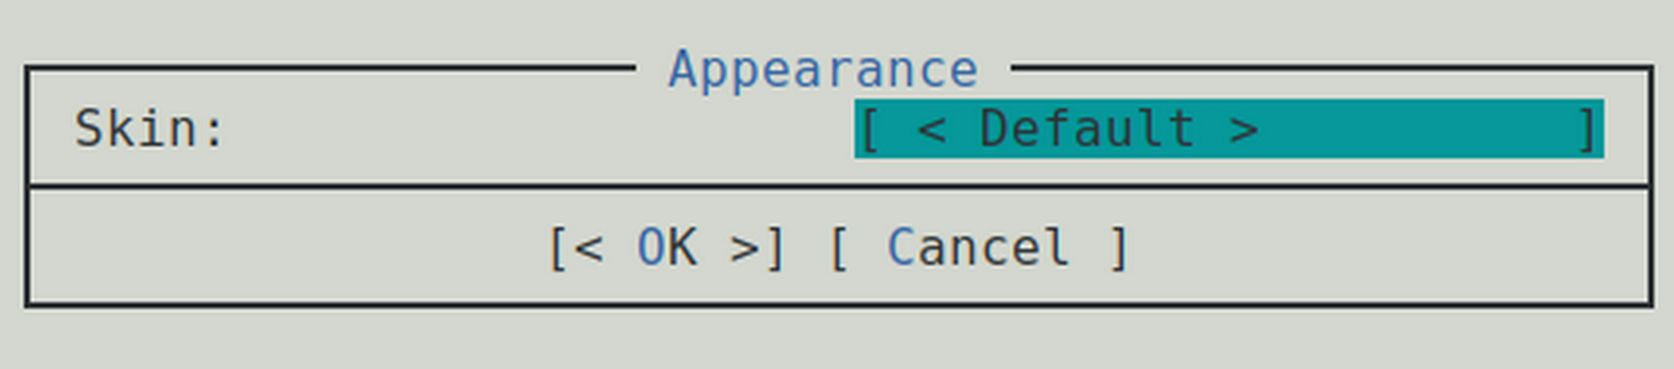
The default skin is called Default. Press Enter to see more options.
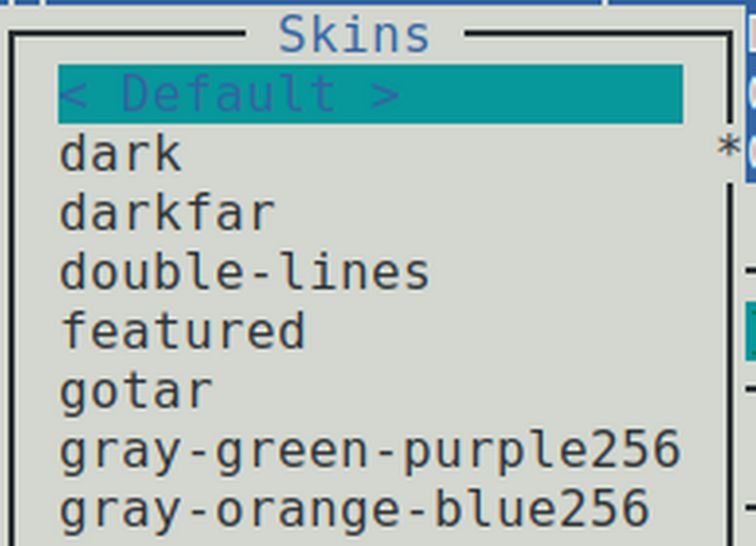
Click Gray, Green Purple (in a server, you would need to use the up or down arrows to select it). Then press Enter. Then press OK.
Hide the Hint Line
There is a Hint Line at the bottom of the page telling you to press Control plus o to change the screen from MC to the Terminal and back again. Try this to see how it works. (Note: sometimes this command does not work. Another option is to use the File menu and click Exit. Then type mc to bring back the MC screen). You can focus more by getting rid of the Hint Line. To do this, click Options, Layout.
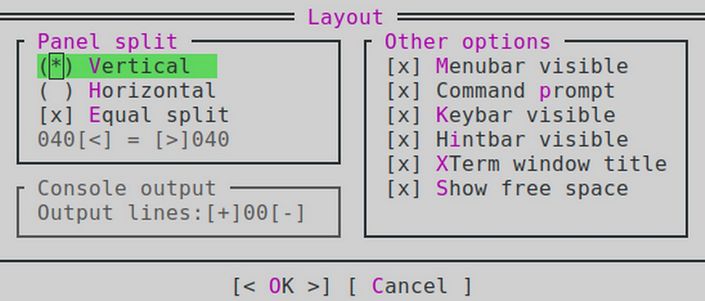
Uncheck the Hintbar Visible box. Then click OK.
Make MC Look Like the Nemo Editor
The Nemo Editor has a narrow column on the left with a tree menu and a bigger column on the right with normal files. We can do something similar with MC. Click Options, Layout. Then Uncheck the Equal Split box. Then use the less than arrow to reduce the left side form 40 to 30. Then click OK.
To save this setting, click Options, Save Setup. Then click the word Left and change the view for the Left panel from File Listing to Tree:
Hide the File Size Column
Click on the word Right to go to the right panel. Then click Listing Format.
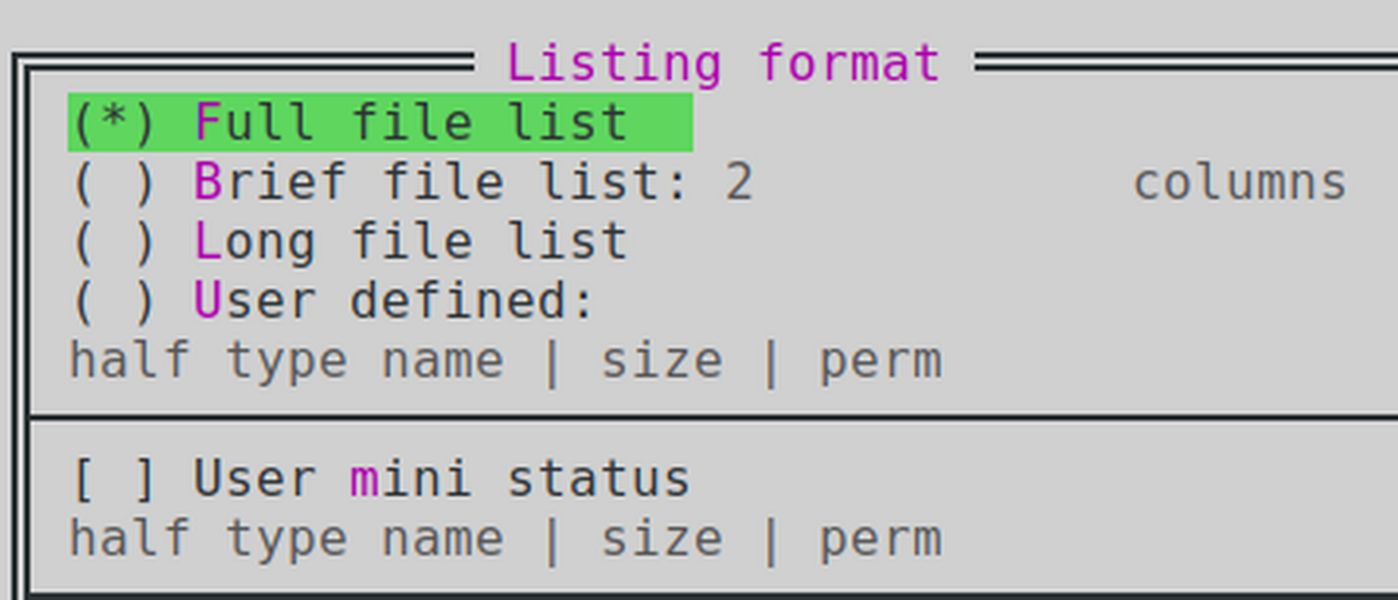
10Check User Defined. Then place your cursor to the right of the word prem (which stands for Permissions) and delete perm and size. Then type mtime.
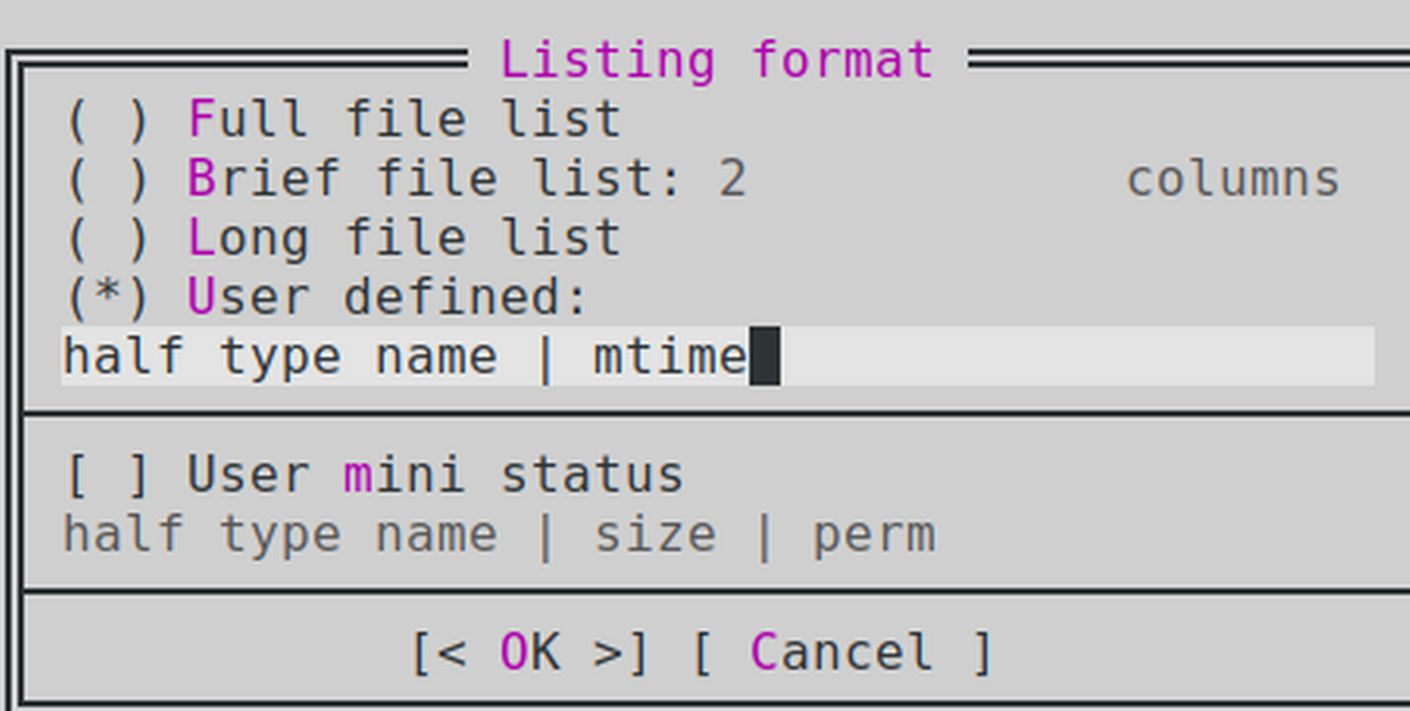
Then click OK.

To open a folder in the Tree view column to see the internal folders, double click on the folder.

This also opens the folder in the right column.
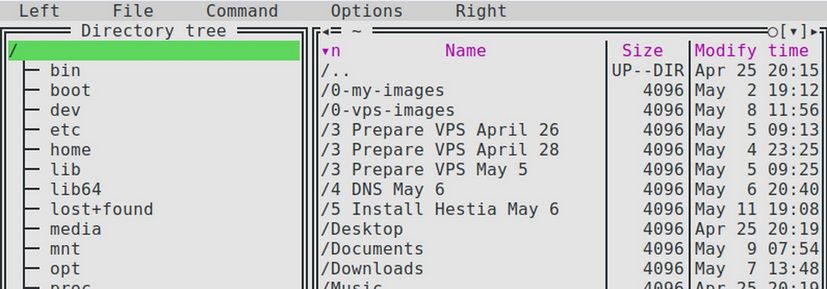
Navigating between Folders
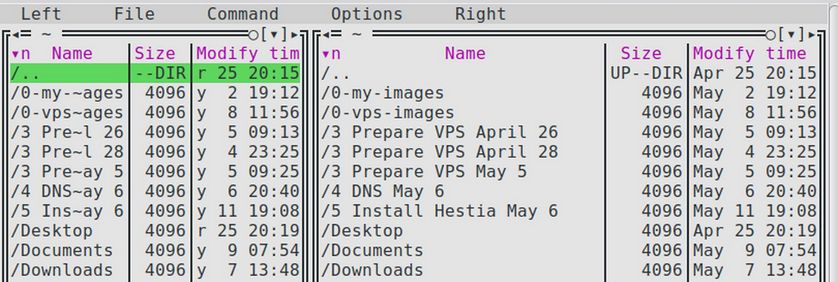
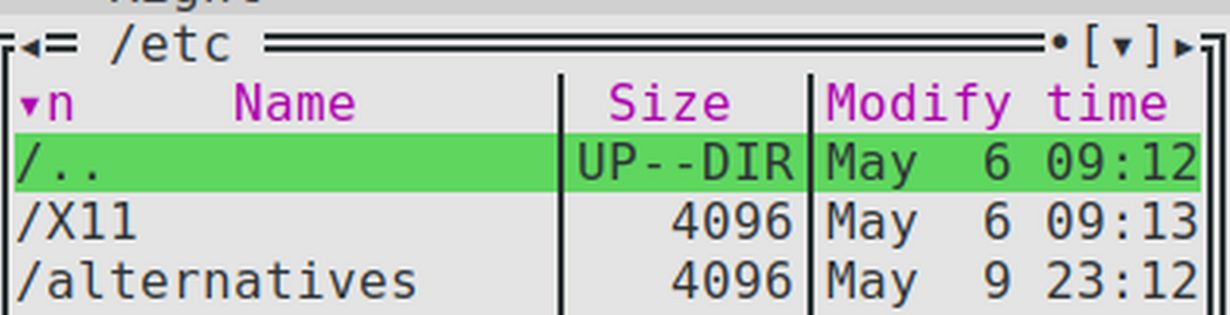
There are three hidden ways to navigate between folders. The first is to notice and click on the two dots at the top of the right panel. Then press Enter. This takes us to the Parent folder which in this case is called /david. Then select the two dots again. Then press Enter.

When working on our server, we are mostly concerned about files in our etc folder. Click on it to select it. Then press Enter to open it.
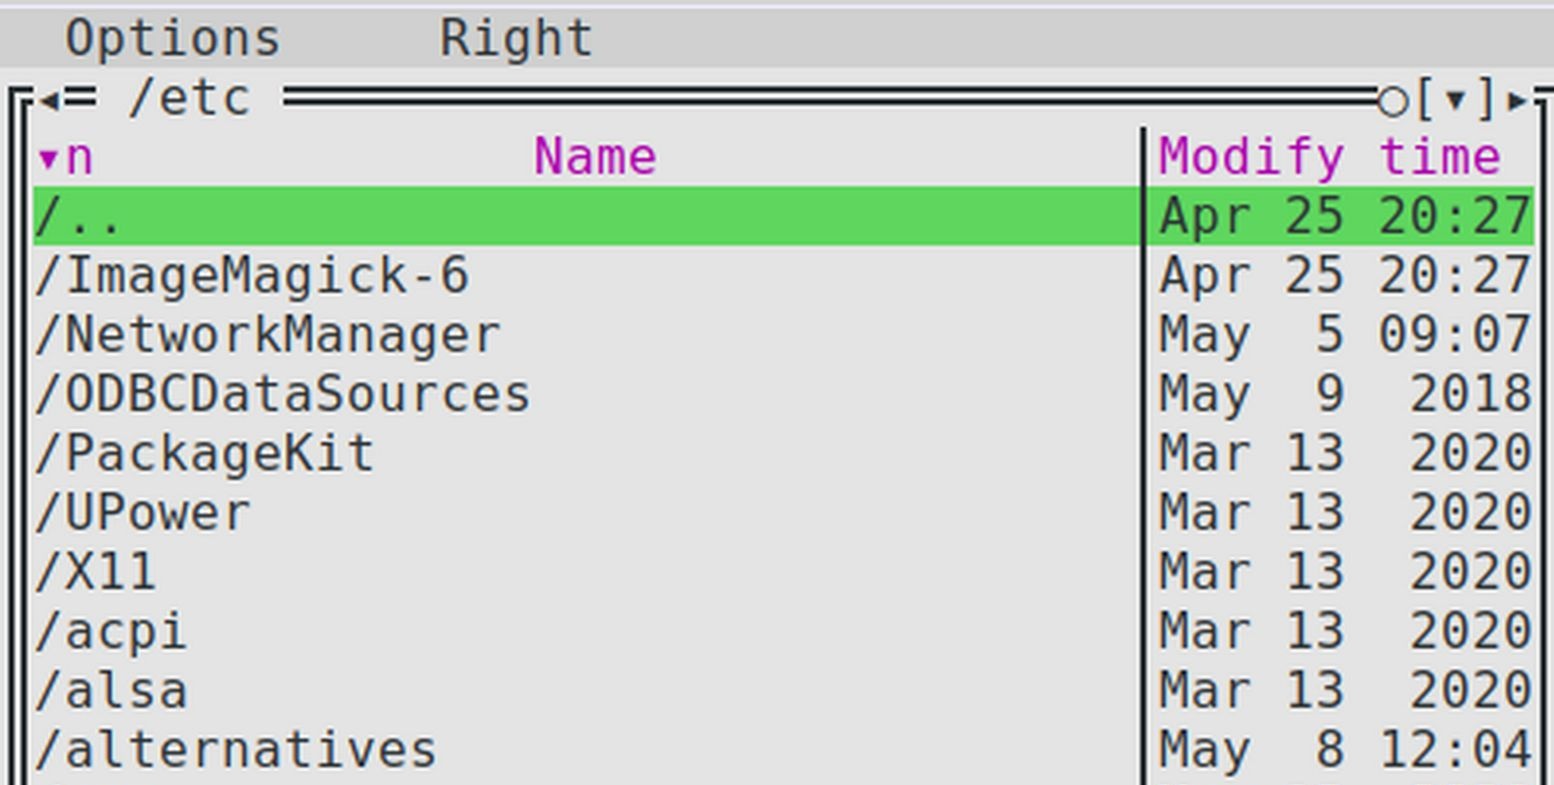
A few folders appear at the top of the list and are not in alphabetical order. These include Network Manager. But most of the folders (and there are many in the etc folder) do appear in alphabetical order.
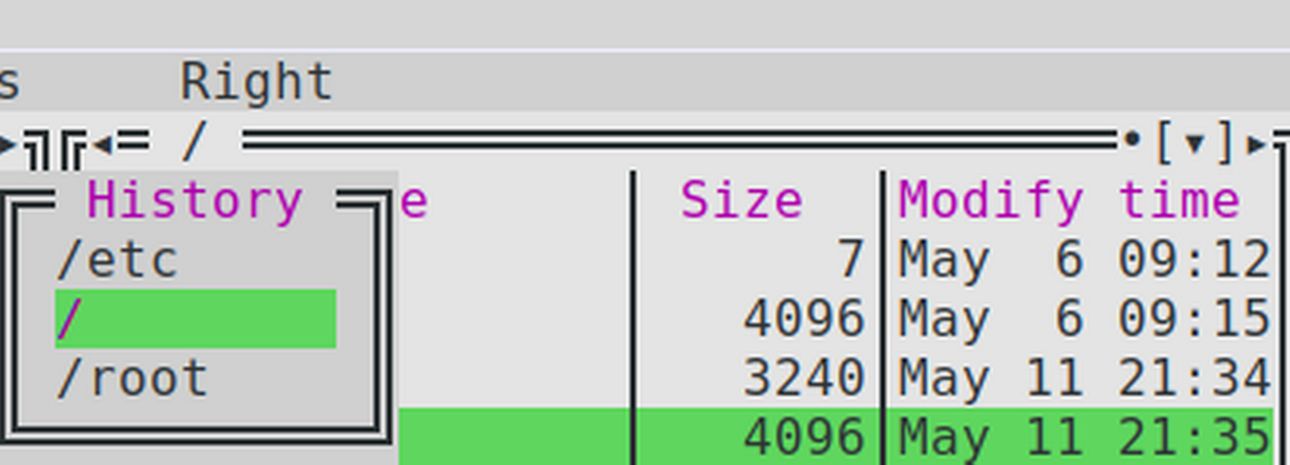
All folders have a slash in front of their name. There are two additional hidden ways to navigate between folders. First, click the small left pointing arrow in the upper left corner to return to the previous folder.

Second, click on the very small down pointing arrow in the upper right corner. This will bring up a history popup where you can click and select any recent previous folder.
Click on the /etc folder to open it again.
How to Open and Edit Files
Use the down arrow to scroll down the list. Below the folders are a series of files all of which are in alphabetically order. As we explained in an earlier chapter, the most important (and oldest) file is called etc/hosts. Scroll down and select this file. If you press Enter, you will notice that files do not open in MC the way they do with Nemo. MC uses a different process to open files. If you simply want to view the file, then Press F3 on your keyboard.
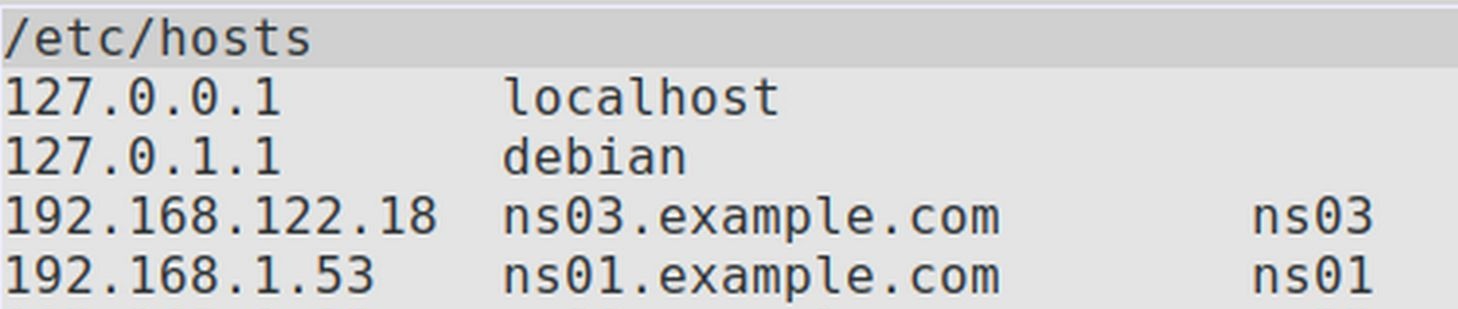
As we explained in an earlier article, you can use etc/hosts to force your browser to display local websites that do not actually exist on the real public Internet. This is a very useful trick for local development. To close a file opened with F3, press F3 again on your keyboard.
Recall that to edit the /etc/hosts file with our terminal, we use the command sudo nano /etc/hosts With MC, we edit a file by pressing F4. The first time we edit a file, MC will ask us what editor we want to use. Type 1, then press Enter to use the Nano editor. A similar screen will appear:
20
However, at the bottom it will say "File is unwritable" because this file is owned by root and we did not open the file as root. To edit files on our server, we will make sure our VPS has a root password. Then we start an SSH session with
Install and Use MC on a Server
Open VMM. Then enter your password. Then start a VPS you have previously created. Then click Open and log into your VPS. Type ip addr. then press Enter, to determine the IP address of your server. You may need to type ip addr a couple of times before the IP address for enp1s0 appears. For example, the IP address for my ns04 VPS is 192.168.1.59.
Note: If the IP address for enp1s0 does not appear, then you do not have an active bridge or NAT connection on this server. For example, my bridge0 connection is not active but my bridge2 connection is active because that it the connection that is using my enx0 USB to Ethernet adapter. Turn off the VPS with the inactive bridge and turn on an IP with an active bridge or NAT connection.
It is easier to work with your home terminal than your VPS terminal. Once you know your VPS IP address, use it to start an SSH session. To start an SSH session as root, your need to know the root password. If you do not recall it or have not set it up yet, start a normal SSH session with
ssh 192.168.1.59
Then copy paste: sudo passwd root
Then enter your user password. Then enter the new root password twice. You should also check to make sure that your ssh configuration file is set to permit root login. Copy paste:
sudo nano /etc/ssh/sshd_config
Then press Enter. Scroll down to the line PermitRootLogin and unhash it. Then change the value to yes. Then click Control plus o, then Enter to save the file. Then Control plus x to close the file. Then log out of the ssh session but leave the server on by typing the word exit. Then close the server with sudo poweroff. Then restart the server to enable the changes to the ssh configuration files.
Assuming you have set up a root user and password on your VPS, and assuming your server is running, open your home terminal and type
ssh
Then enter your root password. Install Midnight Commander with the following command:
sudo apt-get install mc
Then open MC by typing mc. Then press Enter. This is the server home folder:
To change the background color, click Options, Appearance. Then press Enter to choose the Gray skin. Then press Enter and OK. Then click Options, Save Settings to save the settings.
Navigate to the root folder by pressing the two dots. Then press Enter. Then use the up arrow to select the etc folder and press Enter.
Then scroll down to the hosts file. Then click F4 to edit it. Type 1 to select the Nano editor. Then press Enter.

Note that we have set a static IP address and fully qualified domain name for ns04. Close the file with Control plus x. We are nearly ready to install Hestia.
What’s Next?
In the next chapter, we will learn how to create a bridged connection so that our VPS can be seen on the public internet.