
In this article, we will review two questions. The first is whether and how to use a local domain name. The second is whether and how to use a local IP address. We will then explain how to install a static IP to a VPS with a bridged connection.
Local Domain Names
When you are first developing a website, you may not have or want to use a real public domain name. Instead, you may want to use a reserved domain name like example.com or a reserved top level domain (TLD) like dot example or dot test. I have used dev.test and example.com in the past. But these are difficult to get an SSL certificate for.
Others have advocated for the use of dot local as a local domain name (for example, mynetwork.local). The problem with dot local is that it is not a reserved TLD. In addition, the TLD local is now used by a local network program called Multicast which in turn is used by the Linux program Avahi. Any DNS query for a domain name ending with the label local must be sent to the mDNS IPv4 link-local multicast address 224.0.0.251. This service will automatically resolve the private IP addresses and respond to mDNS hostname.local queries.
Avahiz Zeroconf Browser is available in the Debian Software manager. Once installed, Avahi automatically uses your computer's hostname plus the .local extension as it's domain name. So if your machine's hostname is mediaserver, then you can access it on the network by typing mediaserver.local into the URL bar of any computer that has Avahi installed on it.
Others have advocated using dot lan (lan stands for local area network). However dot lan is also not a reserved TLD. So it is not wise to use dot local or dot lan.
Another option is to buy a real domain name and use that for local development. This will help with getting an SSL certificate for local development. It also helps when setting up custom email accounts in a test server. It will also help with DNS resolvers. You may need to add DNS records for the domain name and sub-domains via your domain name hosting account.
I have a domain name localdevtest.com that I use for local development. You can also use a sub-domain of a domain that you already own. For example, I own the domain name davidspring.org. I could use the sub-domain local.davidspring.org for local development.
Public versus Private IP address required for SSL certificate
Domain names whether public or private can be linked to an IP address using the etc/hosts file.

However, we also need to understand how nameservers shown in the etc/resolv.conf file treat public versus private IP addresses. Recall that one way to add name servers to your Wired Connection 1 is to click on Network Connection and select Wired Connection 1. Then click the edit wheel and click the IP v 4 tab. Then add the IP addresses of the DNS resolvers you want to use to the Additional DNS servers box. Then click Save. Then restart your laptop.
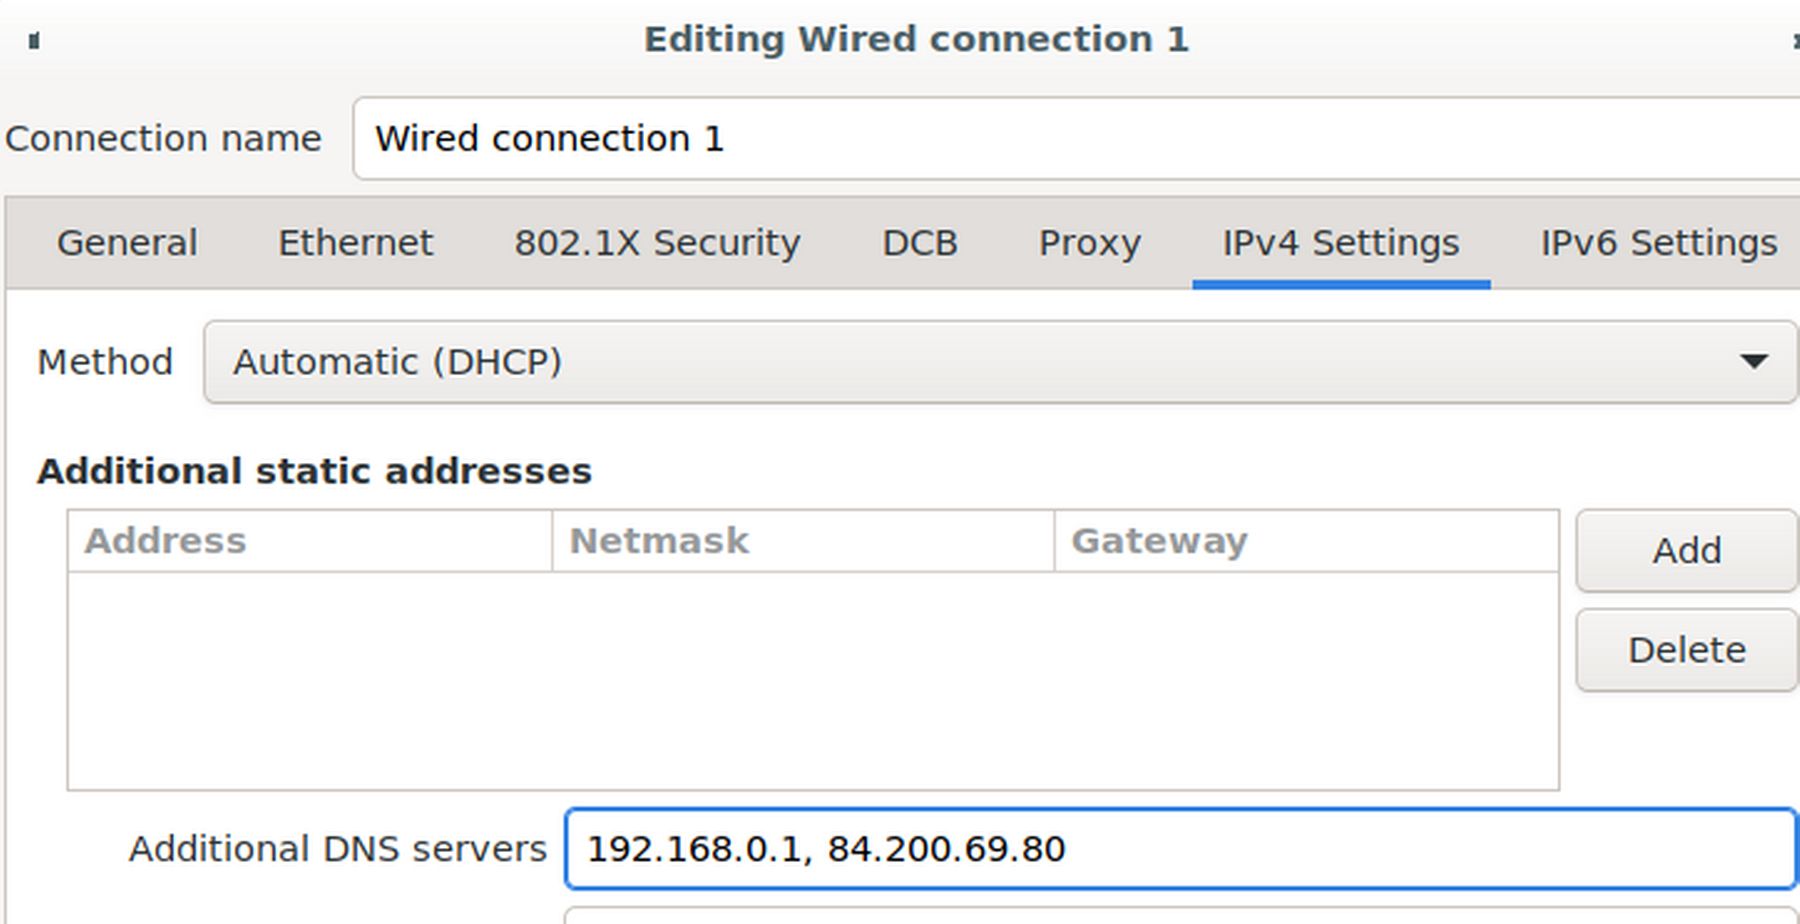
To see your current name servers, open a terminal on your home computer and type cat /etc/resolv.conf
Here are my current name servers on my home laptop:
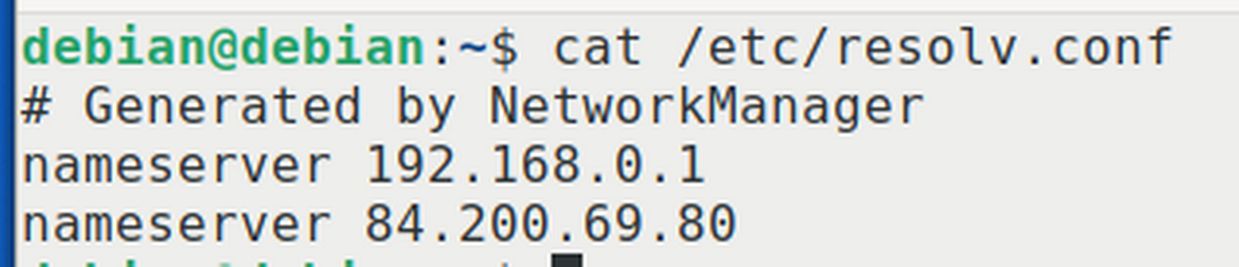
192.168.0.1 is the Gateway IP address of my local network. The other IP address is a public domain name resolver called DNS Watch 84.200.69.80. Note that the resolv.conf file can only work with up to three name servers.
You can also add Domain Name servers using the file /etc/dhcp/dhclient. Line 26,
prepend domain-name-servers 127.0.0.1;
Then save and close this file. Then restart your laptop.
Some tutorials also recommend setting the name server using the etc/network/interfaces file. But as we have discussed previously, there are many times when this will not work as other files may have priority over this file. Even worse, using this file can cause an entire network to go down.
You can test the DNS name resolution process by pinging a hostname:
ping -c 3 debian
Your Public versus Private IP Address
To see your public IP address, go to
A few months ago, this search showed this public IP address:
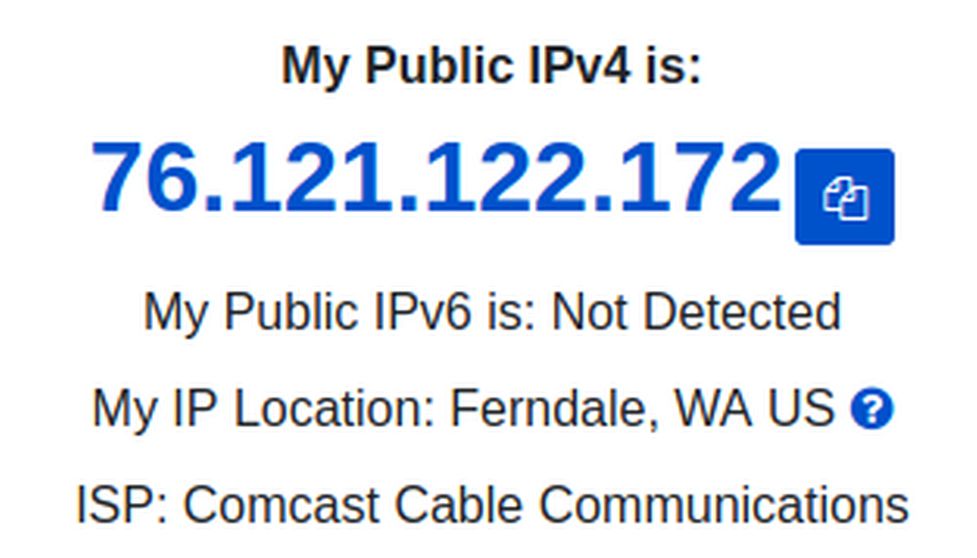
This is the public IP address given to me by Comcast. Public IP addresses are required for any publicly accessible network hardware such as a home router and servers that host websites. However, currently my public IP address assigned by Comcast is 76.28.214.202. So it is not really a static IP address.
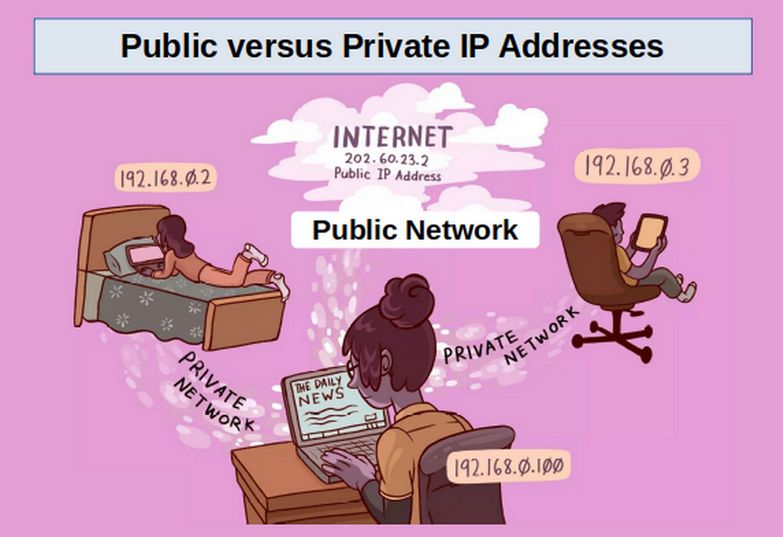
My private IP address is determined by my router and is 192.168.0.1.
With private IP addresses, the devices in your home can have the same private IP addresses as your neighbor's devices and they will not be able to see each other. This is because private IP addresses are non-routable to the public Internet. They are only routable to devices that are connected directly to your private router. Your router serves private IP addresses to the devices privately connected behind your router.
Because these private addresses are restrained from reaching the public Internet, you need a public IP address that can reach the rest of the world. Your Internet Service Provider (ISP) delivers public IP addresses of public domain sites to the devices that are publicly connected to the internet (like your router).
When you open a website from your computer, the request is sent from the computer to the router as a private IP address, after which the router requests the website from your ISP using the public IP address assigned to your network. Once the request has been made, the operations are reversed: the ISP sends the address of the website to your router, which forwards the address to the computer that asked for it.
Private and Public IP Address Ranges
Certain IP addresses are reserved for public use and other IP addresses are reserved for private use. The following ranges are reserved for use as private IPv4 addresses:
10.0.0.0 to 10.255.255.255
192.168.0.0 to 192.168.255.255
The 192.x.x.x addresses aren't registered publicly, which means they can only be used behind a router as private IP addresses.
Why Public IP Addresses Change
Most of the time, you do not need to know your public IP address. But what you do need to know is that the public IP address you have been assigned to today might not be the same as the public IP address you are assigned to tomorrow. Most public IP addresses change, and relatively often. Any type of IP address that changes is called a dynamic IP address.
When ISPs were new, users connected to the internet for only a short amount of time and then disconnected. An IP address that was used by one customer would then be open for use by another that needed to connect to the Internet. This way of assigning IP addresses meant that the ISP didn't need to purchase a large number of addresses. This general process is still in use today even though most people are always connected to the internet.
However, most networks that host websites have static IP addresses because they want to make sure that users have constant access to their server and our DNS system assumes that your website IP address is static.
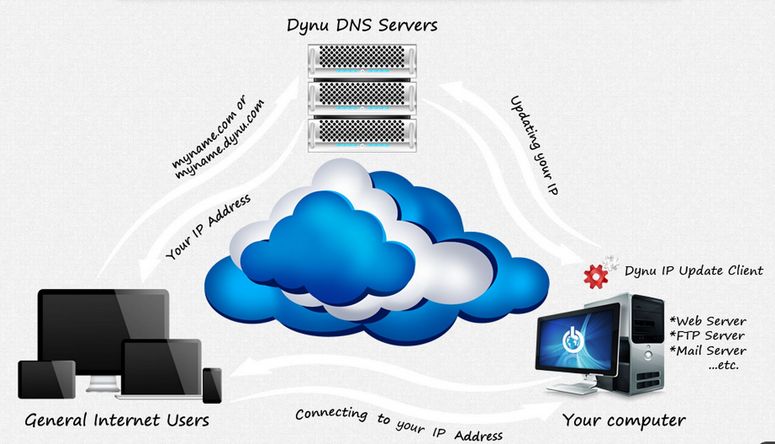
Best Dynamic DNS (DDNS) Providers for Home Networks
One of the biggest challenges for Home networks wanting to host their own websites is that they are assigned a dynamic IP address by their ISP. What a DDNS Provider does is keep track of the dynamic IP address assigned to you and route it through their service. When the ISP changed your IP address, the DDNS service updates their records allowing your website to appear to have a static IP address even though it has a dynamic IP address. Here are two of the best free DDNS Providers:
Dynu Free dynamic DNS service with an easy to use control panel, third-level domain name support, top-level domain name support, global servers, and more. Here is their website:
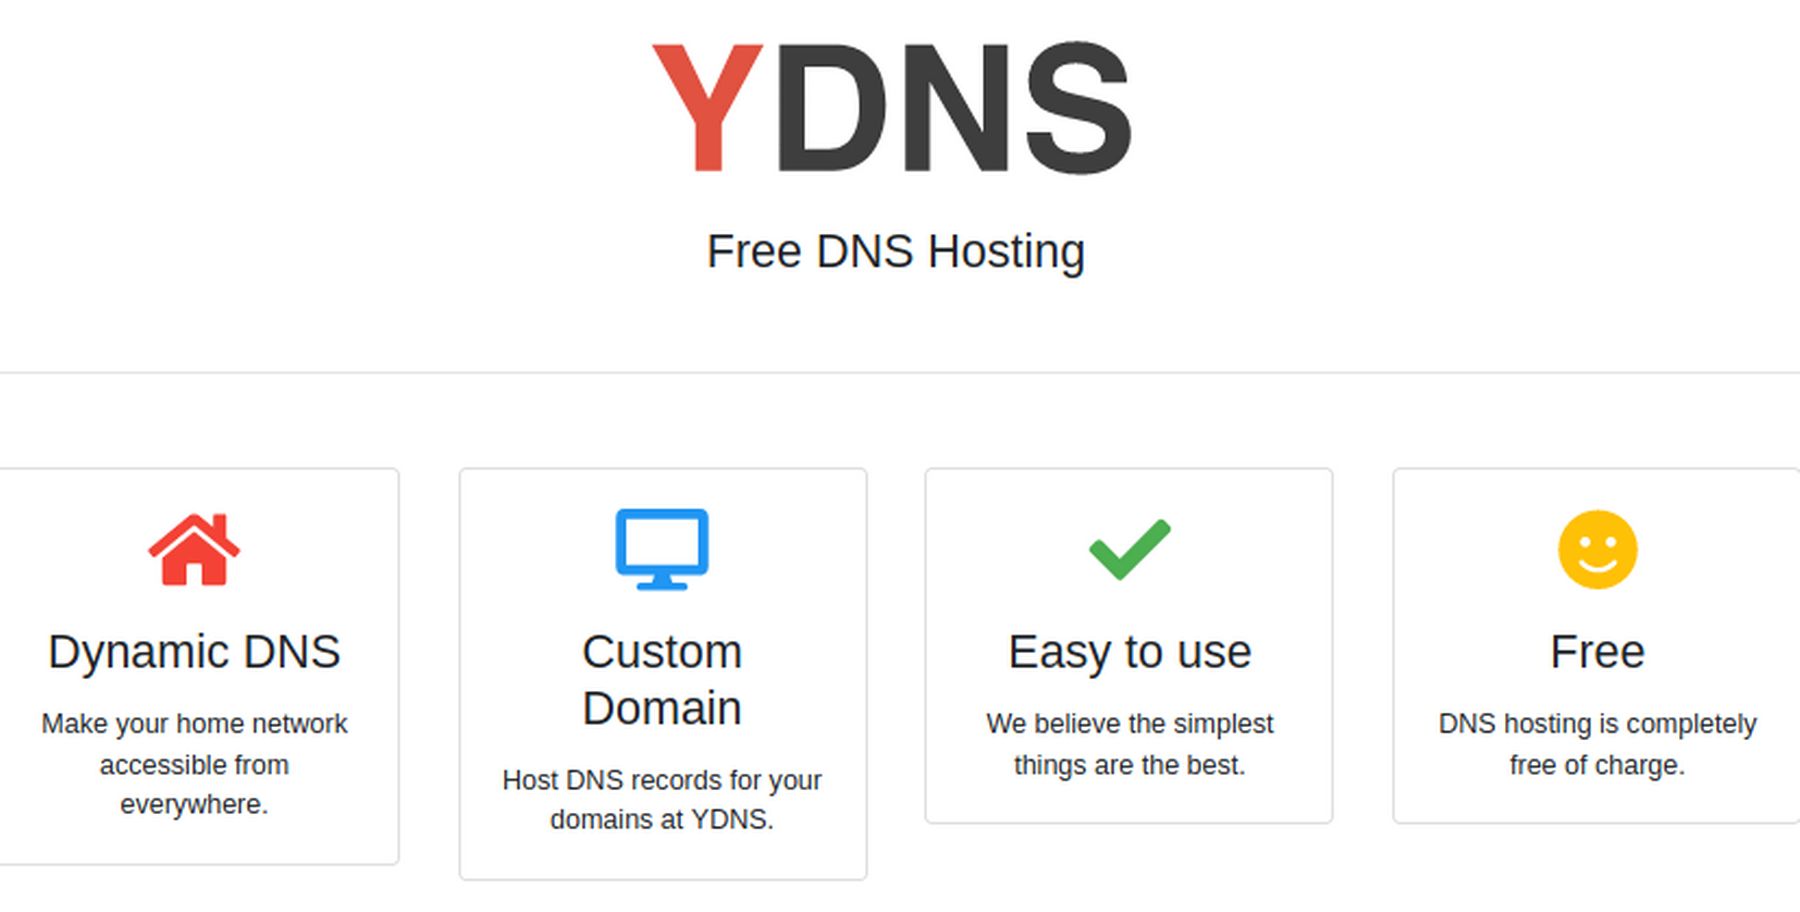
YDNS Free DNS hosting service with unlimited hosts per user, DNSSEC2 support, mail configurations, and more. With YDNS you can create a dynamic DNS for hosts to transform a home network into a permanent hostname. You can manage your domain through the web interface.
Assign an IP to a Bridge VM creating during VMM Install
When we create a VM with Virtual Machine Manager using the default NAT connection, VMM assigns a static IP address which is retained even if we replace NAT with bridge0. When we create a VM with a VMM using a bridge0 connection that has a manual IP, VMM also assigns a static IP to the VM. However, when we create a VM with VMM using a bridge0 connection that uses the Automatic (DHCP) method, VMM does not assign a static IP to the VM. Instead, VMM assigns a random local IP address like 192.168.0.xxx.
Here we will look at other ways to assign an IP to a VPS created with a bridge connection.
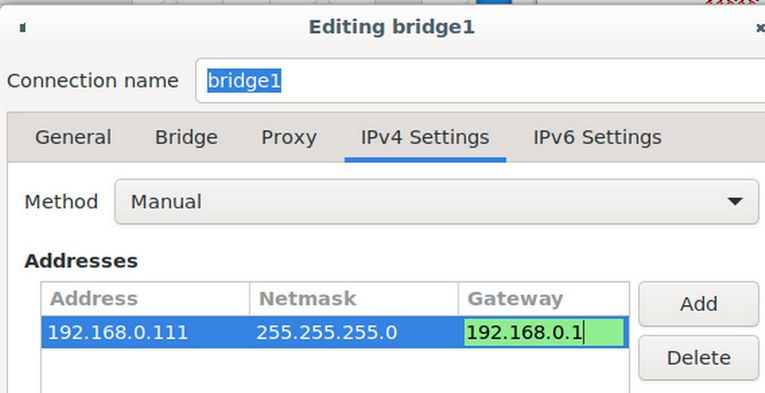
We will compare a bridge0 connection with a with an Automatic (DHCP) connection to a newly created bridge1 connection with a Manual static IP address 192.168.0.111.
Note: To create and use bridge1, we need to first remove the slave from bridge0. Then restart the laptop so enx0 is available for bridge1 to capture and use. Then, use the file manager to add the bridge1 XML file to /etc/libvirt/qemu/networks so VMM can see bridge1.
<network>
<name>bridge1</name>
<forward mode='bridge'/>
<bridge name='bridge1'/>
</network>
Then click Save and Close and close the file manager.
Then open your terminal and copy paste this command:
sudo virsh net-define /etc/libvirt/qemu/networks/bridge1.xml
The terminal should reply: Network bridge1 defined from /etc/libvirt/qemu/networks/bridge0.xml
Then start the network with this command:
sudo virsh net-start bridge1
It should reply that Network bridge1 started. Then set the network to autostart with each reboot with this command:
sudo virsh net-autostart bridge1
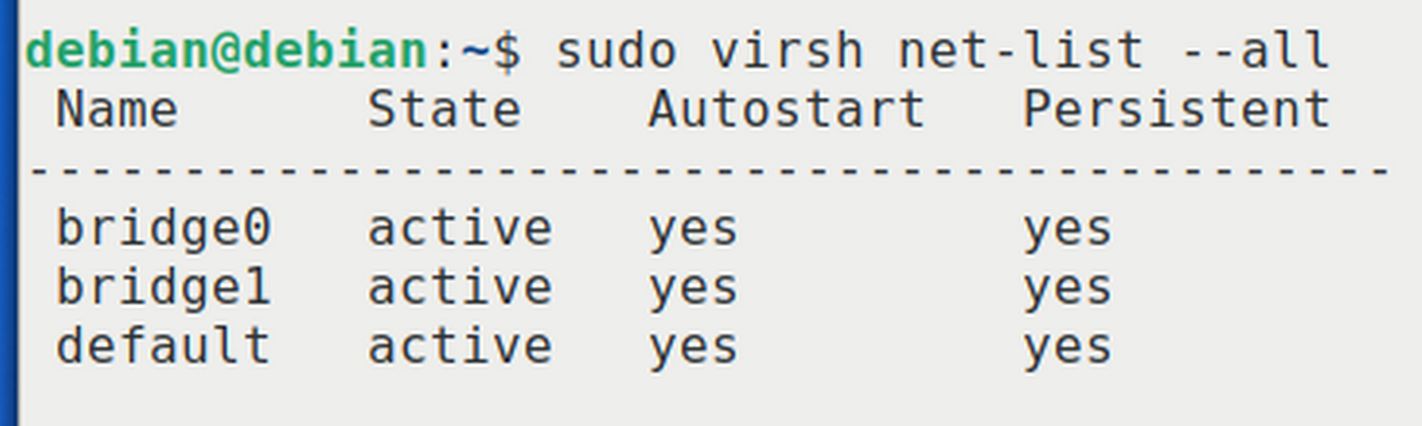
It should reply that Network bridge1 marked as autostarted. Then to confirm the network status, copy paste this command.
sudo virsh net-list –all
Close the terminal.
Use Virtual Machine Manager to Create ns04
Once we have enx0 working properly again and displaying when we click on the Network icon in our taskbar, we can then open VMM and use it to create ns04 with the bridge1 connection. At Step 5, rename the VPS ns04 and select bridge2:
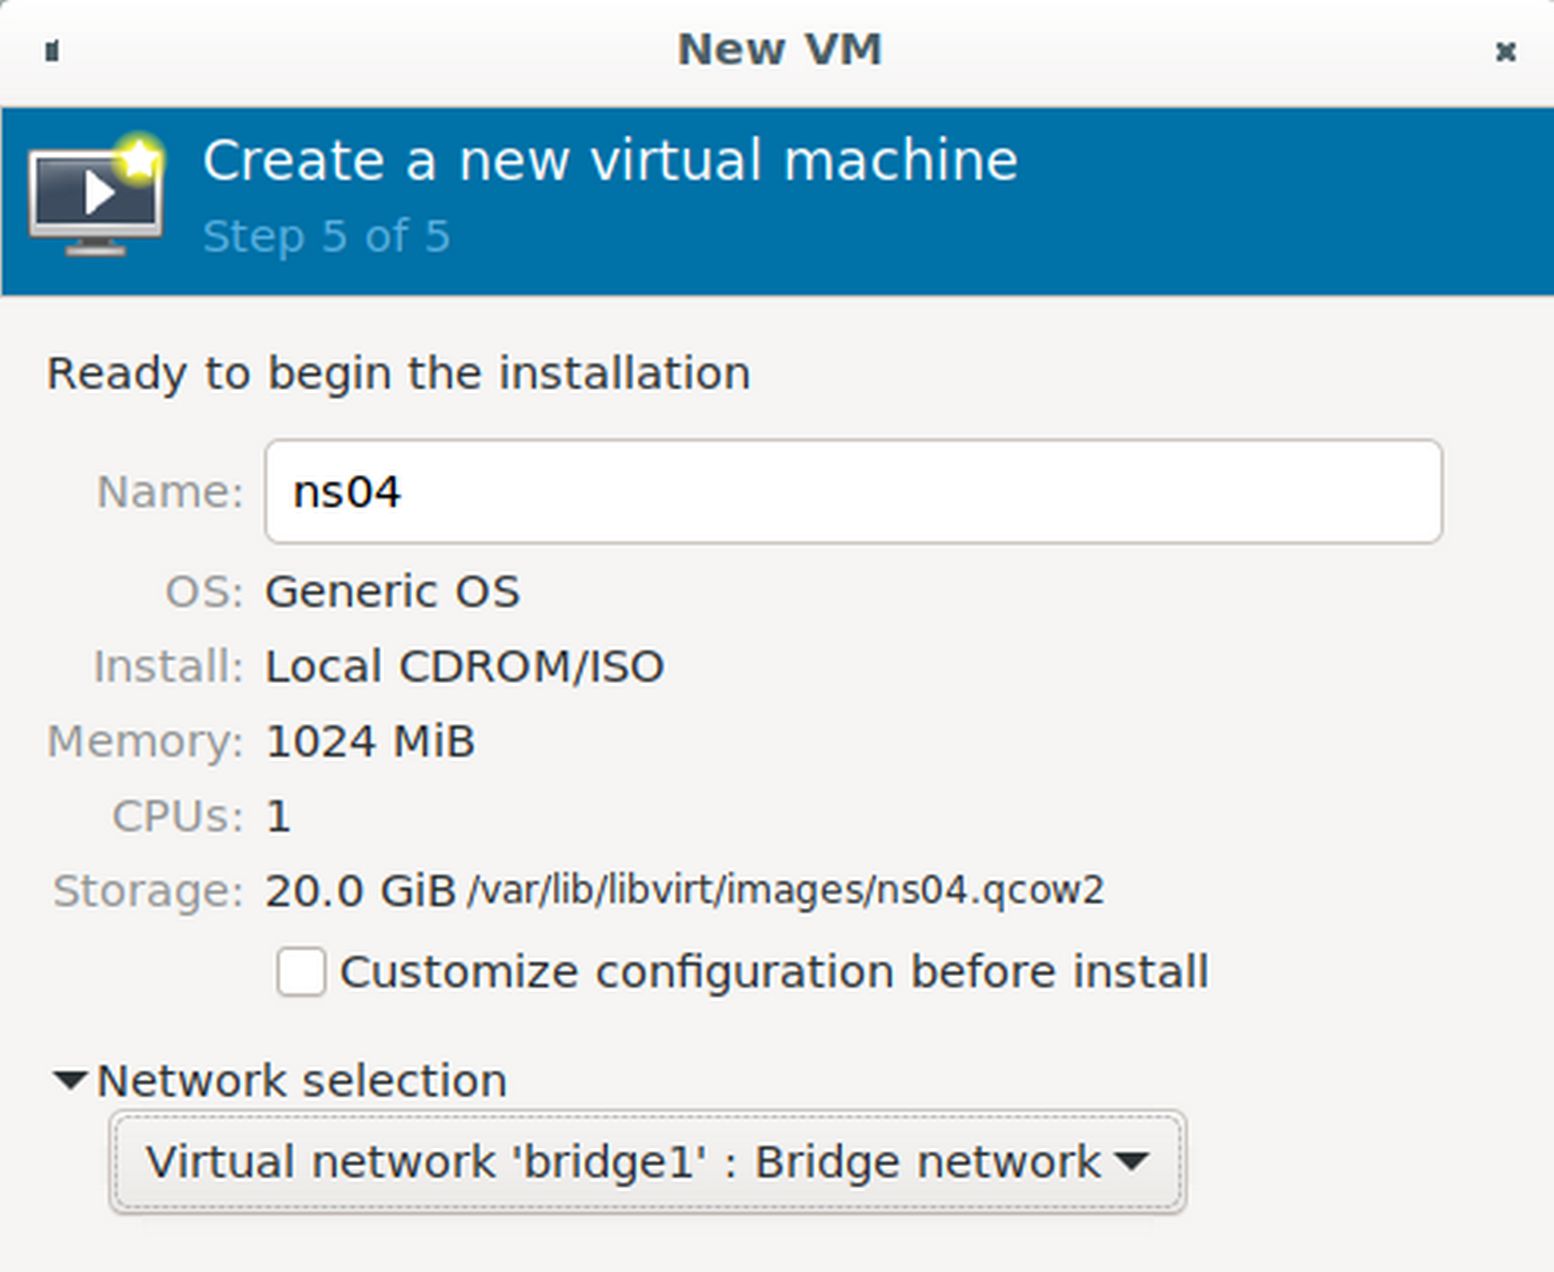
Then click Finish which will start the Debian installer. Call the new VPS ns04 with example.com as the domain name. When install is completed, log in and type ip addr. Sadly, ens3 has no assigned IP address. We will now try to add an IP address with the hosts file. Sadly, ens3 was assigned the IP address 192.168.0.218 even though bridge1 was set for the static IP address of 192.168.0.111. Close ns04.
Option 1 Assign an IP Address with the hosts file
Open the terminal on your home computer and type sudo nano /etc/hosts. Add a fourth line:
192.168.0.218 ns04.example.com ns04
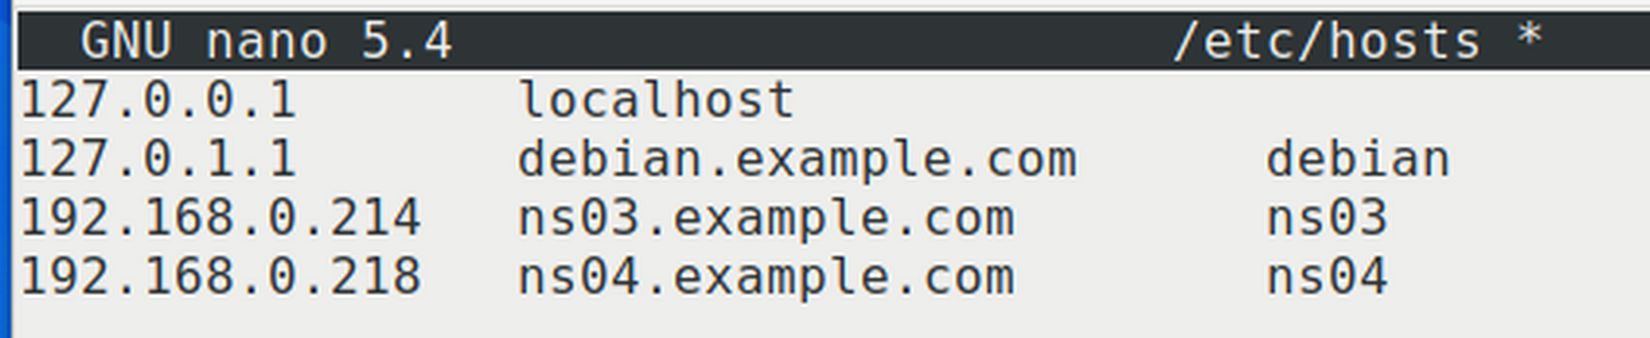
Then save and close the hosts file. Close the terminal.
Use VMM to start ns04. You do not need to log in. Then open a new terminal on your home computer and attempt to start an SSH session with ns04 by typing
ssh 192.168.0.218
Type ip addr to confirm that ns04 is still using 192.168.0.218
The only remaining question is whether Hestia will recognize ns04. We will find out shortly. Type sudo poweroff to end the SSH session. Then close the home terminal. Then close the ns04 screen. Then close VMM.
What's Next?
In the next article, we will install Hestia onto our VPS.