5 Use Hestia to Install Joomla

5.3 Use Hestia to Create a Joomla 3 Website

At the end of the previous chapter, we opened the folder public_html and used the file index.html to edit the default Hestia website. In this article, we will explain how to replace the index.html file with a complete Joomla website.

1 Log into the Hestia User Control Panel and Create a New User
We first need to turn on our server. Open Virtual Machine Manager and start the server called ns01. It will take about one minute for Hestia to fully load and have the server start. You do not need to actually log into the server.

01a

Then open a browser tab and type in the Hestia login page URL: 192.168.0.105:8083

We can also reach the same log in page by entering

ns01.dev.test:8083
01b

Then type admin and your admin password.
01c

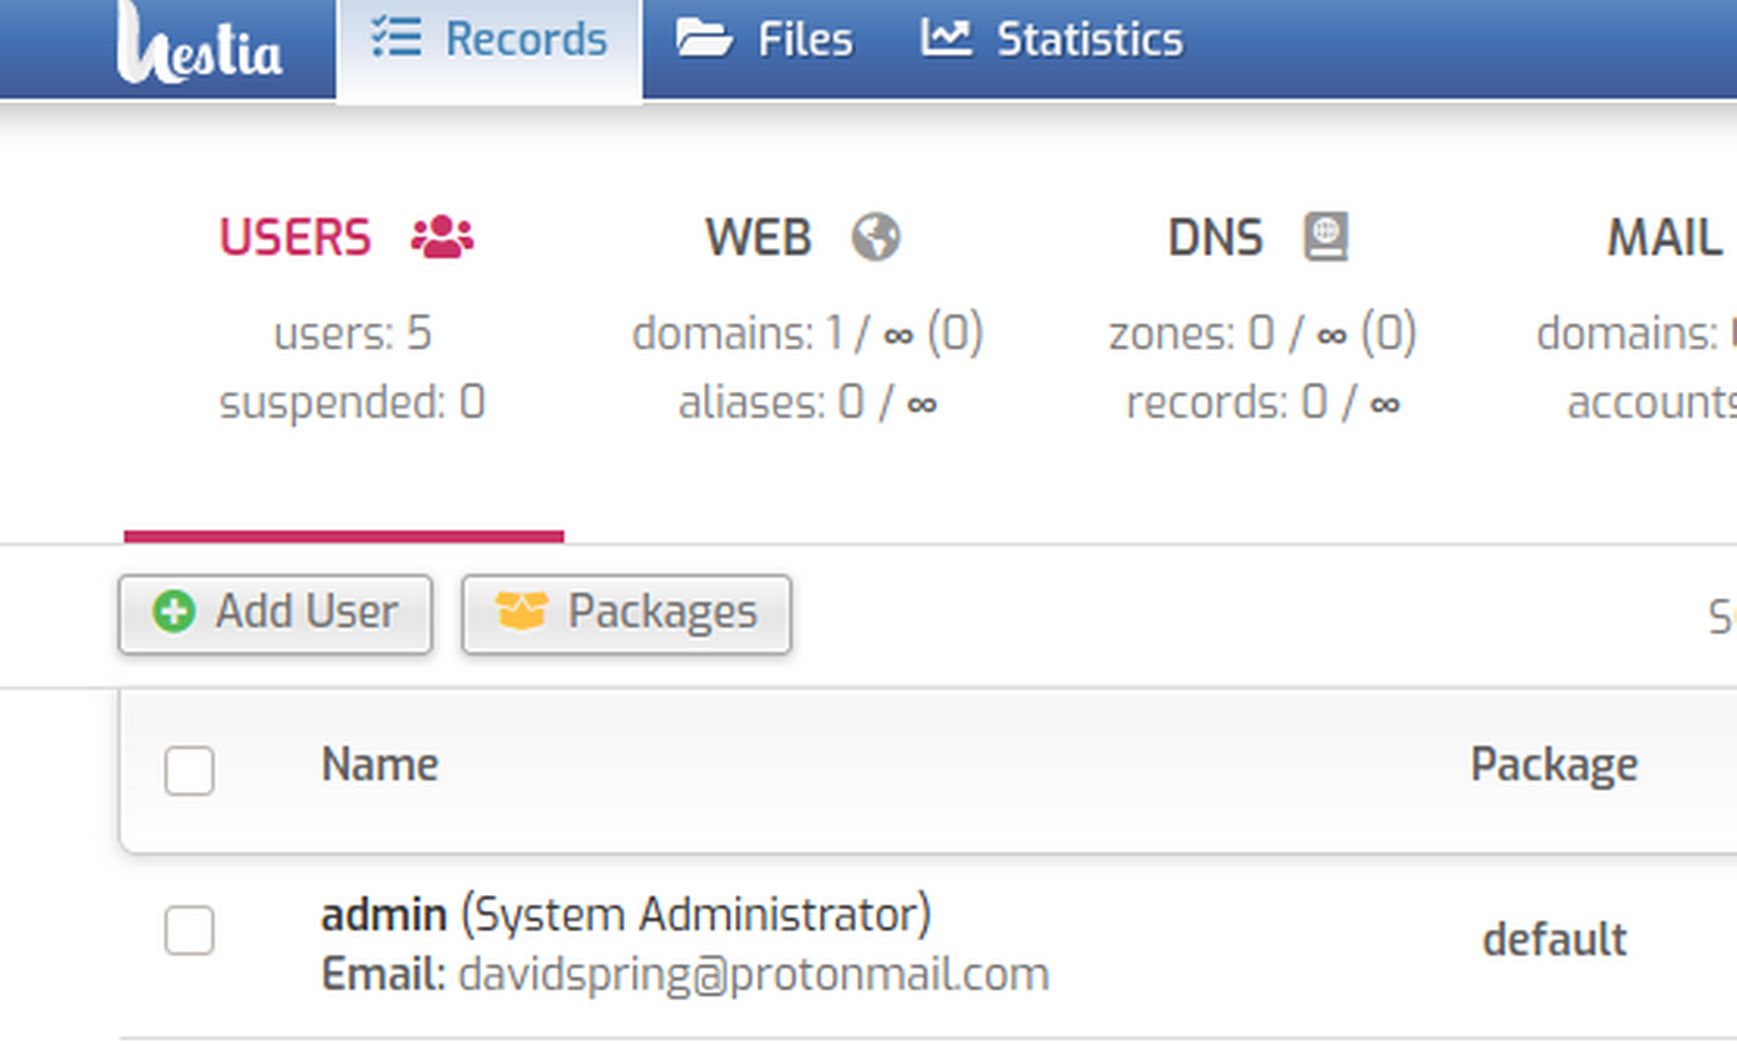
Then click USERS and Add a New User called user2:

01

We will use the website for the Name. Add a password and click Save and Back.  For security reasons, It is important that each website be created by a separate Hestia user. This way, if one website is hacked, it will not affect any other websites on the server.

2 Make sure the new domain name has been added to your host computer /etc/hosts file.
Open a terminal on your home computer and copy paste or type:

sudo nano /etc/hosts

Recall that in our last article, we added a fake domain name called dev2.test to our home computer etc/hosts file and linked it to the static IP address of our ns01 server.

2a

If you change this file, save it with Control plus o followed by Ennter. Then close the file with Control plus X.

3 Start an SSH Session to modify two server settings

We need to make two important changes on our server settings and we will use Midnight Commander to make those change. These changes are “server-wide” changes which only need to be made once. Open the terminal again on your home computer and type or copy paste:

ssh root@192.168.0.105

Then enter your root password. Then type mc, then press Enter to open Midnight Commander. Press Enter again to go to the root folder. Then click on the etc folder to open it.

Fix the Database Configuration File
There is an incorrect setting in the Database Configuration file. If not fixed, it will prevent Joomla from displaying the Module Table and display an error stating “
Out of sort memory, consider increasing server sort buffer size”.
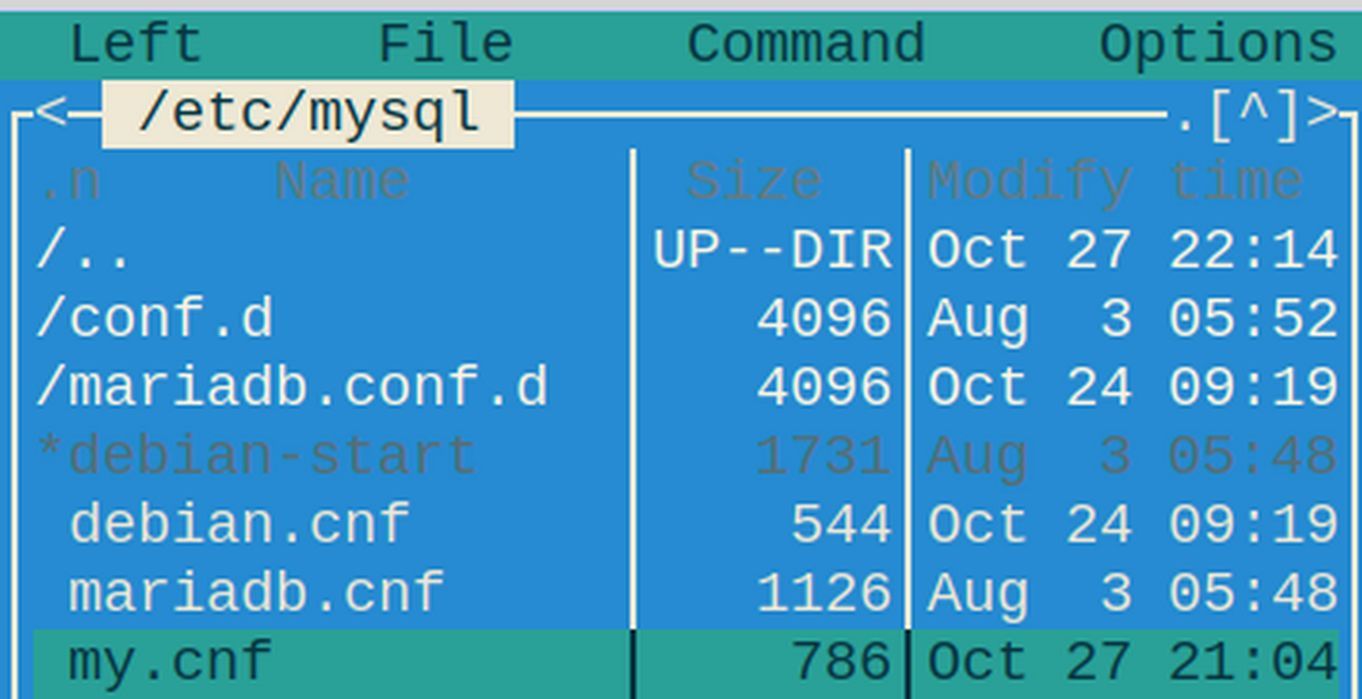
To fix this problem, open Midnight commander and navigate to the folder /etc/mysql. Then click on the file called my.cnf to select it:
2b1

Then click File Edit. Then scroll down to Sort buffer size which by default is 64K. Delete 64K and increase it to 1M. Then press Control plus o then Enter to save the change. Then press Control plus x to close the file. Then in the Hestia Control Panel admin settings screen, restart mariadb for this change to take effect. (We will restart mariadb AFTER changing the PHP INI file which comes next).

Note: This change is not needed on a real Hestia VPS as Sort buffer size is already set for 1M. This change is only needed on Practice Hestia servers created with Virtual Machine Manager. However, the next change is needed on both a practice VPS and a real VPS.

Fix the PHP INI File
We next need to edit the PHP ini file which is in the following path:
/etc/php/7.4/fpm/php.ini Assuming you already have Midnight Commander open to the etc folder, click on the php folder to open it. Then click on the 7.4 folder to open it. Then click on the fpm folder to open it.

2b

After selecting php.ini, click File Edit to open the php.ini file. Note that there are 1947 lines in this file. To add line numbers to the Midnight Commander edit screen, press Alt plus c to show the line numbers. Scroll down to line 215 which does not have a semi-colon in front of it and is therefore active.

Change output_buffering = 4096 to output_buffering = Off.

Why we need to turn off PHP output buffering
The reason we need to turn off PHP output buffering is that Joomla and Apache server both have their own output buffering system and the PHP output buffering system will cause conflict problems. Forgetting to do this step will result in the following warning during the Joomla installation process:

2c

Why does Joomla recommend turning off Output Buffering?
This question has been asked many times on the Joomla forums and the developers of Joomla have never given a clear answer. Technically, Joomla will still work with Output Buffering left on. In addition, many Shared Hosting providers will not let you turn Output Buffering off. The primary reason to leave it on is that some Wordpress functions require output buffering to be on.

However, I do not recommend Wordpress as I think the Wordpress Code is bloated, poorly written and can easily be hacked. If you are using your own Virtual Private Server and you will not be installing Wordpress websites on your VPS, I think it is wise to follow the Joomla recommendation for two important reasons.

Output Buffering is the primary cause of the White Page of Death
The first reason is that Output Buffering can make analyzing coding errors more difficult. Occasionally, you may download a Joomla plugin or template that has a minor coding error. Output buffering can prevent the web page from loading and instead may display a blank white page with no information at all. This can happen even if your website is set to display coding errors. The “White Page of Death” can make it very difficult to figure out what the actual coding problem is and where the coding problem is even located. I think this is the primary reason why the developers of Joomla recommend that Output Buffering be turned off. One of their main jobs is fixing coding conflicts and Output Buffering makes their job more difficult.

Output Buffering can create problems for URL Rewriting
Another problem with output buffering is in some cases, it can create problems with URL Rewriting. URL Rewriting is the process of converting actual URL links into more human friendly URL links. Because I recommend turning on URL Rewriting, I recommend turning off Output Buffering.

There is no real benefit to Output Buffering
Some have claimed that Output Buffering can speed up page loading. This claim is not accurate. There are more than one hundred factors that affect page loading. Output Buffering is not even a minor factor. In fact, there are cases where output buffering can actually slow down page loading. After having spent days reading all of the posts on the Internet both for and against Output Buffering, my opinion is that there is no real benefit to output buffering – but there are several significant drawbacks. I understand why the developers of PHP have Output Buffering turned on by default. (It is needed by Wordpress). However, I agree with the developers of Joomla that PHP Output Buffering should be turned off. If output buffering is needed at all, it should be handled inside of Apache or Joomla by turning it on inside of a limited section of PHP code – not with it being on by default globally in PHP where it can harm all kinds of things on the server. To be clear, I am not against Output Buffering, I am against it being turned on my default in the PHP INI file.

Fixing other bad PHP INI default settings
The PHP INI file also has several other truly ridiculous default settings that should have been updated years ago. Thankfully, these only need to be fixed once – when you are first setting up your VPS. Here are three important settings to change:

#1 Scroll down to line 694 and increase post max size from 8M to 28M: post_max_size = 28M

#2 Scroll down to line 846. Increase upload max file size from 2M to 22M.

#3 Scroll down to line 849. Increase max file uploads from 20 to 30. This will allow us to upload up to 30 images at a time instead of the current 20.

Then save the PHP INI file with Control plus o followed by Enter. Then close the file with Control plus x. Then type exit to close Midnight Commander. Then type exit to close ssh session without turning off server. Then close the terminal.

Restart Several Hestia Services for changes to take effect
Back at the Hestia Admin screen, click on Server settings, Configuration and restart apache, mariah db, nginx and php7.4-fpm. You are now ready to add as many Joomla websites as you want!

4 Add a New Web Domain
Once the new Hestia user is added, click on the arrow to the right of the user to log in as user2 .

02

Call our new website dev2.test. The IP address is the static IP address of our server ns01. Check Create DNS zone. Then click Save and Back.

03

Click on the hidden arrow to the right of the domain name to go to the default Home page:

04

It is important to verify that the Hestia test page displays before trying to install a Joomla website on it.

5 Download the most recent Joomla Installer Zip File
Go to Joomla.org and cdownload Joomla 3.10. Here is the direct link:

https://downloads.joomla.org/cms

Click on Joomla 3. Then for the latest version of Joomla 3.10, click View Files. Then scroll down to the ZIP package and click Download Now. Then save the package in your Downloads folder.

6 Upload the Joomla 3.10 Zipped File to public_html

Go back to the Hestia User 2 screen and click Files, web, dev2.test and open the public_html folder. Then click Add files. Then select and add the zipped file. Then in your home file manager, navigate to your Downloads folder and select the zipped Joomla folder.

05

When it is finished loading, close the upload screen. Click on the three dots to the right of the Joomla zipped file. This will bring up a pop up screen. Click Unzip. Then click Unzip again. When it is done, there will be lots of folders and files in the public_html folder:

06

Find the Joomla zipped folder and click on the three dots. Then click Delete to delete the zipped folder. Then find the index.html folder and click on the three dots and click Rename to rename it old-index.html.

07

7 Use a web browser to open the Joomla Installation page
Click Exit to Control Panel to go back to the Hestia User 2 screen. Then click on the arrow to the right of the website name to open a new browser tab and go to the Joomla installation page.

Tip: If the prior default Hestia page comes up instead, rather than clearing the browser tab, which will log you out of the Hestia panel, just copy the website URL into a browser tab on a different browser:

http://dev2.test/

08

Name the site whatever you want. We will call the site Joomla 3 Ten Test Site. Type in a one sentence description. Type in your email address and an easy to remember username and password. Then click Next.

09

8 Use Hestia to Create a Database
Before we can fill out the browser database page, we need to use Hestia to create a data. Go back to the Hestia User 2 panel. Then click DB (for Database). Then click Add Database.

10

Hestia will add the user name as a prefix to the database name and database username. Therefore:

Database name db2 = user2_db2

Username un2 = user2_un2

Password user2_Pw2

Then click save and go back to browser and fill in the form. Then click Next.

11

Leave Install Sample Data at None. Scroll down the screen to make sure everything looks OK. Then click Install.

12

Scroll down the page and click on the orange button to delete the installation folder. It will reply "Installation folder removed."

9 Log into your new Joomla website

Click on the blue Administrator button to go to the log in page:

13

Log in with your administrator username and password.

14

Click Never for the data mining. Read and close the Messages. Here is the default Joomla 3 Control Panel:

15

Then click on the site name in the upper right corner to go to the front end of your website:

16

Close the browser tab and log out of your Joomla control panel by clicking on the person icon in the upper right corner. Then log out of your Hestia user screen and admin screen. Then shut down your ns01 VPS. Then close Virtual Machine Manager.

What's Next?
Now that you know how to use Hestia to create a Joomla website, in the next article, we will look at how to choose a VPS host. Then in the following chapter, we will review steps to improve the security of your Hestia Control Pane, your VPS and your Joomla website.

5.2 How to Learn Joomla

In the previous article, we provided evidence that the Debian operating system is much more secure than Windows and that the Joomla Content Management System was much more secure than Wordpress. In this article, we will provide an introduction to some of the terms and concepts that taken together make up the Joomla Content Management System.

01

Why Joomla uses a Database
In the next article, we will create a Joomla website. One of the first steps in this process is the creation of a database. The reason Joomla needs a database is because Joomla is capable of doing a lot of different things. For example, Joomla can take the same content and display it on a web page in many different ways. How it performs this Magic Trick is by storing the content (such as images and blocks of text) inside a series of tables. This series of tables is called a Database. Other database tables include different types of users, different types of menu items, different types of web pages, different types of content boxes (which Joomla calls Modules) and different type of function tools (which Joomla calls Components). Components you can add to the Joomla Core Components include form builders, newsletter creators, slideshow creators and online shopping carts. Joomla offers literally thousands of free components.

In addition to Content Creation tools, Joomla also offers a wide range of Appearance Creation tools. While Wordpress calls these appearance tools “themes”, Joomla calls them Templates. Templates in turn are often based on website page building tools called Frameworks. Each of these functional layers requires the addition of new tables to your Joomla website database.

All of these terms can seem a bit overwhelming when you are first learning Joomla. The complexity of Joomla is one reason many beginners make the mistake of just setting up a Wordpress website. Wordpress is a little easier to learn than Joomla. But Wordpress is easier to learn because Wordpress is lacking many extremely important features – features whose functions and purpose only become apparent over time as your website content grows.

A good way to understand the difference in structure between Joomla and Wordpress is to imagine that your website is a house or building that your online business will live in for the next 20 years. Initially, you may only need one or two rooms in the house. But over time, you may need a dozen rooms on the main floor and many more rooms on the second and third floors. It is essential to plan ahead by building a strong foundation underneath the house. Joomla provides this strong foundation for your business website. It provides a lot of tools that you are not required to use – but tools that will be there if and when your business grows.

The Underlying Difference between Joomla 3 and Joomla 4
To understand the difference between various versions of Joomla, you need to understand about a program called PHP. PHP is a scripting language that is used to control Joomla databases. Scripting means that single words of code can stand for much more complex blocks of code. For example, the words “Moby Dick” can be used to refer to all of the text in the entire book Moby Dick.

PHP was first developed in 1996. PHP version 5 was used to create the initial version of Joomla 3 in September 2012. However, PHP 5 had several security holes and was replaced by PHP 7.0 in 2016 with the release of Joomla version 3.5. Currently PHP version 7.4 is being used to create Joomla version 3.10. Joomla version 4 was released in August 2021 after about two years of development.

Joomla 4 is also based on PHP 7.4 but has support for PHP version 8. Newer versions of PHP are more secure and faster than older versions. Joomla 3 will be supported until August 2023. Joomla 3 will therefore have a total life cycle of 11 years. This is a remarkable period of time given the rapidly changing nature of the modern internet. In the next article, we will build and configure a Joomla 3.10 website before we build a website based on Joomla 4. Given that Joomla 4 is based on a better and newer code base that Joomla 3.10, why bother learning about Joomla 3.10???

Many Components are not yet ready for Joomla 4
There are practical reasons to learn Joomla 3.10 before learning Joomla 4. For example, many components that work well in Joomla 3 are still being developed for Joomla 4. These components include the Form Building tool we recommend and the Shopping Cart Building tool we recommend. It could be several months before all of the components we need for our online store are ready for Joomla 4.

Joomla 3 has a better menu structure than Joomla 4
The most important reason to learn Joomla 3 first is that Joomla 3 has a better menu structure than Joomla 4. This better menu structure makes it easier to learn Joomla 3 than to learn Joomla 4. Joomla 3 has a single top menu that is structured like the Table of Contents of a book. There is a clear division of categories with fixed drop down menu items. Here is the Joomla 3 Control Panel Top Menu

02

Joomla 4 uses an expandable side menu that makes it appear to be similar to the Wordpress Back-end Dashboard. Most of the complexity of Joomla is hidden from the simple side menu in a very complex Settings page. This side menu structure may fool some people into thinking that Joomla is just like Wordpress. But it is not a good way to learn about or use Joomla for the long run.

Here is the Joomla 4 Control Panel

03

Here is the Joomla 4 Systems screen

04

Thankfully, it is very easy to convert the Joomla 4 back end dash board (which we will call a Control Panel) back into the Joomla 3 top menu structure. We will show you how to do this after we install a practice Joomla 4 website.

9 Steps to Learning Joomla

We will divide the process of learning Joomla into several steps. These steps include:

#1 How to Use Hestia to Install Joomla.

#2 How to Add a Custom Template to Joomla.

#3 How to Create a Joomla Category Folder Structure so that the structure of your website matches the category structure of your website folders on your Home computer.

#4 How to create an article with images on your Home computer.

#5 How to transfer an article with images from your Home computer to your Joomla website.

#6 How to Create Menu Items to display your website categories and articles.

#7 How to add boxes of content called Modules to your website.

#8 How to add Components such as Forms and Newsletters and Calendars to your website.

#9 How to manage your website over time.

Learning about VPS Functions in addition to Learning about Joomla Processes

In addition to learning about Joomla, we also need to cover several important functions needed to run a Virtual Private Server. These functions include data transfer, email management and automated backups. Because these skills are best learned by actually doing them, this is a bit like building an airplane while you are flying it.

05

We will therefore introduce Joomla basics in this chapter and then get back to VPS skills in the next chapter.

What’s Next?

Now that we have a clearer idea of the Joomla learning process, in the next article we will review how to use Hestia to create a Joomla 3.10 website.

5.1 Security Benefits of Joomla over Wordpress

In the next article, we will review how to use Hestia to create a Joomla business website. But before we do that, we should first explain why we recommend Joomla to build a business website instead of Wordpress. I have previously written an article on the benefits of Joomla over Wordpress which you can read at this link:

https://createyourowninteractivewebsite.com/3-security/3-1-what-is-real-website-security

Given that the security problems of Wordpress websites have been known and well documented for many years, it is amazing that anyone would continue to base their business website on such an insecure web building tool.

The security benefits of Joomla over Wordpress are similar to the security benefits of Linux over Windows. Yet people continue to use Windows to build Wordpress business websites – and then wonder how come their websites were hacked – forcing them to pay millions in Windows and Wordpress ransomware fees. Before we get to the shocking data on Wordpress vulnerabilities, let’s first look at the most recent Windows 10 documented vulnerabilities since the beginning of January 2021 – compared to Linux Debian vulnerabilities during the same period of time.

2021 CVE Windows versus Linux Debian

Linux Debian had 18 reported flaws from January to October 2021.

https://cve.mitre.org/cgi-bin/cvekey.cgi?keyword=Linux+Debian+2021

These 18 flaws can be broken down into the following root causes:

3- Flatpak (caused by IBM/Redhat)

7 Kernel problems

3 Google Chrome problems

1 Disputed. 1 Avahi problem 1 Intel CPU problem

Thus, so far in 2021, despite upgrading hundreds of packages from Debian 10 to Debian 11, there has not been a single vulnerability reported that was caused by a security error on the part of the Debian team.

During the past 10 months while the Debian operating system had not a single security error, the Microsoft Windows 10 operating system had 610 Windows security flaws!

https://cve.mitre.org/cgi-bin/cvekey.cgi?keyword=Windows+2021

The two most common categories of Windows flaws are Remote Code Execution (through the Windows browser) and Elevation of Privilege (because no password is needed for many Windows functions). There are hundreds of examples in both categories.

01
Every month, more of these Windows flaws are reported. For example, in October 2021, 75 Windows flaws were reported. Microsoft issues “patches” for these flaws. But because the patches do not address the underlying problems in the Windows operating system, each month brings new reports using the same old backdoors.

The question then is this: Why would anyone use the extremely insecure Windows operating system when they could instead use the extremely secure Debian operating system?

Now that we see how ridiculously bad Windows is, let’s look at Wordpress. Here is a real shocker: Wordpress actually has MORE security holes than Windows!

2021 Wordpress CVE versus Joomla
During the first 10 months of 2021, Windows had 610 reported security flaws – while Wordpress had 699! Comparing Wordpress to Joomla, Wordpress had 669 security flaws this year while Joomla has only had 25 flaws so far in 2021. Here is the link:

https://cve.mitre.org/cgi-bin/cvekey.cgi?keyword=2021+Wordpress

Below is one page out of 30 pages of Wordpress errors this year.

Name

Description

CVE-2021-39357

The Leaky Paywall WordPress plugin is vulnerable to Stored Cross-Site Scripting

CVE-2021-39356

The Content Staging WordPress plugin is vulnerable to Stored Cross-Site Scripting due to insufficient input validation

CVE-2021-39355

The Indeed Job Importer WordPress plugin is vulnerable to Stored Cross-Site Scripting

CVE-2021-39354

The Easy Digital Downloads WordPress plugin is vulnerable to Reflected Cross-Site Scripting

CVE-2021-39352

The Catch Themes Demo Import WordPress plugin is vulnerable to arbitrary file uploads makes it possible for an attacker with administrative privileges to upload malicious files that can be used to achieve remote code execution.

CVE-2021-39351

The WP Bannerize WordPress plugin is vulnerable to authenticated SQL injection which allows attackers to exfiltrate sensitive information from vulnerable sites.

CVE-2021-39350

The FV Flowplayer Video Player WordPress plugin is vulnerable to Reflected Cross-Site Scripting

CVE-2021-39349

The Author Bio Box WordPress plugin is vulnerable to Stored Cross-Site Scripting

CVE-2021-39348

The LearnPress WordPress plugin is vulnerable to Stored Cross-Site Scripting

CVE-2021-39347

The Stripe for WooCommerce WordPress plugin is missing a capability check on the save() function makes it possible for attackers to use other site users unique STRIPE identifier and make purchases with their payment accounts.

CVE-2021-39345

The HAL WordPress plugin is vulnerable to Stored Cross-Site Scripting

CVE-2021-39344

The KJM Admin Notices WordPress plugin is vulnerable to Stored Cross-Site Scripting

CVE-2021-39343

The MPL-Publisher WordPress plugin is vulnerable to Stored Cross-Site Scripting

CVE-2021-39342

The Credova_Financial WordPress plugin discloses a site's associated Credova API account username and password in plaintext

CVE-2021-39339

The Telefication WordPress plugin is vulnerable to Open Proxy and Server-Side Request Forgery

CVE-2021-39338

The MyBB Cross-Poster WordPress plugin is vulnerable to Stored Cross-Site Scripting

CVE-2021-39337

The job-portal WordPress plugin is vulnerable to Stored Cross-Site Scripting

Here is a summary of the 25 Joomla errors this year (all 25 have been fixed)

https://cve.mitre.org/cgi-bin/cvekey.cgi?keyword=2021+Joomla

Name

Description

CVE-2021-26040

Joomla! 4.0.0. The media manager does not correctly check the user's permissions before executing a file deletion command.

CVE-2021-26039

Inadequate escaping in the imagelist view of com_media leads to a XSS vulnerability.

CVE-2021-26038

Install action in com_installer lack the required hardcoded ACL checks for superusers. A default system is not affected

CVE-2021-26037

CMS functions did not properly termine existing user sessions when a user's password was changed or the user was blocked.

CVE-2021-26036

Missing validation could lead to a broken usergroups table.

CVE-2021-26035

Inadequate escaping of the JForm leads to a XSS vulnerability.

CVE-2021-26034

A missing token check causes a CSRF vulnerability in data download endpoints in com_banners and com_sysinfo.

CVE-2021-26033

A missing token check causes a CSRF vulnerability in the AJAX reordering endpoint.

CVE-2021-26032

HTML was missing in the executable block list of MediaHelper::canUpload, leading to XSS attack vectors.

CVE-2021-26031

Inadequate filters on module layout settings could lead to LFI.

CVE-2021-26030

Inadequate escaping allowed XSS attacks using the logo parameter of the default templates on error page

CVE-2021-26029

Inadequate filtering of form contents could allow to overwrite the author field.

CVE-2021-26028

Extracting a crafted zip package could write files outside of the intended path.

CVE-2021-26027

Incorrect ACL checks could allow unauthorized change of the category for an article.

CVE-2021-23132

com_media allowed paths that are not intended for image uploads

CVE-2021-23131

Missing input validation within the template manager.

CVE-2021-23130

Missing filtering of feed fields could lead to xss issues.

CVE-2021-23129

Missing filtering of messages to users could lead to xss issues.

CVE-2021-23128

The core shipped but unused randval implementation within FOF used a potential insecure implemetation.

CVE-2021-23127

insufficient length for the 2FA secret of 10 bytes vs 20 bytes.

CVE-2021-23126

Usage of the insecure rand() function within the process of generating the 2FA secret.

CVE-2021-23125

The lack of escaping of image-related parameters in multiple com_tags views could lead to XSS attack vectors.

CVE-2021-23124

The lack of escaping in mod_breadcrumbs aria-label attribute allows XSS attacks.

CVE-2021-23123

The lack of ACL checks in the orderPosition endpoint of com_modules leak names of unpublished modules.

Why are Debian and Joomla so much more secure than Windows and Wordpress?

The problems with both Windows and Wordpress is that they are top down corporations controlled by an extremely small group of people whose goals are to maximize short term profits. In the case of Wordpress, all major decisions are made by just a single person. In the case of Microsoft, most of the really bad decisions were made by a guy named Bill Gates many years ago. Microsoft staff and customers have been paying a huge price for his mistakes ever since.

02

By contrast, Debian and Joomla both consist of a large group of actually users. These users have a vested interested in making sure that the tools they use and create are as secure as possible from hacking attacks. To improve security, both groups have put in place a series of Checks and Balances. These checks and balances slow down innovation a little bit. But they result in a much more secure system in the long run.

Put another way, both Microsoft and Wordpress use very poor coding practices that result in their computers and websites being a bloated mess over time. Just look at any Wordpress website that is more than a few years old. You will see hundreds of articles all on the same page – making it impossible to find the article you are actually looking for. Similarly, after a few years of Windows updates, Windows computers get so bogged down that they literally come to a stop – even if they are not hacked.

Because Debian and Joomla use better structured coding practices, they are like having a clean house – where there are fewer places for hackers to hide.

Now that we have a clearer idea of why we recommend Joomla over Wordpress and Debian over Windows, let’s look at how easy it is to install Joomla on a Debian server using the Hestia Control Panel.

5.2 How to Choose a Secure Canadian VPS Host

As I have explained previously, it is not wise to host your website or Virtual Private Server with a US based hosting company. The reason for this is that the US has a draconian law called the Patriot Act – which allows US federal agencies to take down your website or VPS without notice and without a court hearing. The only way to have a truly secure website or VPS is to use a web host and domain registrar that is not located in the US. I recently had to seek out a new Canadian web host. After months of evaluating more than 100 Canadian web hosts, I eventually chose a VPS host called CanHost.ca. In this article, I will explain why I chose CanHost not only for my VPS but also as a host to recommend to my students and business friends.

01

#1 CanHost is actually owned by Canadians and has actual servers that are actually located in Canada

During my research on Canadian VPS hosts, I found that many hosting companies which claimed to be owned by Canadians were in fact incorporated in the US and had their headquarters in the US – making them and their customers (aka your business website) subject to the draconian US Patriot Act. In fact, there has been a very sad trend in recent years of major US corporations buying Canadian web hosting companies. This trend has gotten so bad that only a few Canadian VPS hosts are actually owned by Canadians and located in Canada. Even among VPS hosting companies still owned by Canadians, many of them no longer use actual servers that are actually located in Canada. It has become very common for VPS hosting companies to out source their servers to major US corporations like Amazon Web Services (AWS Cloud) and/or the Microsoft (Azure Cloud).

This hidden change of ownership also makes your business website subject to the draconian US Patriot Act. By contrast, CanHost has actual servers (not just cloud servers) and is located in Kelowna, British Columbia. You can schedule a visit to see their servers. Thus, you will know where your business VPS is actually located. And, if any government agency wants to take down your VPS, they will have to explain why to an actual judge – giving you a chance to explain to the judge why your VPS should not be taken down.

02

How to determine if your VPS web host DNS Name Servers are actually located in Canada

Go to the following link and enter the full name of the name server:

https://whois.domaintools.com/

For example, the primary name server for Canhost.ca is

NS1.MANAGEDNS.CA

Here is a screen shot of the search result:

02a

The CanHost IP address, 66.209.177.17, is also listed as being located in Canada.

Does it really matter where your website domain names are hosted?

Here is an article posted on April 28, 2021 where the domain registrar Tucows, was served with a US court order to hand over some domain names. Tucow automatically compiled because they get such court orders all the time and they always comply. It turned out that this court order was a FAKE court order created by hackers. The hackers then took over the domain names, changed the location of the domain names to a different server, then changed the content and started hacking the visitors of the domain names! https://cybershafarat.com/2021/04/28/tucows-domains-court-order/

Here is a quote from the article:

“Tucows handed domain names over to hackers pretending to have a court order… the domains were transferred internally at Tucows to their compliance department and then handed over to the attacker, who then immediately transferred these domains to other registrars.”

Even worse, a lot of the so-called Canadian web hosts were actually using Amazon cloud servers. In 2018, the world’s largest Domain Registrar, GoDaddy moved their 17 million customers to the Amazon cloud. https://onlinedomain.com/2018/03/28/domain-name-news/godaddy-will-be-migrating-to-amazon-web-services-aws/

Here is a quote from a comment at the bottom of this article:

“Any organization that entrusts their In house data to any public cloud platform endangers their end Users to Breach. The Digital pipeline is full of Hackers that are salivating at companies entrusting their valuable data to any Public Cloud platform.”

In January, 2021, the Social Platform Parler.com found out how dangerous it was to use Amazon to host their website. Amazon took them down without notice in less than 24 hours!

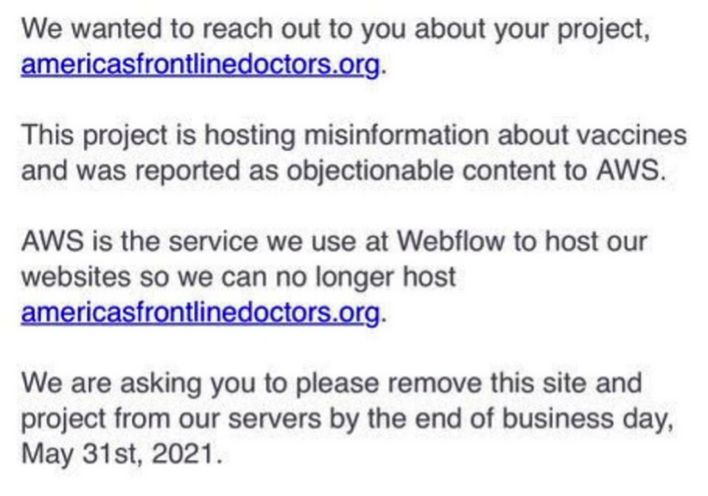
In May 2021, a group of US doctors critical of the new GMO shots were also taken down by Amazon. They were using an expensive Content Management System called Webflow which uses AWS for hosting. AWS demanded that Webflow take down the website and Webflow complied – despite the fact that every article published by Americas Frontline doctors was backed up by scientific studies. Here is a screen show of the email they got from Amazon:

02b

Here are a couple of additional examples of how dangerous it is to use the Amazon Mega Cloud: Former employees have claimed that while they worked at Amazon, they had complete access to all customer email addresses, passwords and credit cards.

Do a search on “Amazon IP Fishing” and you can read this article:https://labs.bishopfox.com/tech-blog/2015/10/fishing-the-aws-ip-pool-for-dangling-domains

The article, posted in October 2015, is called “Dangerous Ips Amazon Recycling IP addresses and providing hackers with access to other users” The article explains how hackers can gain easy access to corporations that use Amazon Web Services because Amazon recycles IP addresses – meaning that IP addresses previously controlled by a corporation can be taken over by hackers.

The only way to avoid the US Hacker Heaven is to use a VPS host that is actually located in Canada.

#2 CanHost offers REAL Virtual Private Servers and not merely Cloud Servers

One clue that a VPS host has out sourced their servers to a US mega corporation is that they offer “Cloud VPS” hosting rather than “VPS” hosting. The term “Cloud VPS” means that your VPS is not located on one particular server. Instead, it means that your cloud-based VPS might be located on just about any server in the world. Amazon Web Services and Microsoft both have more than one thousand servers. However, this concentration of power and centralization of computer networks can be a major point of failure. If hackers can bring down the AWS cloud, they can bring down every one using the AWS cloud. One of the most important principles of VPS security is decentralization. You are therefore better off on a local but well protected and updated server than you are on a mega cloud. This is why I do not recommend cloud servers and instead only recommend REAL servers.

03

#3 CanHost offers a simple DNS Manager with a Graphical User Interface
Because we will be using the Hestia Control Panel, we will be setting up our own websites, our own databases and our own custom mailing systems. These are all relatively easy tasks that most online business owners can learn to manage on their own. But setting up a DNS Manager can be a much more complex undertaking. I therefore wanted a VPS hosting company that could host all of my domain names and also have a DNS Manager which will allow me to easily route my domain names. This may seem surprising – but most VPS hosts do not have a DNS Manager!

04

#4 CanHost has hundreds of helpful Tutorials
Many VPS providers do not offer any instruction as to how to use their VPS. But CanHost has more than 200 tutorials which you can see at the following link: https://www.canhost.ca/hosting/index.php?rp=/knowledgebase/tag/VPS

Here is a tutorial explaining how to use the CanHost DNS Manager: https://www.canhost.ca/hosting/index.php?rp=/knowledgebase/275/How-Do-I-Manage-my-DNS.html

Their tutorials include lots of helpful images. Here is the beginning of their DNS Manager tutorial: To update your DNS records, first navigate to your Client Area by logging in to canhost.ca. Navigate to the 'Shortcuts' list on the left, and select the list item called 'My DNS'.

05

This will open up your DNS manager, which displays all of your active DNS zones and their corresponding domain names. To edit a specific zone, click on the Edit Zone button on the right hand side. This will allow you to edit the individual DNS records for this domain.

06

Here is what their DNS Manager table looks like:

07

 #5 CanHost DNS Manager can create CAA Records
CAA (Certificate Authority Authorization) records have become increasingly important to protect websites from hacker attacks. Web security relies on Secure Socket Layer (SSL) certificates. SSL certificates, in turn, rely on Public Keys. Unfortunately, in recent years, hackers have found a way around the Public Keys by pretending to be an SSL certificate authority (CA). The best and easiest way to stop this type of hacker attack is for website owners to add Certificate Authority Authorization (CAA) DNS records. CAA DNS records specify the Certificate Authorities (CA), who can issue a specific domain name certificates for their website. When a CAA record is not found, a malicious hacker can generate a Certificate Signing Request (CSR) for your domain and have the certificate signed by any domain. This is a security threat that we should not allow to happen. In addition, CAA records make it much easier to add a free Lets Encrypt SSL certificate to your website. Despite the importance of CAA records, many web hosts and VPS hosts do not provide a way to add CAA records to your website. Thankfully, the CanHost DNS Manager
offers a very easy way to add CAA records to your website in a matter of seconds.

#6 CanHost has Flexible VPS Packages
If you go to their VPS page, it looks like CanHost only offers three options.

08

This would be a problem because many small businesses, with only a couple of websites, might get by on 20 GB of disc space. But they may need more than 2 GB of RAM. Thankfully, when you click on the VPS Express 1 Buy Now button, you will see a couple of options. First, in the lower left corner, you can change the currency from Canadian dollars to US dollars. This brings the price of VPS 1 down to $12.38 per month.

In addition, you can change the RAM from 2 GB to 4 GB for an added $6.19 per month. This brings the total VPS monthly cost to $18.57.

The SSD disc space can be increased from 20 GB to 40 GB for $6.19 per month. But what if you only need 30 GB? Again, no problem. Click the Disc Space drop down arrow and you can select 30 GB for $3.50 = 2.89 us and 35 gb 4.25 CAN = 3.51 USD. So you get 4 GB of RAM and 30 GB of disc space for $21.45 USD per month or 4 GB RAM and 35 GB for $22.08 USD per month or 4 GB of RAM and 40 GB for $24.72 USD per month.

Given that the average Joomla website starts out at less than 100 MB and rarely reaches beyond 500 MB – even with hundreds of images – and thus even with a one or two local backups does not need more than 1 GB of disc space, it is reasonable to estimate that one can have as many as 30 websites on a 35 GB VPS.

Here is a table to help you calculate the amount of disc space you need:

CanHost VPS

RAM/SSD Disc Space

Minus Debian 10

Hestia & Free Space*

Space Left for Websites

Total Websites with backups

@ 1 GB each

Monthly Cost

USD

4/20 GB

- 10 GB

10 GB

10

$19

4/25 GB

- 10 GB

15 GB

15

$20

4/30 GB

- 10 GB

20 GB

20

$21

4/35 GB

- 10 GB

25 GB

25

$22

4/40 GB

- 10 GB

30 GB

30**

$25

* You never want to run the risk of using up all of your disc space.

** If you have more than 30 websites, it would be better for logistical and security reasons to add a second VPS.

#7 CanHost offers Debian 10 VPS servers

Sadly, many VPS hosts only offer Ubuntu or CentOS operating systems. CanHost offers Debian 10 which is the operating system I recommend and the operating system most recommended by the leaders of Hestia.

#8 Stability and Security

We want a web host that is big enough so that they will not go out of business tomorrow and so that they have a staff who can keep the programs on the server up to date. But we do not want the web host to be so big that they are indifferent to the needs of a small business owner. This is another reason I do not recommend any of the major cloud web hosts.

#9 Hard Drive Space
Assuming you are using the Joomla Content Management System for a secure foundation and Phoca Cart for a flexible online store, and several other tools to perform various business functions, a small online store should not require more than 1 GB of hard drive space. However, if you have a lot of products and/or a lot of customers, you will need more space to store this data. You will also need backups of your system and each backup will double the amount of space needed. This can expand the space needed to 10 GB or more. Many businesses require several websites. For example, I have different websites for each of my courses and books. In addition, the Debian Server itself along with its hundreds of programs can take 5 GB or more. Therefore, it may be useful to seek a VPS with 30 GB or more of hard drive space.

#10 RAM
A Linux VPS does not require as much RAM as a Windows computer. But to run an online business with an online store, you need at least 2 GB of RAM and 4 GB is better. Virtual servers come with their own dedicated RAM. With more RAM available, you can run an efficient website loaded with more content. Note that if you have only 2 GB of RAM, you should do a special installation of Hestia that EXCLUDES ClamAV. This is because ClamAV (which is not really needed) will use 1 GB of RAM all by itself. Even if you have 4 GB of RAM, I recommend excluding ClamAV from your Hestia installation as their other better ways to protect your VPS.

Summary: CanHost is by far the best option of you are looking for a REAL Canadian VPS server with a DNS Manager.

Managed versus Unmanaged Servers???
There is a debate as to whether most business owners can even manage their own VPS. Many VPS providers recommend a Managed VPS. CanHost offers dedicated managed servers for $130 per month. Historically, it was so difficult to set up and run your own server that getting a Managed server was the only practical option for many online business owners. However, the Hestia Control Panel is changing that.

09

While the leaders of Hestia rightly warn that Hestia is not for beginners, it is much easy to set up and run a VPS with Hestia than it has been in the past. The only thing that has been missing has been a Hestia User Manual manual with lots of images and clear step by step instructions.

10

Hopefully, this guide will fill that need – allowing more online business owners to set up their own VPS – saving your business not only thousands of dollars per year – but also giving you complete control over the future of your online business.

What’s Next?

In the next article, we will review how to move an existing website from shared hosting and Cpanel to a VPS with the Hestia Control Panel.

5.4 Use Hestia to Create a Joomla Website

In a previous article, we opened the folder public_html and used the file index.html to edit the default Hestia website. In this article, we will explain how to replace the index.html file with a complete Joomla website.

1 Log into the Hestia User Control Panel
We first need to turn on our server. Open VMM and start the server. It will take about one minute for Hestia to fully load and have the server start. You do not need to actually log into the server. Then open a browser tab and type in the Hestia login page URL:

192.168.1.59:8083

Then type your username and password (not the admin user). It is important that all websites be added from a user account and not an admin account. Here is the user log in screen.

01

In our last article, we create a new website called ns04.dev.test. Here is what the HTML page currently looks like:

02

It is important to verify that the Hestia test page displays before trying to install a Joomla website on it.

2 Download the most recent Joomla Installer Zip File

Go to Joomla.org and click Download Joomla. Here is the direct link:

https://downloads.joomla.org/

Click on the latest version to download the zipped file to your home computer.

3 Upload the Joomla Zipped File to public_html

Click Files, web, ns04.dev.test and open the public_html folder.

03

Click Add Files. Then in your home file manager, navigate to your Downloads folder and select the zipped Joomla installer. When it is finished loading, close the upload screen.

04

Right click on the Joomla zipped file. This will bring up a pop up screen. Click Unzip. Then click Unzip again.

It will take a couple of minutes to unzip the file. Be patient. When it is done, there will be lots of folders and files in the public_html folder:

05

3 Use a web browser to open the Joomla Installation page

Open a new browser (not the one you are using for your Hestia Control Panel) and type the name of your website followed by a forward slash and then index.php:

http://ns04.dev.test/index.php:

The browser tab will open in a warning page noting that the site is not secure. Click Continue. This will bring up the Joomla Installation screen:

06

Name the site whatever you want. We will call the site Hestia Joomla Test Site ns04. Type in a one sentence description. Type in your email address and an easy to remember username and password. Then click Next.

07

4 Use Hestia to Create a Database
Before we can fill out the browser database page, we need to use Hestia to create a data. Go back to the Hestia Control panel. Then exit the file manager. Then click DB (for Database).

Then click Add Database.

08

Hestia will add the user name as a prefix to the database name and database username. Therefore:

Database name ns04 = dave_ns04

Username ns04 = dave_ns04

Password David_ns04

Scroll down and enter an email address to see what the email credentials looks like. Then click save and go back to browser and fill in the form. Then click Next.

09

Leave Install Sample Data at None. Scroll down the next screen to make sure everything looks OK. Then click Install.

10

Scroll down the page and click on the orange button to delete the installation folder. It will reply "Installation folder removed." Then click on the blue Administrator button to go to the log in page:

11

Log in with your administrator username and password.

12

Click Never for the data mining.

Then click on the site name in the upper right corner to go to the front end of your website:

13

The hide the Hestia default web page, go back to your Hestia File manager and rename index.html to old-index.html. Then reload the website page.

14

Close the browser tab and log out of your Joomla control panel. Then log out of Hestia and close your VPS. Then close VMM.

What's Next?
Now that you know how to use Hestia to create a Joomla website, in the next chapter, we will review steps to improve the security of your Hestia Control Pane, your VPS and your Joomla website.